Installation Note N9032-90007 23
Solid State Disk Drive
Disk Drive Removal and Installation
1. Turn the instrument off, wait until the yellow standby LED is lit, and remove the AC power
cord.
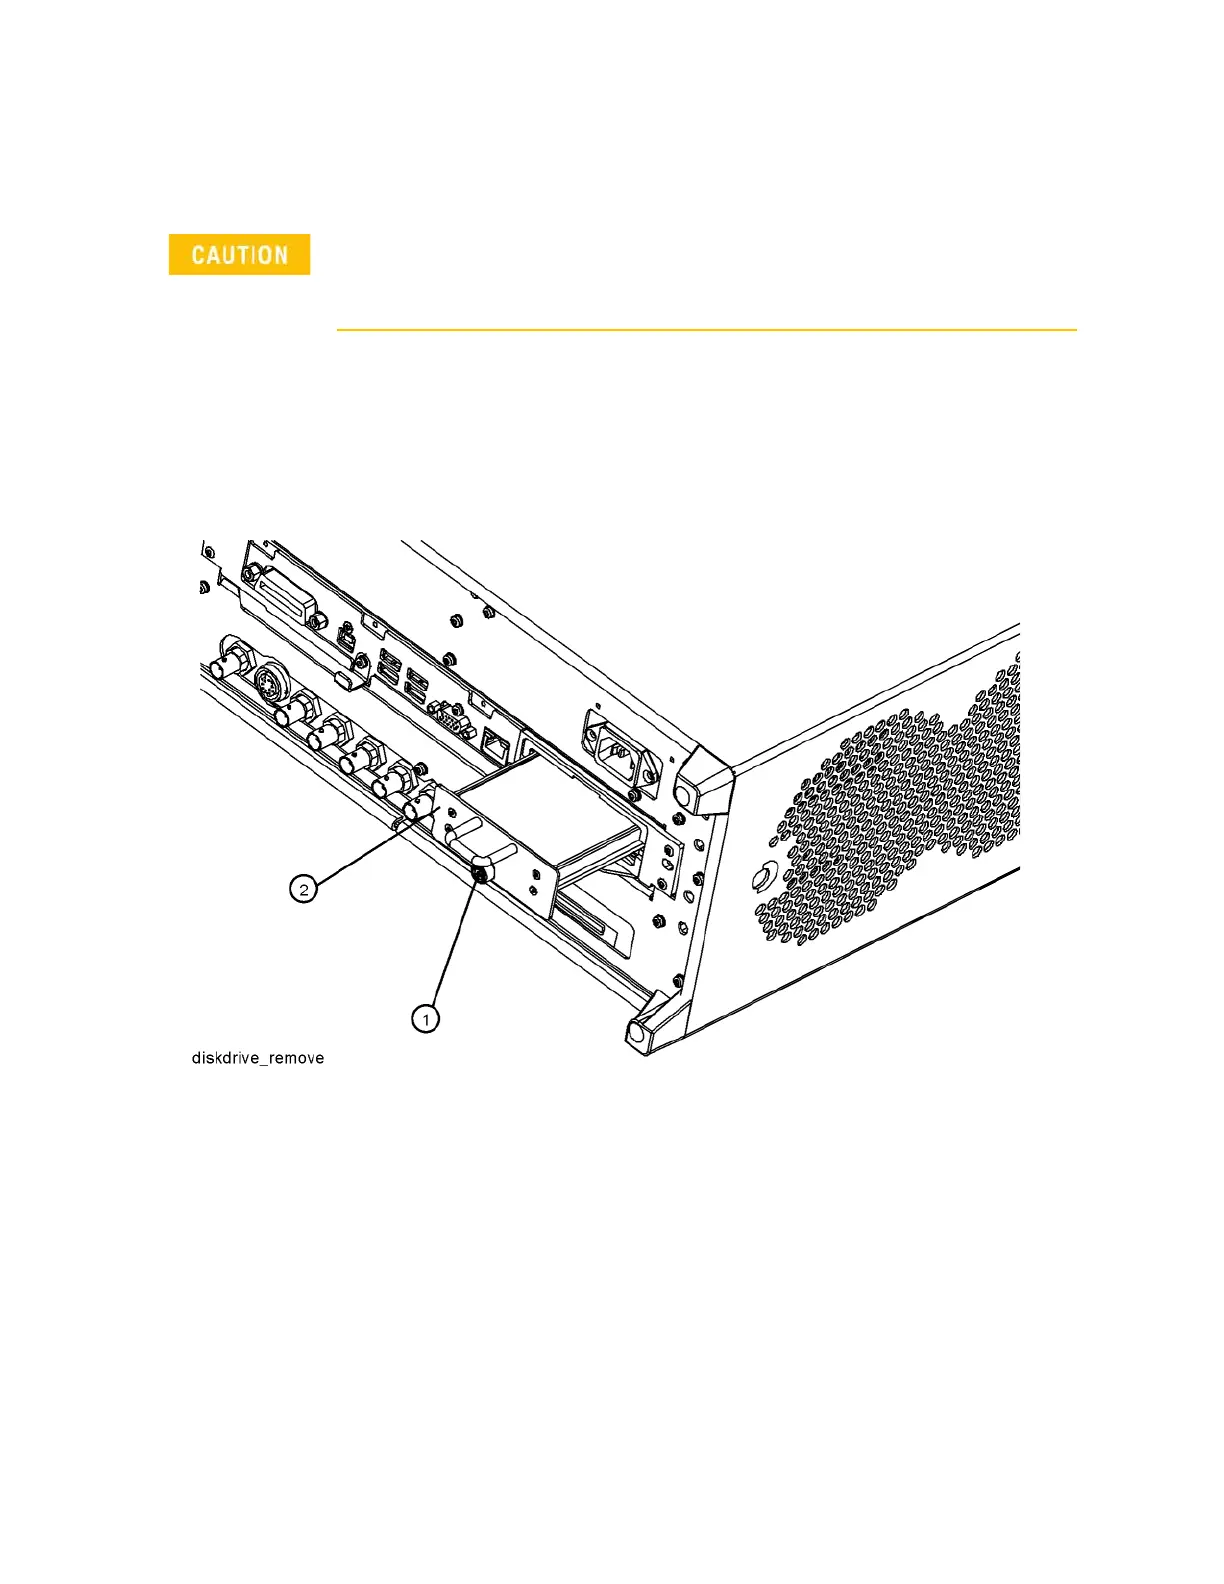
2. Refer to Figure 14. Locate and remove the existing disk drive carrier assembly (2) from the
instrument by loosening the rear panel screw (1).
Figure 14 Replacing the Disk Drive Carrier Assembly
3. Replace the disk drive carrier assembly (2) into the instrument and tighten the screw (1) to
9 inch-pounds.
Electrostatic discharge (ESD) can damage or destroy electronic components. All work on
electronic assemblies should be performed at a static-safe workstation. Refer to the
documentation that pertains to your instrument for information about static-safe workstations
and ordering static-safe accessories.

 Loading...


