Calibration Procedures 1
Keysight U1281A/U1282A Service Guide 51
Vsense (non-contact voltage) calibration
1 Turn rotary switch to position with the shown on the display.
2 Connect a dual open type banana plug into the output voltage terminals of the
calibrator.
3 Ensure the EARTH button of calibrator is on.
4 Hold the multimeter so that the top of the multimeter is vertically and
horizontally centered and in contact with the banana plug’s Hi terminal.
5 Set the source output to 10 V/55 Hz.
6 Press to start the calibration. If the calibration is successful, will
be displayed.
7 Set the source output to 30 V/55 Hz.
8 Press to start the calibration process.
9 Set the calibrator to standby mode when the calibration is done.
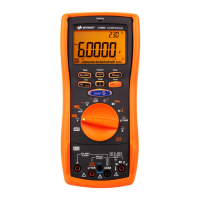
See Figure 1-8 for the multimeter display.
– Ensure the multimeter is REMOVED from the holster prior to performing this
calibration.
– Keep the multimeter away from fluorescent lights, dimmable lights, motors,
and other electrical noise sources when running the tests. These electrical
noise sources can invalidate the calibration.
– It may be necessary in step 4 and step 8 below to slightly adjust the position
of the multimeter for maximum signal strength.
 Loading...
