11
Assemble units as described herein only. To do otherwise
may result in instability. All screws, nuts and bolts must be
tightened securely and must be checked periodically after
assembly. Failure to assemble properly, or to secure parts
may result in assembly failure and personal injury.
Concerto
®
Seating with Power & Data
Assembly Instructions
Seat Attachment
Note: Seats are to be attached to
uprights prior to tightening the
uprights to the floor.
1. Stage product by seat type listed
below and as marked on the product
to aid product installation.
NOTE: There are 14 different Seat
Types:
1. 19" seat
2. 20" seat
3. 20" tablet seat left-hand
4. 20" tablet seat right-hand
5. 21" seat
6. 21" tablet seat (this is not handed)
7. 22" seat
8. 22" tablet seat right-hand
9. 22" tablet seat left-hand
10. 23" seat
11. 23" tablet seat (this is not handed)
12. 24" seat
13. 24" tablet seat, right-hand
14. 24" tablet seat, left-hand
Seat type and location are noted
on space-planning layout. In
addition, each seat assembly is
marked with a decal noting its
type.
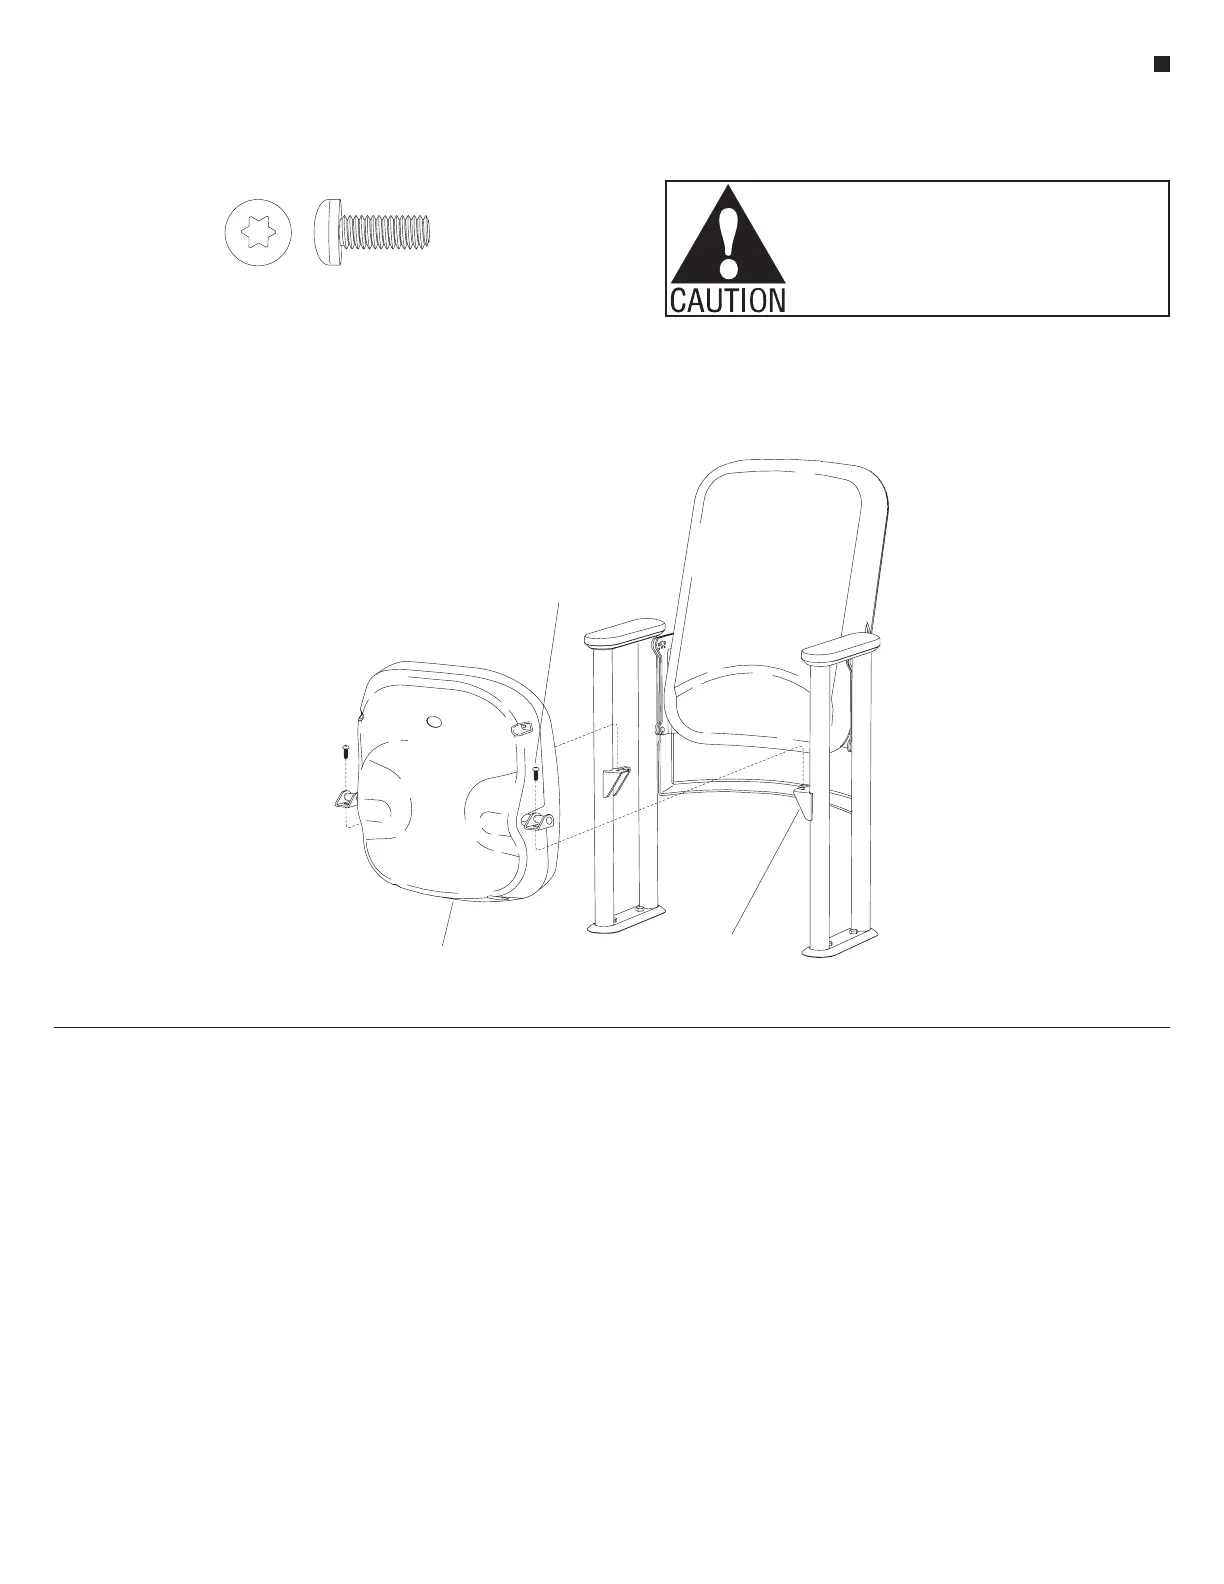
2. Hold the seat assembly with the
shroud facing you as shown in the
above drawing. Slide the seat into
the pivot brackets as shown. Start
the
1
/
4
-20 x
5
/
8
" T-30 Torx screws
into the pivot brackets. The pivot
mounting screws are thread forming
screws. Tighten them just tight
enough to allow adjustment of the
seat’s position between the uprights
(Figure 8).
3. Adjust seat so there is equal space
between each end of the axle and
the adjacent upright tube. Be sure
uprights are properly positioned to
be straight in-line with other rows
and to give a straight aisle.
4. Tighten the screws.
5. Check seat to assure that it pivots
freely and returns to the stored
position.
6. While maintaining upright alignment
along aisles, position uprights so
front edges are in-line along row.
7. Tighten oor anchors to secure.
8
15
/ -20 x /”
48
T-30 Torx screw
pivot bracket
seat assembly
15
/ -20 x /”Pan Head T-30 Torx Screw
48