13
Assemble units as described herein only. To do otherwise
may result in instability. All screws, nuts and bolts must be
tightened securely and must be checked periodically after
assembly. Failure to assemble properly, or to secure parts
may result in assembly failure and personal injury.
Concerto
®
Seating with Power & Data
Assembly Instructions
ADA Upright with Flip-Arm Cap
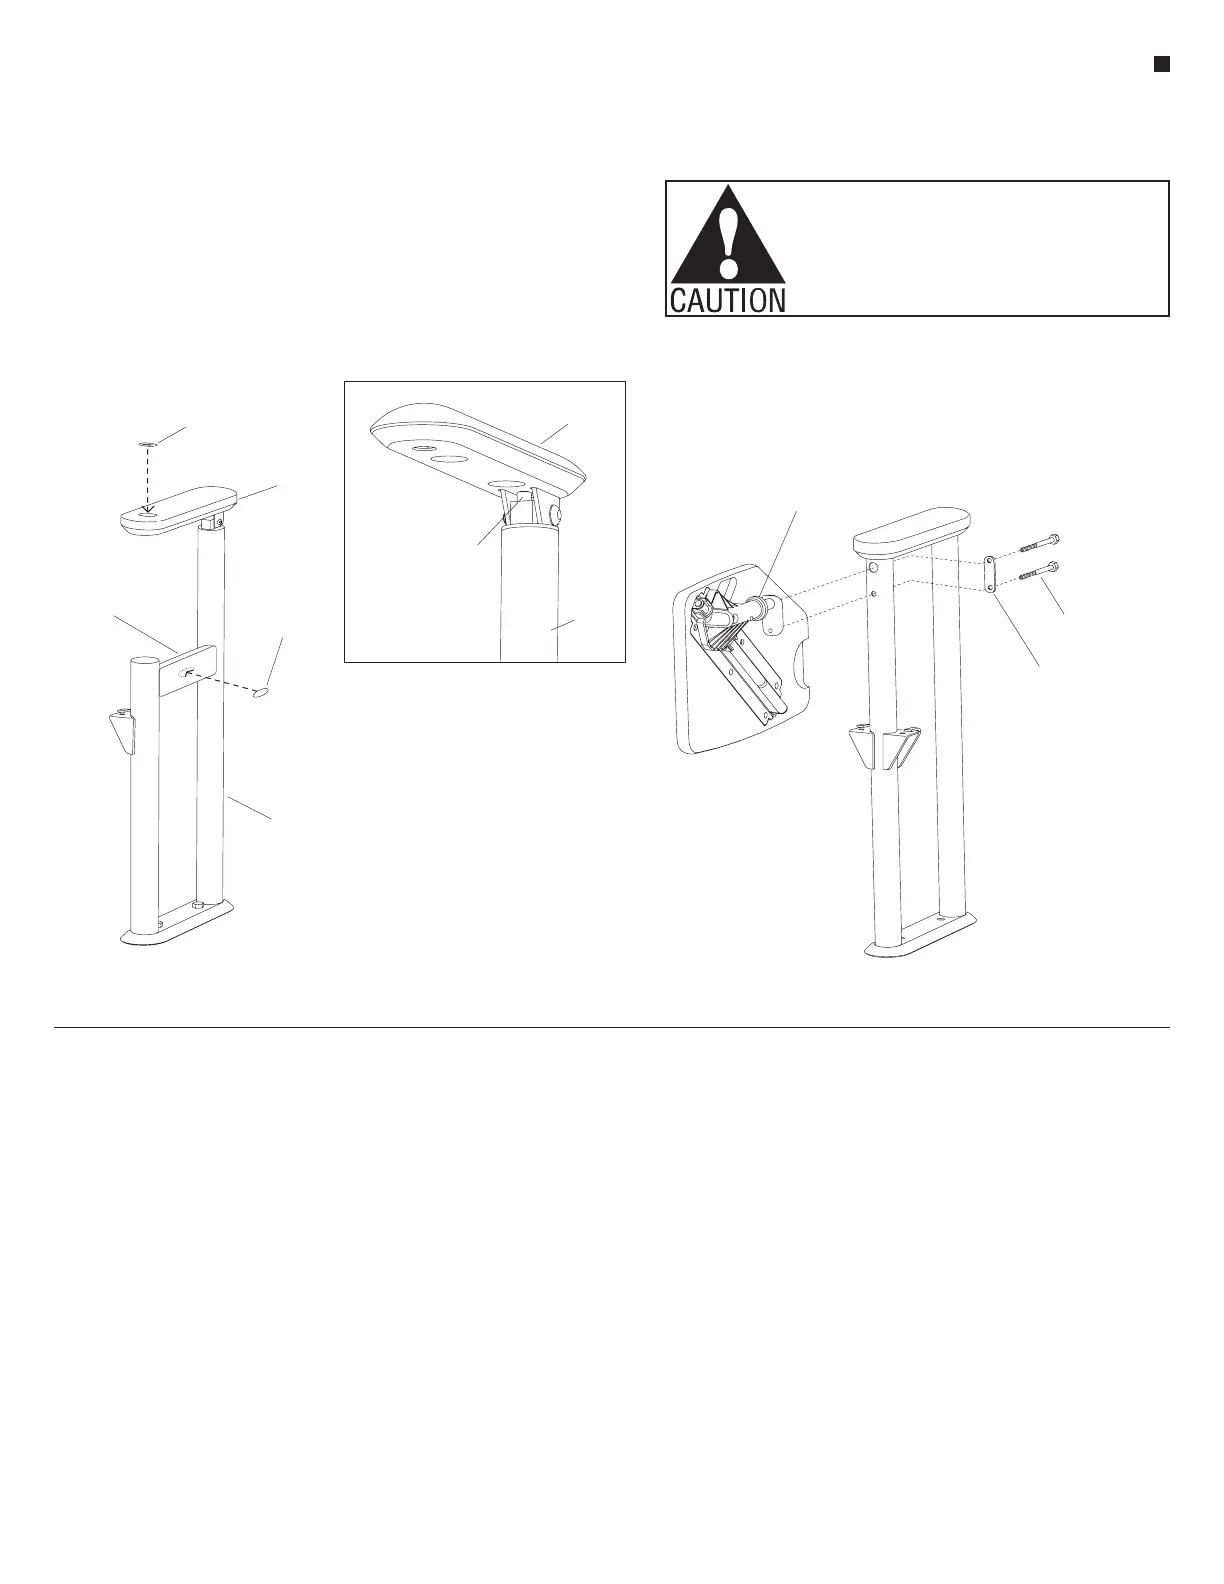
1. ADA uprights are to receive an "ADA
sticker" to designate upright as an
ADA upright. The sticker may be
placed onto either the arm cap or the
support brace as shown (Figure 10).
The sticker should face outward to
the aisle so it can be easily visible.
Note: A
1
/
4
-20 x
3
/
4
" screw (arm
adjust screw) is located on the
underside of the flip-arm cap. The
screw can be twisted inward or
outward slightly to adjust the angle
of the arm to be level (Detail B).
Small Tablet Arm - Standard
Concerto
Small tablet arms are not available with
power & data.
1. Stage the product by tablet arm type
to aid product installation.
2. Hold unit as shown. Align holes of
tablet arm mounting bracket to holes
in the upright (Figure 11).
3. Install
1
/
4
-20 x 1
3
/
4
" hex head cap
screws through the backing plate and
into the tablet arm mounting bracket.
Screws should only be started in the
mounting plate (Figure 11).
4. Tighten top screw first to draw the
mounting bracket into the hole. A
portion of the tablet arm mounting
plate fits tightly inside the large
hole in the upright, requiring the
top screw to be tightened first. A
ratcheting box end wrench with
a small head works best. Tighten
bottom cap screw next (Figure 11).
5. Check tablet to assure it is seated
properly to the tube and the
mounting bracket fits flush to the
upright.
6. Check tablet for operation. Tablet
should slide up freely, rotate over
and stop. Rotate tablet back and slide
it down to its resting position.
7. If there is any interference between
seat and tablet, check to make sure
proper seat model was installed. If
so, you may adjust the centering of
the seat slightly to gain clearance
between seat and tablet.
ADA
at aisle
ADA
sticker
(option 2)
flip-arm
cap
ADA
sticker
(option 1)
t
brace
tablet arm
mounting bracket
/ -20 x 1 /”
backing
plate
flip-arm
cap
13
/ -20 x /”screw
(arm adjust
screw)
44
end
upright
at aisle