| KICHLER.COM
14
ATTACHING THE FAN BLADES
CAUTION: Remove the rubber shipping blocks attached to the face
of the motor. These blocks keep the motor from shifting during
shipping and MUST be removed during installation.
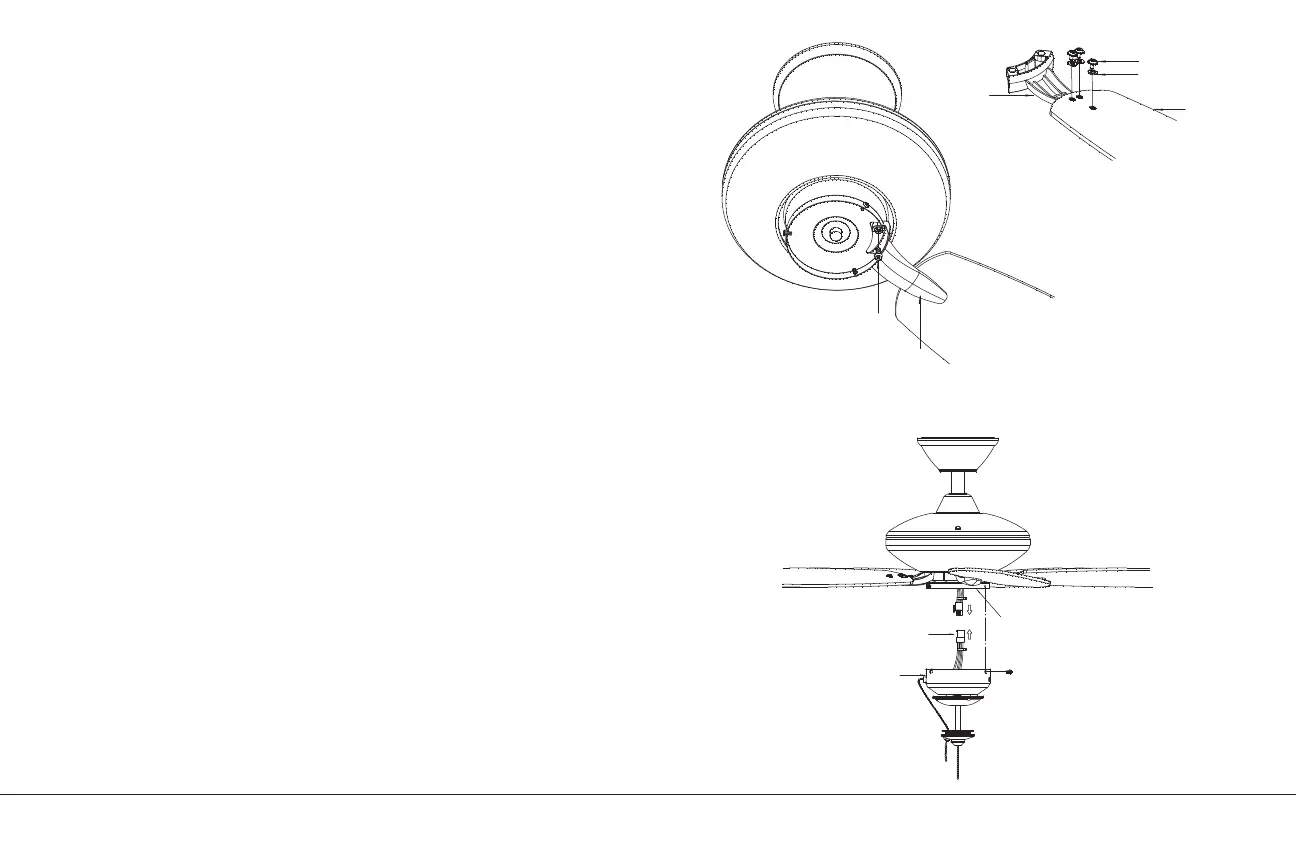
Step 1. Attach the blade to the blade bracket using the screws and
washers as shown in Figure 14. Start screw into bracket. Repeat for
the two remaining screws.
Step 2. Make sure the blade is straight and tighten each screw.
Step 3. Fasten blade assembly to motor using “Pre-Installed”
mounting screws in the blade bracket.
INSTALLING THE LIGHT KIT
NOTE: Before continuing installation, confirm that the power is still
turned o at the main circuit breaker or by removing the correct
fuse. Turning the power o using a wall switch is not sucient to
prevent electrical shock.
Step 1. While holding the switch housing under your ceiling fan, push
the square wire connectors together. One from the fan and one from
the switch housing. (Fig. 15)
NOTE: These connectors are color coded and will ONLY engage
when the colored strips are matched (aligned).
Step 2. Carefully push all the wires into the switch housing. Attach
the switch housing to the mounting ring with the screws provided.
Make sure each screw is tight. (Fig. 15)
Fig. 14
Fig. 15
Washer
Screw
Blade arm
Blade
Screw
Screws
Switch housing
Wire connector
Mounting ring