Removing the wheel
›
Lift up the floor in the luggage compartment.
›
Loosen the retaining belt and take out the box with the tool kit.
›
Unscrew the nut in the direction of arrow » fig. 87 and take out the wheel.
Stow the wheel
›
Place the wheel into the wheel well with the wheel rim pointing downward.
›
Pull the fixing band through the opposite holes in the wheel rim.
›
Screw the nut in the opposite direction to the arrow until it stops » fig. 87.
›
Place the box with the tool kit back inside the wheel and secure it with the
tape.
›
Fold back the floor in the luggage compartment.
Full wheel trim
Remove trim
›
Hang the clamps for removing the full wheel trims on the edge of the full
wheel trim.
›
Push the wheel wrench through the clamp, support on the tyre and pull off
the wheel trim.
Install trim
›
Press the wheel trim onto the wheel rim at the designated valve opening.
›
Then press the trim into the wheel rim until its entire circumference locks
correctly in place.
The position of the anti-theft wheel bolt is indicated by means of a symbol on
the back of the wheel trim supplied ex-factory or from the ŠKODA Original
Accessories. If using the anti-theft wheel bolt it should be fitted at this point
» .
WARNING
We recommend that you use wheel trims from ŠKODA Original Accesso-
ries. With other hub caps, a sufficient air supply for cooling the brake sys-
tem may not be guaranteed - There is risk of an accident.
CAUTION
■
If the wheel trim is positioned outside the position marked for the anti-theft
wheel bolt, there is a risk of damaging the wheel cover.
■
Only use manual pressure and do not hit the full wheel trim – there is a risk of
damaging the trim.
Notice
We recommend that you use wheel trims from ŠKODA Original Accessories.
Wheel bolts
Fig. 88
Remove the cap
›
To remove the cap, insert the extraction pliers up to the stop on the cap and
pull this in the direction of the arrow » fig. 88.
›
To install, insert the cap up to the stop on the wheel bolt.
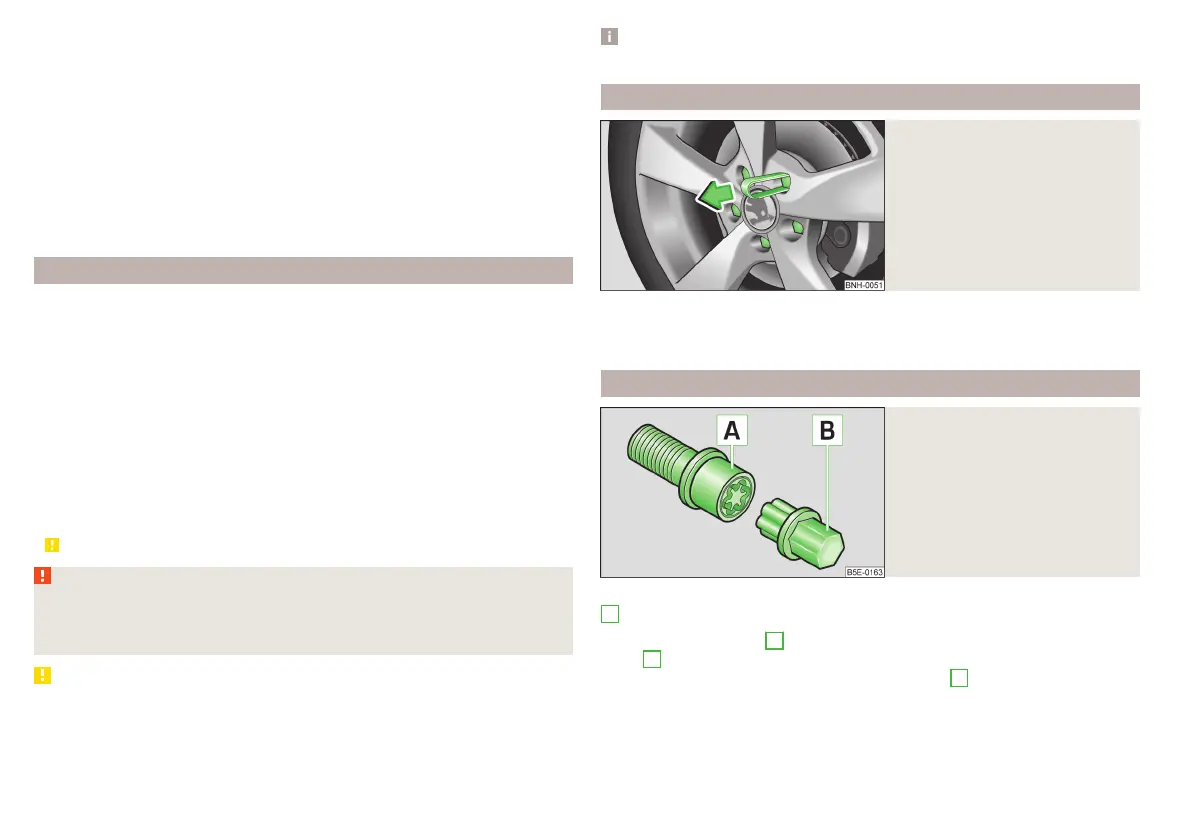
Anti-theft wheel bolts
Fig. 89
Anti-theft wheel bolt and at-
tachment
The anti-theft wheel bolts protect wheels from being stolen. This can only be
B
.with the attachment» fig. 89 loosened / tightened.
›
Insert the attachment
B
» fig. 89 as far as it will go on the anti-theft wheel
bolt
A
.
›
Insert the key as far as it will go onto attachment
B
and loosen / tighten the
wheel bolt.
›
Remove the attachment.
The attachment for the anti-theft wheel bolts must always be kept in the
vehicle in case of a potential wheel change.
88
Do-it-yourself