EasyManua.ls Logo

Kodak i3000 Series - User Manual

Kodak i3000 Series
60 pages
Print Icon
To Next Page IconTo Next Page
Loading...

Table of Contents

Other manuals for Kodak i3000 Series

Questions and Answers

  • C
    carlos44Aug 19, 2025
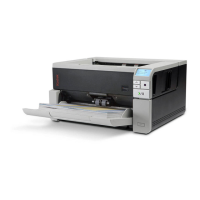
    How to fix documents jamming on Kodak i3000?
    • J
      Johnathan AndersonAug 19, 2025
      To resolve documents jamming or multiple documents feeding in your Kodak scanner, ensure the documents meet the size, weight, and type specifications outlined in Appendix A. Remove all staples and paper clips. Clean all rollers and tires, and ensure the separation roller and feed module are properly installed. To remove a document jam: Remove any documents from the feeder area, open the scanner cover, locate the jammed document(s) and remove it, close the scanner cover, and resume scanning.
  • T
    Tara ReillyAug 21, 2025
    What to do if my Kodak i3000 Scanner will not scan documents?
    • L
      Lisa WagnerAug 21, 2025
      If your Kodak scanner will not scan or feed documents, make sure the power cord is plugged in and the power is on. Ensure the power button has been pushed and the green LED is lit. Verify that the scanner cover is completely closed. Check that documents are making contact with the feed module and are covering the paper present sensor, and that documents meet specifications for size, weight, and type. For thicker documents, turn the gap release dial vertically to open the space between the feed module and separation module. Check the feed module and separation roller for signs of wear, and replace these parts if necessary. You can also power the scanner down and power it up again.
  • J
    jason76Aug 23, 2025
    What to do if my Kodak scanner shows '0' and won't communicate with PC?
    • B
      Brenda TaylorAug 25, 2025
      If you see a '0' displayed in the operator control panel after powering on your Kodak scanner, indicating it's not communicating with the PC, check that the USB cable is in good working condition and securely plugged into both the PC and the USB port. Ensure you are using a USB 2.0 (or higher) connection, as USB 1.1 will not work. Be sure the software is loaded. Verify that the PC is recognizing the scanner: Click Start>Settings>Control Panel>Administrative Tools>Computer Management to display the Computer Management window. Select Device Manager and select your PC. The Kodak i3200 (or i3250/i3300/i3400/i3450/i3500) Scanner should be displayed under Imaging Devices. Click Action>Scan for hardware changes.
  • J
    Jeff CastilloAug 26, 2025
    How to improve Kodak i3000 Scanner image quality?
    • K
      Katherine CruzAug 26, 2025
      If the image quality from your Kodak scanner is poor or has decreased, make sure that the scanner and imaging guides are clean. Refer to “5 Maintenance” on page 27.
  • B
    bradleybrownAug 28, 2025
    How to scan long documents on Kodak i3000 Scanner?
    • A
      Alicia RomeroAug 28, 2025
      If you are having trouble feeding or are jamming 11 inches / 27.94 cm or longer documents in your Kodak scanner, make sure the input and output tray extenders are pulled out to provide support for long documents. Also see problem U9 (document jam) on page 6-1.
  • A
    Autumn OconnorAug 30, 2025
    Why is my Kodak i3000 running so slow?
    • M
      Mary BurnsAug 30, 2025
      If your Kodak scanner is running slowly, there might be several reasons. First, your PC may not meet the minimum requirements for the scanner. Disable any anti-virus or security suite software. If the problem resolves, consult the anti-virus or security suite software documentation for how to use exceptions or exclusions and add the Kodak folders. Some image processing functions will reduce scanner speed. The resolution (dpi) setting may be set too high. Your virus software may be scanning all TIFF or JPEG files. Ensure you are scanning to a local drive.
  • C
    Cynthia BoydSep 1, 2025
    How to fix documents being skewed during scanning on Kodak scanner?
    • D
      Darius WilsonSep 1, 2025
      If documents are skewed during scanning with your Kodak scanner, ensure the input tray side guides are adjusted to fit the documents being fed. Make sure documents are fed perpendicular to the feed module. Remove all staples and paper clips from the documents. Ensure the feed module, separation roller, and drive rollers are clean. Also, make sure the scanner cover is firmly closed.
  • P
    Paul GravesSep 4, 2025
    How to resolve false paper jams on Kodak i3000 Scanner?
    • L
      Larry JonesSep 4, 2025
      If you are experiencing “false” paper jams or multifeeds with your Kodak scanner, make sure that the transport area is clean.
  • R
    Robert ButlerSep 6, 2025
    Why is my Kodak scanner multifeeding documents?
    • C
      Craig JonesSep 6, 2025
      If you are experiencing documents multifeeding on your Kodak scanner, ensure the leading edges of all batched documents are centered in the feeder so that each document will come in contact with the feed rollers. Make sure the feed module and separation roller are clean and not worn. If documents have an unusual texture or surface, feed them manually. Also, ensure the gap release is not in the vertical position.
  • J
    Jared JohnstonSep 8, 2025
    How to remove roller marks from Kodak i3000?
    • S
      Scott VargasSep 9, 2025
      If you're seeing roller marks or streaks on documents after scanning with your Kodak scanner, clean the feed module, transport rollers, separation roller, and tires. Refer to “5 Maintenance” on page 27.

Summary

Safety Information

User Precautions

Precautions for safe operation and installation of the scanner.

Warning Labels

Identifies important safety warnings, such as moving parts.

Overview and Accessories

Supporting Documentation

Lists additional documentation available for the scanner.

Scanner Accessories

Lists optional accessories available for the Kodak i3000 Series Scanners.

Whats in the Box

Lists the items included in the scanner package.

Scanner Components

Front View Components

Illustrates and labels the front components of the scanner.

Inside View Components

Shows and labels the internal components of the scanner.

Rear View Components

Illustrates and labels the rear ports and connectors of the scanner.

Printer Accessory View

Shows operating components of the optional printer accessory.

Installation and Setup

Installation Setup Overview

Overview of the steps for installing the scanner and software.

Install Scanner Software

Procedure for installing the scanner software from the CD.

Connect Scanner to PC

Instructions for connecting the scanner to the power and PC.

Scanning Operations

Starting the Scanner

Procedure for powering on and preparing the scanner for use.

Document Preparation

Guidance on preparing documents for optimal scanning.

Scanner Adjustments

How to adjust tray guides and extenders for different document sizes.

Flatbed Scanning

Instructions for using the flatbed scanner for exception documents.

Rear Document Exit Usage

How to use the rear exit for special handling or fragile documents.

Selecting Scanning Application

Overview of included software: Smart Touch and Kodak Capture Desktop.

Document Printing

Using the Printer Accessory

Information on using the optional printer accessory.

Printer Specifications

Details on the capabilities and characteristics of the printer accessory.

Ink Cartridge Installation

Step-by-step guide for installing or replacing the ink cartridge.

Changing Print Positions

How to adjust the printer carrier position for different print layouts.

Printer Problem Solving

Troubleshooting common issues related to document printing.

Maintenance Procedures

Cleaning Tools and Materials

Lists the recommended supplies for scanner maintenance.

Opening Scanner Cover

Procedure for safely opening the scanner cover for cleaning or maintenance.

General Cleaning Procedures

General guidelines and precautions for cleaning scanner components.

Cleaning Rollers and Tires

Instructions for cleaning various scanner rollers and tires.

Cleaning Imaging Guides and Flatbed

Procedures for cleaning imaging guides and the flatbed glass.

Transport Cleaning

Using a cleaning sheet to maintain the scanner's transport path.

Replacement Procedures

Overview of parts that can be replaced and their frequency.

Troubleshooting

Problem Solving Guide

Guide to diagnosing and resolving common scanner issues.

Indicator Lights and Error Codes

Explanation of scanner status lights and error codes.

Upgrading Software

Instructions for updating scanner drivers and firmware.

Contacting Service

Information on how to contact Kodak Alaris support for assistance.

Specifications and Warranty

Scanner Specifications

Technical specifications for the Kodak i3000 Series Scanners.

System Requirements

Recommended PC configuration for running the scanner software.

Limited Warranty Information

Details the limited warranty terms for Kodak Scanners in the US and Canada.

Obtaining Warranty Service

Steps for getting warranty service and service descriptions.

Contacting Kodak Alaris Support

Contact information and resources for Kodak Alaris support.

Kodak i3000 Series Specifications

General IconGeneral
Optical Resolution600 dpi
Color Depth24-bit
Output Resolution1200 dpi
File FormatsPDF, JPEG, TIFF, BMP, PNG, RTF, TXT, Searchable PDF
Operating System CompatibilityWindows
IlluminationLED
Scanner TypeDocument Scanner
Maximum Scan Size216 x 863 mm (8.5 x 34 in.)

Related product manuals