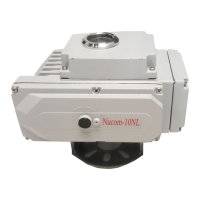
ACT-N02E-1
10
B-2. Position the actuator at 0 % (full close), and set the actuator limit switch so as to work at 0 %.
(Note that the limit switch should normally be set to work at a half turn of manual handle past the full close of
signal rate.) (See FIG.9)
B-3. Bolt a bracket on the valve.
B-4. Tentatively bolt the actuator on the bracket.
B-5. Position the actuator at 0% (close), then joint the actuator shaft and the valve stem with a coupling.
B-6. Secure the bolts.
B-7. Manually check that the actuator turns smoothly without eccentricity etc.
Confirm that the limit switch works at 0 % before the shaft touches at the stop.
(If the shaft touches at the valve stop before the limit switch would function, the actuator may be locked, and
may overheat.
In such a case, the thermo protector will stop the motor, but the case may cause damages to the unit.)
8. POWER AND SIGNALS
8-1 Supply voltages
Standard AC 110, 115, 120, 220, 230, 240V±10% (50/60Hz)
Option AC 24V, DC 24V ±10% (50/60Hz)
For other voltages than the above, refer to our Sales Dept.
8-2 Fuse and breaker
Recommendable fuse/breaker capacities
Model Capacity of fuse/breaker Motor capacity
Nucom-10NS 5A 20W
Nucom-10NM 7A 90W
Nucom-10NL 10A 100W
8-3 Input signals
4~20mA (or 1~5V) DC
4~12mA (or 1~3V) DC
Standard
12~20mA (or 3~5V) DC
For other signal rates, please refer to our Sales Dept.
 Loading...