10
2. Secure the window panel frame to the top window jamb:
• Drill two 9/64” diameter pilot holes in the top window jamb that are in line with the
partially plugged holes in the window panel frame.
• Secure the window panel frame with two #8-32x3/4” self-threading screws.
• If additional support is needed, two screws may be used on the sides of the panel frame
as well.
3. Secure the side panels to the side window jambs:
• Drill two screw holes in the side channels near the bottom of the channels.
• Drill two 9/64” diameter pilot holes in the side window jambs.
• Secure the side channels using two #8-32x3/4” self-threading screws.
4. Replace the front panel by reversing the steps in the “Remove the Front Panel” section.
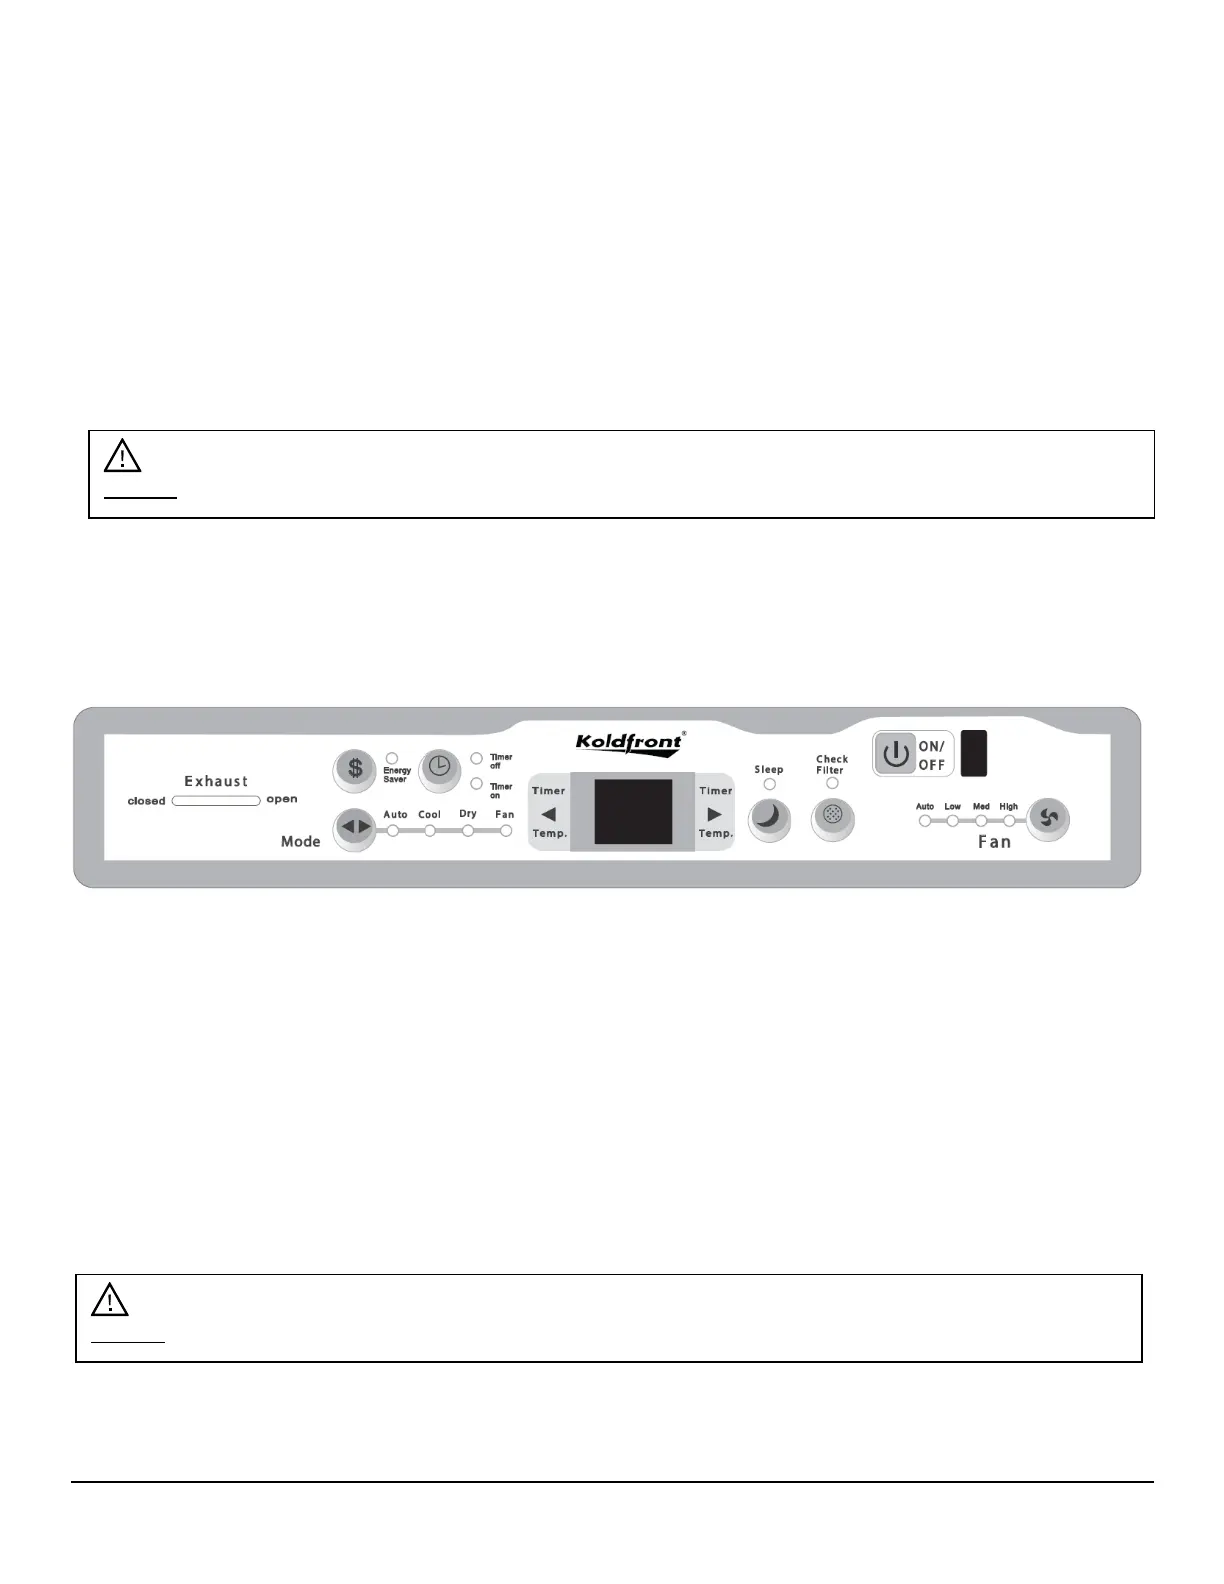
Control Panel Operations
Using the Control Panel
Digital Display:
• Displays the set temperature in degrees Celsius or Fahrenheit while in most modes.
However, while in Fan Only mode, it shows the ambient room temperature.
• To change the display from °F to °C press both the Left and Right button simultaneously
for 3 seconds.
To Turn the Unit On:
Press the On/Off button.