Shenzhen Anycubic Technology Co., Ltd.
2
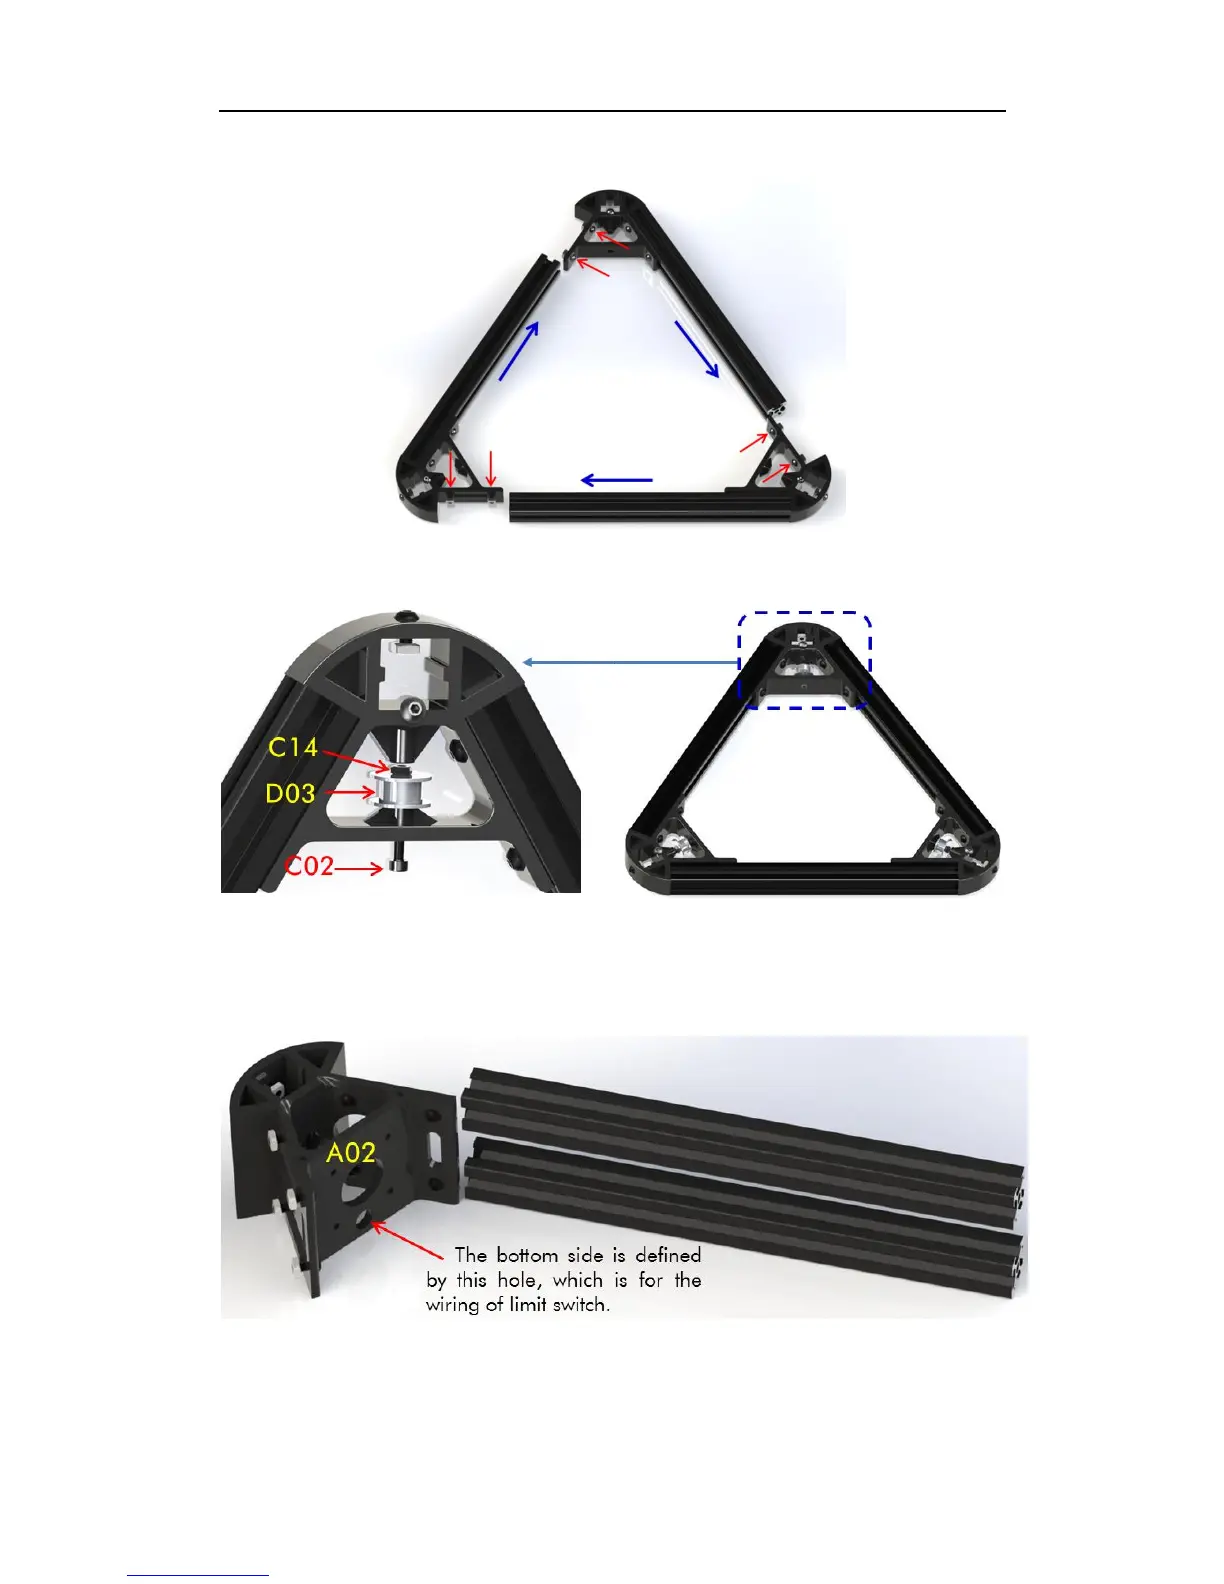
form a triangle and tighten the corresponding screws (red arrows).
Fig. 2
Step 3. Fig. 3 shows the assembly details of one of the three corners of the top triangle.
Fig. 3
Step 4. The assembly of bottom triangle is the same as the top, except 10 pairs of C16 and
C11 and 2 pairs of short Al-extrusion are used for A02, which is show in Fig. 4.
Fig. 4
Step 5. After 3 pieces of assembled A02 are ready, push them forward simultaneously to
form the bottom triangle and then tighten the corresponding screws, just as Fig. 5 shows.