Shenzhen Anycubic Technology Co., Ltd.
16
Setup
1. Driver Installation
*Note: there is a gift SD card contains the files for setup.
ANYCUBIC mainboard uses CP2012 chip for communication. Normally, when printer
connects to PC via USB for the first time, the PC will automatically install the driver for
CP2102. The corresponding port name will appear in Device Manager of the PC. The port
number is random but it keeps the same if using the same mainboard and USB port.
If auto installation fails, the reason could be that the PC system is a simplified version or has
been modified. Please unzip the file “Drivers for CP2102” from the SD card, and install the
driver manually.
2. Firmware uploading
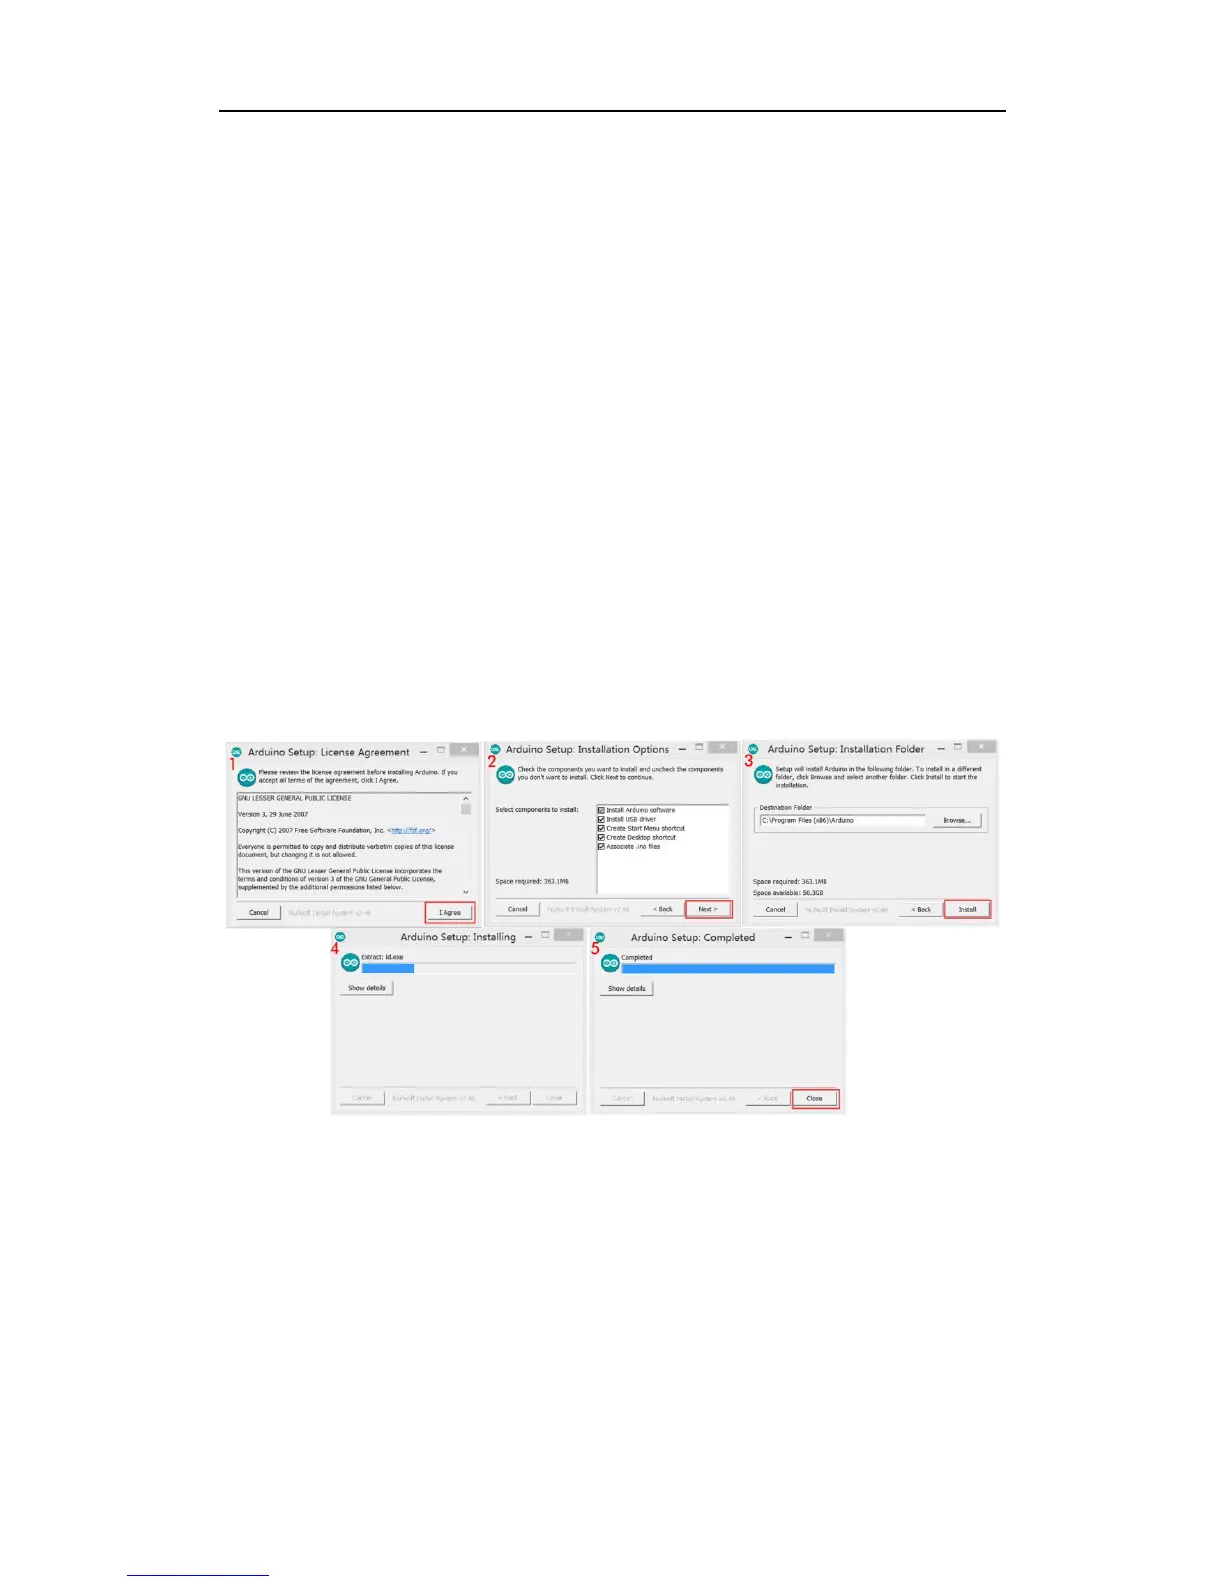
Step 1. The installation of Arduino is shown in Figure 34, double click ‟arduino - 1.6.4 -
windows.exe‟, then click „I Agree‟ in the installation dialogue and click „Next‟ and choose
the „installation path‟ if necessary till finally see the „Install‟ button then click it to start. When
installation finished, close the dialogue interface and a shortcut of „Arduino‟ would appear
on PC desktop, which means it has been successfully installed.
Fig. 34
Step 2. Uploading the firmware to ANYCUBIC mainboard. After the installation of „Arduino‟,
unzip the „Firmware for ANYCUBIC Kossel 3D printer‟ in SD card, and find „Marlin.ino‟ or
„Marlin.pde‟ then double click it.
Next, as Fig. 35 shows when the interface appears, please do as the follows: (1) click
„Tools‟-„Board‟, and then select „Arduino Mega or Mega 2560‟; (2) select
„Tools‟-„Processor‟-„ATmega 2560(Mega 2560)‟; (3) select „Tools‟-„Port‟-„COM4 (Arduino
Mega or Mega 2560)‟ (the same as ANYCUBIC Mainboard Port number).