Shenzhen Anycubic Technology Co., Ltd.
14
d. Motors: X, Y, Z slots are for X, Y, Z motors respectively. There are 2 slots for Z motor,
please choose any one of them. E0 is for extrusion motor. (E1 is for expansion function
such as two extruders).
e. Heat rod: wiring from printing head to Heat 0 port (without positive and negative).
f. Fan: connect the 4010 cooling fan to FAN 2 slot, while connect the 4010 blower fan (for
model cooling) to FAN 0 slot. Red line wires to positive terminal and black one wires to
negative terminal.
g. Power and USB: when everything is ready, connect power supply to the power port and
USB line to the USB port.
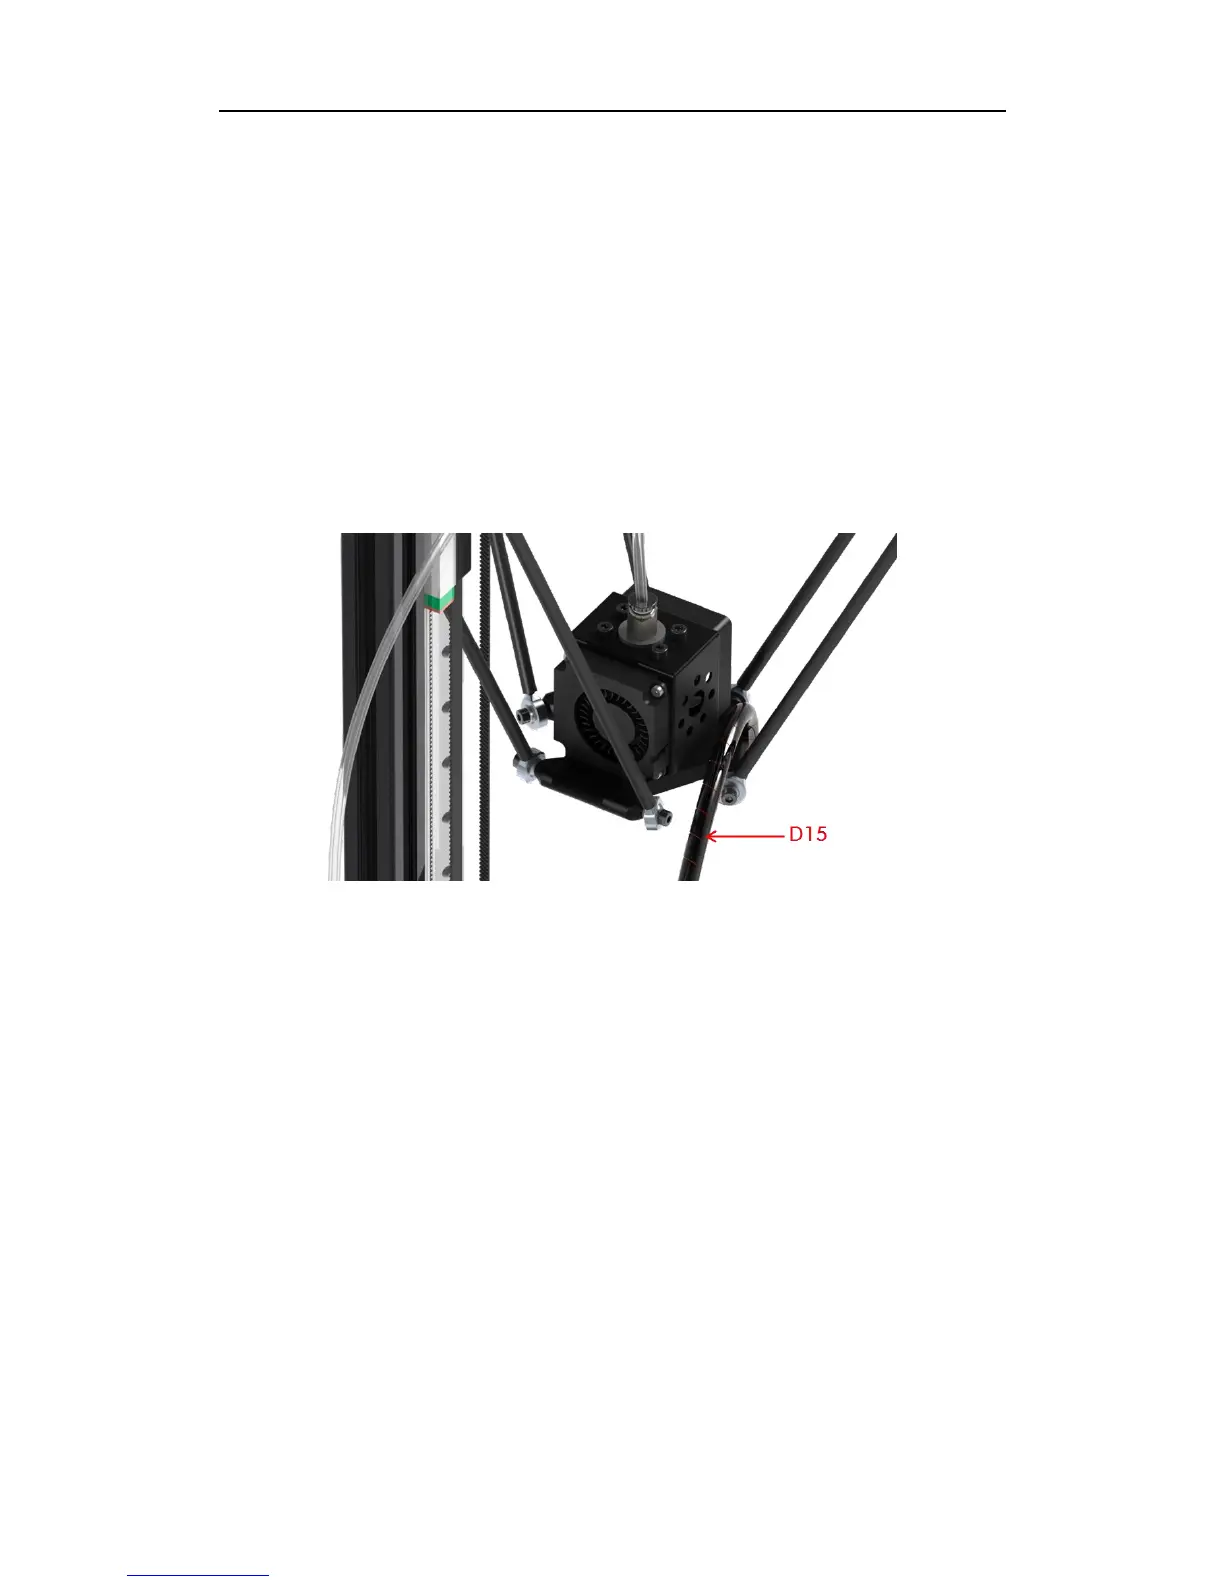
When wiring is finished, use straps (D15) to arrange the wires from printing head, as shown
in Fig. 31. The wire-cluster could be fixed to one of the carbon fiber tubes by ribbon, but do
not let it to restrict or interfere with the motion of the printing head.
Fig. 31
8. LCD
Firstly prepare the LCD with the LCD cover (A15) and other fasteners as shown in Fig. 32.
Then use the cables to wire EXP1 and EXP2 from mainboard to LCD. Lastly, fix the LCD to
the bottom Al-extrusions, just as shown in Fig. 32.
9. Platform
As shown in Fig. 33, install 6 pieces of limit-blocks (A16, including right and left parts) onto
the bottom triangle frame using 6 pairs of C16 and C11. Then put the glass platform onto
A16 and adjust its position accordingly. Lastly, fasten those screws to fix the platform. Then
you could fix the ANYCUBIC platform sticker onto the glass platform.