Control flap bk
Clean the control flap and check the pins in the control flap for tight fit.
Measure the distance
A between the two pins (see illustration).
When mounted, the control flap must not scrape against the exhaust
port.
Distance
A: min. 5.5 mm (0.22 in)/max. 5.8 mm (0.23 in)
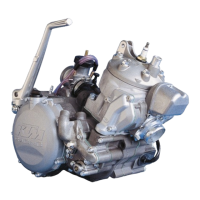
Preassembling the cylinder
–Grease O-rings bn and control flap axles 9, especially at the pins.
– Slide control flap
bk through the exhaust duct into the cylinder, and
position it such that the control flap axles may engage the 2 recesses
of the control flap.
–Mount the left and the right control flap axles
9 without tightening
them yet.
– Insert two feeler gauges of identical thickness (approx. 0.20 mm /
0.008 in) between the control flap and the cylinder wall at points
B.
This distance must be equal on both sides.
–Twist the control flap axles
9 all the way in and then 1/8 of a full
turn out again.
– Apply Loctite 243 to two bolts
7 and use them to fix the two locking
plates
8, thereby taking care to turn the control flap axles 9 as little
as possible.
– Remove the two feeler gauges and check control flap for easy
operation.
– When installed, the control flap must not touch the exhaust duct.
– Thoroughly oil the lifting bolt
bl and insert it from above into the
bore in the cylinder. Insert the lifting bolt until it engages in the
control flap
bk. Then rotate it a quarter of a full turn so that the flat
section is perpendicular to the direction of travel and faces forward
(in the direction of the exhaust port).
– Thoroughly oil the control rollers
5 and insert them into the bores in
the cylinder. Insert the control roller with one mark on the left and the
control roller with 2 marks on the right side.
– Thoroughly oil the eccentric shaft
6 of the control flap and mount it
in the cylinder. Move the control flap up and down. The eccentric
shaft should move with the control flap.
5-7C
ca. 0,20 mm ca. 0,20 mm
A
5
5
6
B
B
11