12
10
8
9
2
13
14
15
4
1
3
5
6
7
12
11
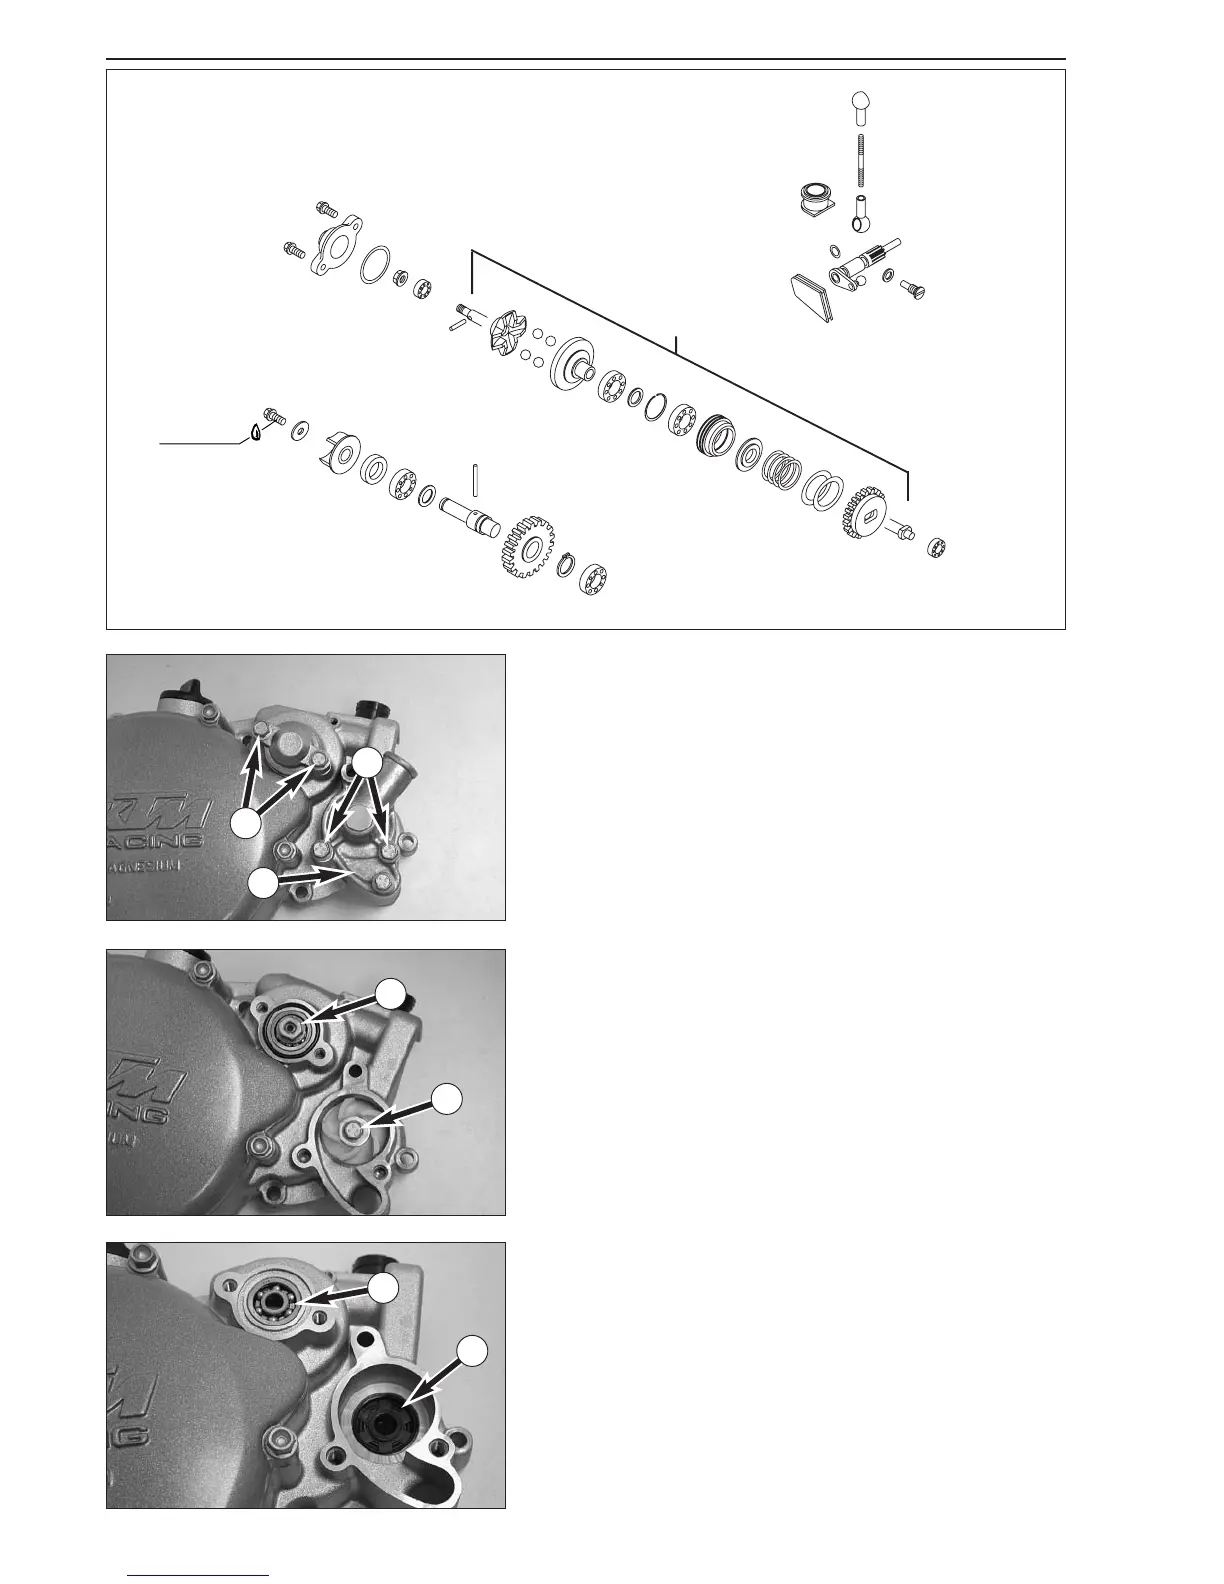
Dismounting the centrifugal timer and the water pump
– Remove both of the bolts 1 and take off the closing cover 2
together with the O-ring.
– Loosen the nut
3 on the centrifugal timer.
– Pull the centrifugal timer
4 out of the housing.
– Remove both of the bolts
5 and take off the water pump cover 6
together with the gasket.
– Loosen the bolt
7 on the water pump wheel.
– Pull off the water pump wheel
8 and take out the water pump
shaft
9.
– Cleanse all parts and check for wear.
– Check the ball heads on the linkage
bn for play.
– Check the water pump drive wheel
bo for damage or wear.
– Check the grooved ball bearings
bk and bl for wear.
NOTE: The centrifugal timer does not require any maintenance work or
adjustments.
Replacing the grooved ball bearings
bk for the water pump and the
centrifugal timer
bl:
– Remove the shaft seal ring
bm from the water pump and heat the
housing half in an oven to approx. 150° C.
– When it has reached a temperature of 150° C, the bearings will fall
out of the bearing seats by themselves when the housing half is
tapped on a flat wooden surface.
–Press in new bearings until flush.
–Press in a new shaft seal ring for the water pump from the outside
with the sealing lip facing inwards until flush.
Preassembling the clutch cover
–Grease the shaft seal ring bm for the water pump and mount the
water pump shaft 9 together with the washer (10x14x0.5 mm).
– Mount the water pump wheel, apply Loctite 243 to the bolt
bp and
tighten together with the washer to 4 Nm.
– Mount the water pump cover and gasket.
– Insert the centrifugal timer in the housing and tighten the self-locking
nut to 6 Nm.
– Mount a new O-ring and mount the closing cover.


 To Next Page