5-13
Transmission
Secure mainshaft or countershaft in the vice (using soft jaw-covers).
Remove gears and check the following for wear:
– Needle bearing
– Mainshaft and countershaft pivot points including idler gears
– Shift dogs and gear wheels
–Tooth faces of all gears
–Tooth profile of mainshaft and countershaft and correspondending
gears
– Easy operation of gear-change
– Check the friction bearings in the idler gears for score marks and a
flawless condition.
Carefully clean components and replace damaged components.
NOTE:
– Always place circlips with sharp edge facing the components secured,
ensuring that they are not overexpanded (use special pliers).
– Check that after any repair of the transmission, circlips should axially
not move more than 0.20 mm and must not seize between stop discs.
– Apply graphite paste (MOS2) to the idler gears before you mount
them.
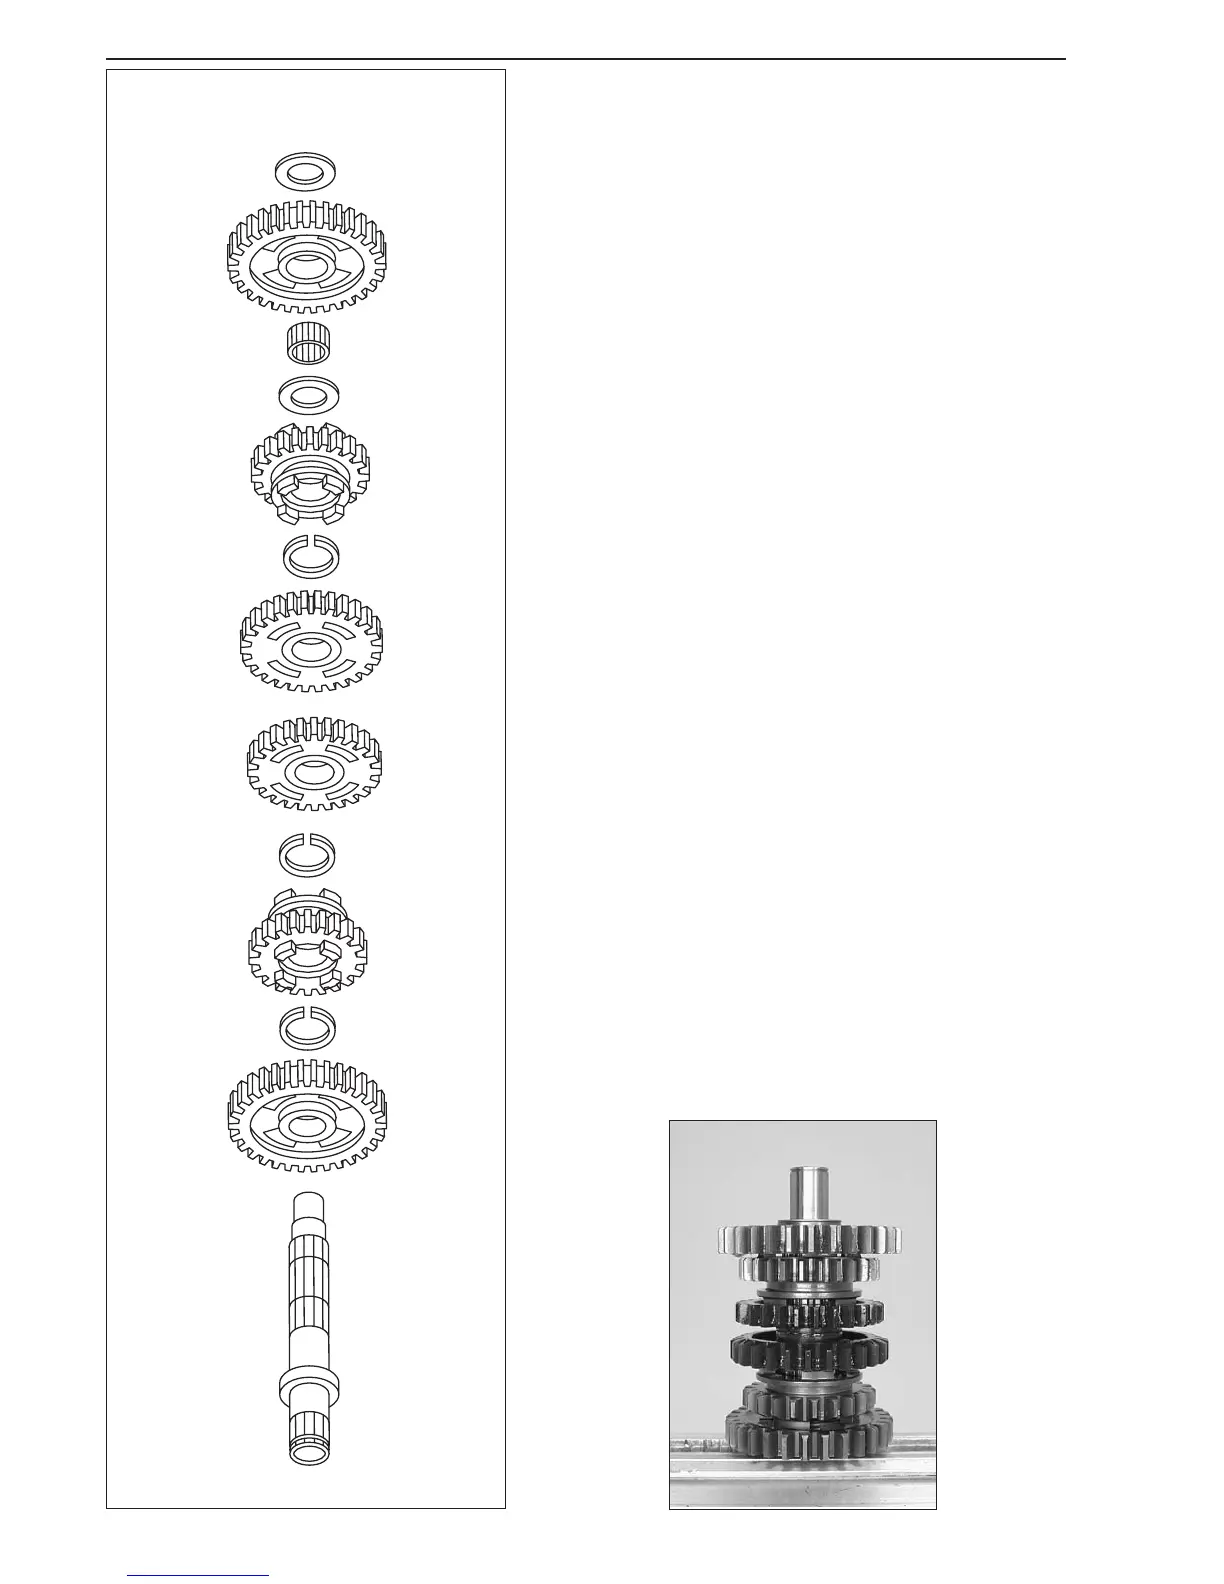
Assembly countershaft
– Fix countershaft in vice with toothed end (use covered clamps).
– Oil all parts before assembly.
– Slide on the 2nd idler gear
1 with the collar facing down.
–Mount the circlip
2 (21 SW) with the sharp edge facing up.
– Slip on the 6th sliding gear
3 with the shift groove facing up and
mount the circlip
4 (21 SW).
– Slip on the 3rd idler gear
5 with the collar facing up and the 4th idler
gear
6 with the collar facing down.
–Mount the circlip
7 (21 SW) with the sharp edge facing up.
– Mount the 5th sliding gear
8 with the shift groove facing down.
– Slip on the stop disk
9 (15x25x0.5) and the needle bearing bk.
– Slide on the 1st gear idler
bl with the notches in the contact surface
facing down and slip on the stop disk
bm (15x25x1).
–Finally, check all of the gears for smooth operation.
7
1
8
6
2
3
4
5
9
10
11
12


 To Next Page