54-0274-01 Rev. A 6 © 2005 KVH Industries, Inc., All rights reserved.
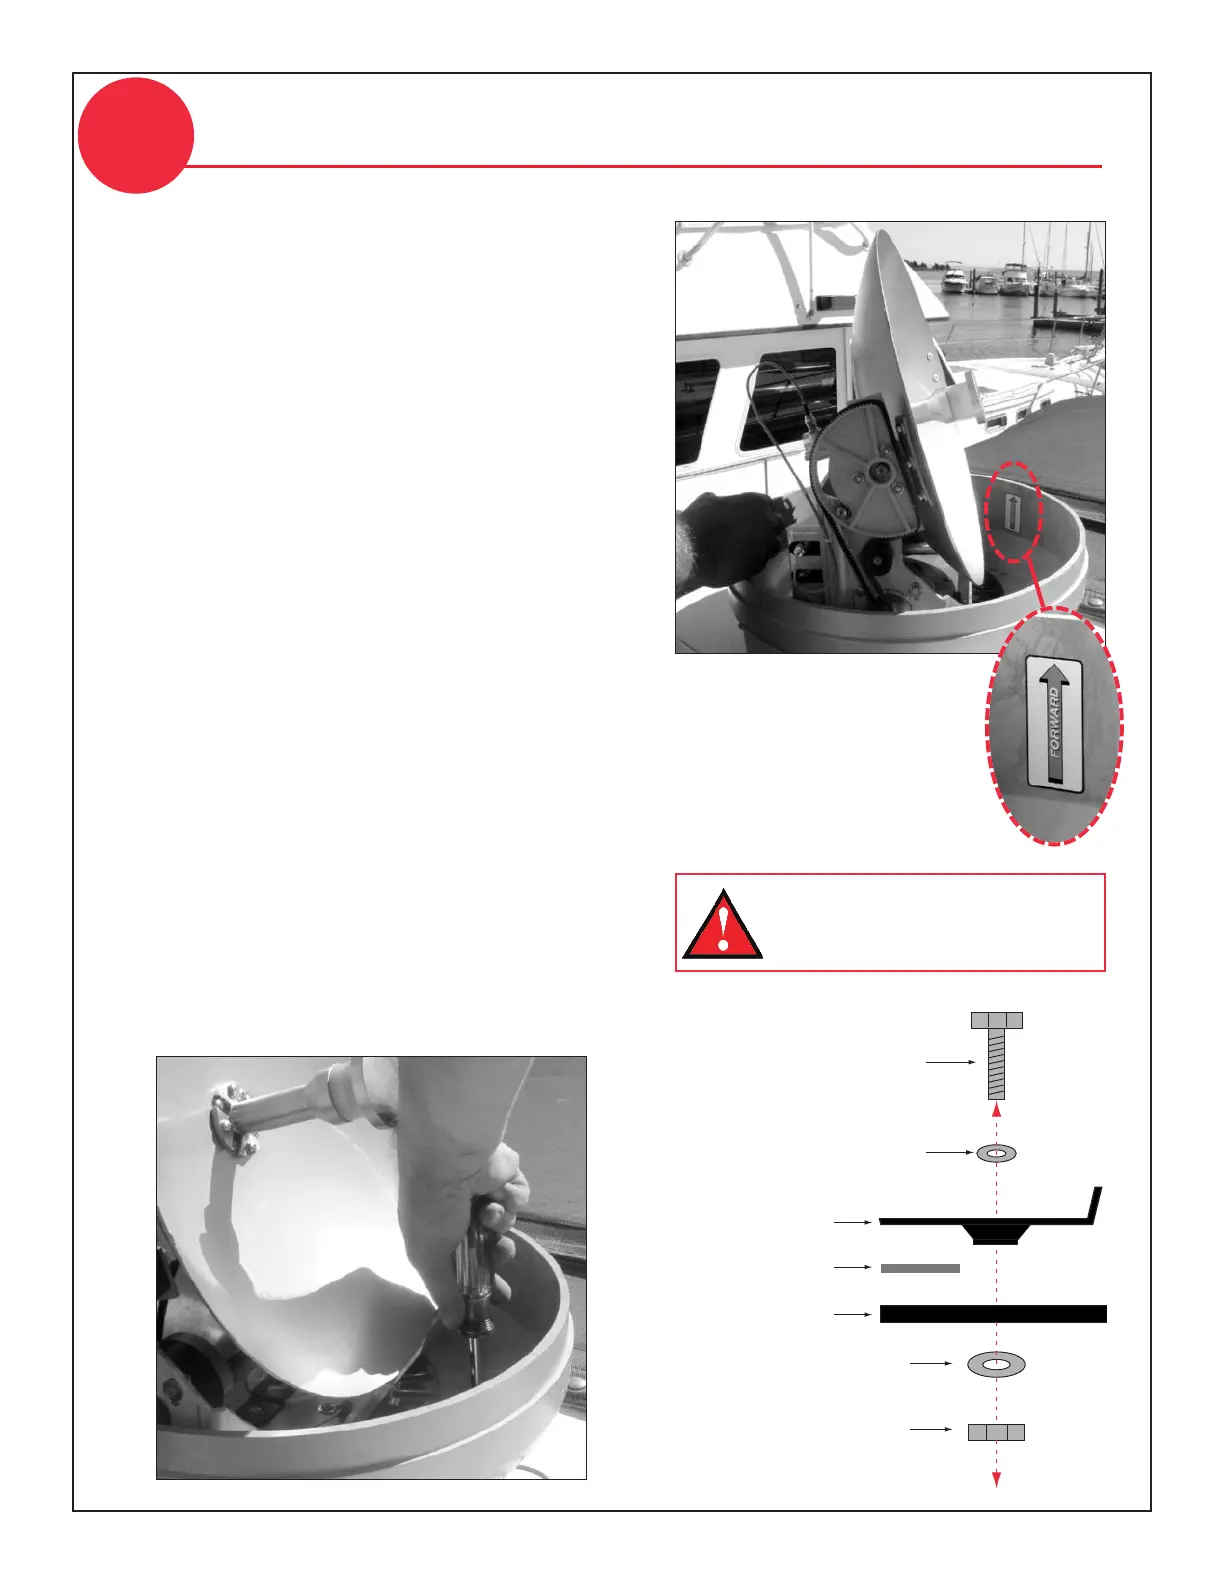
1. Remove the three #10-32 screws securing
the radome to the antenna. Carefully
remove the radome and set it aside in a safe
place. Due to the snug fit, some contact
between the radome’s sealing gasket and the
antenna mechanism is normal.
2. Position the antenna onto the mounting
surface. The antenna’s base should rest
squarely atop the foam seal.
3. Align the four holes in the antenna’s base
with the four holes in the mounting surface.
Be sure the antenna’s “Forward” arrow
points toward the bow.
4. Secure the antenna’s base to the mounting
surface using four
1
⁄4"-20 bolts,
5
⁄8" washers,
1" washers, and lock nuts, as shown in the
illustration. Be sure to insert the bolts from
above and use the supplied hardware for a
secure installation.
5. Tighten the bolts until the foam seal is fully
compressed and the antenna’s four rubber
feet are bottomed against the mounting
surface.
Mount the Antenna
5
 Loading...