2LV/2L1/2L2/2MS/2MT
1-5-20
[60/50/45 ppm model]
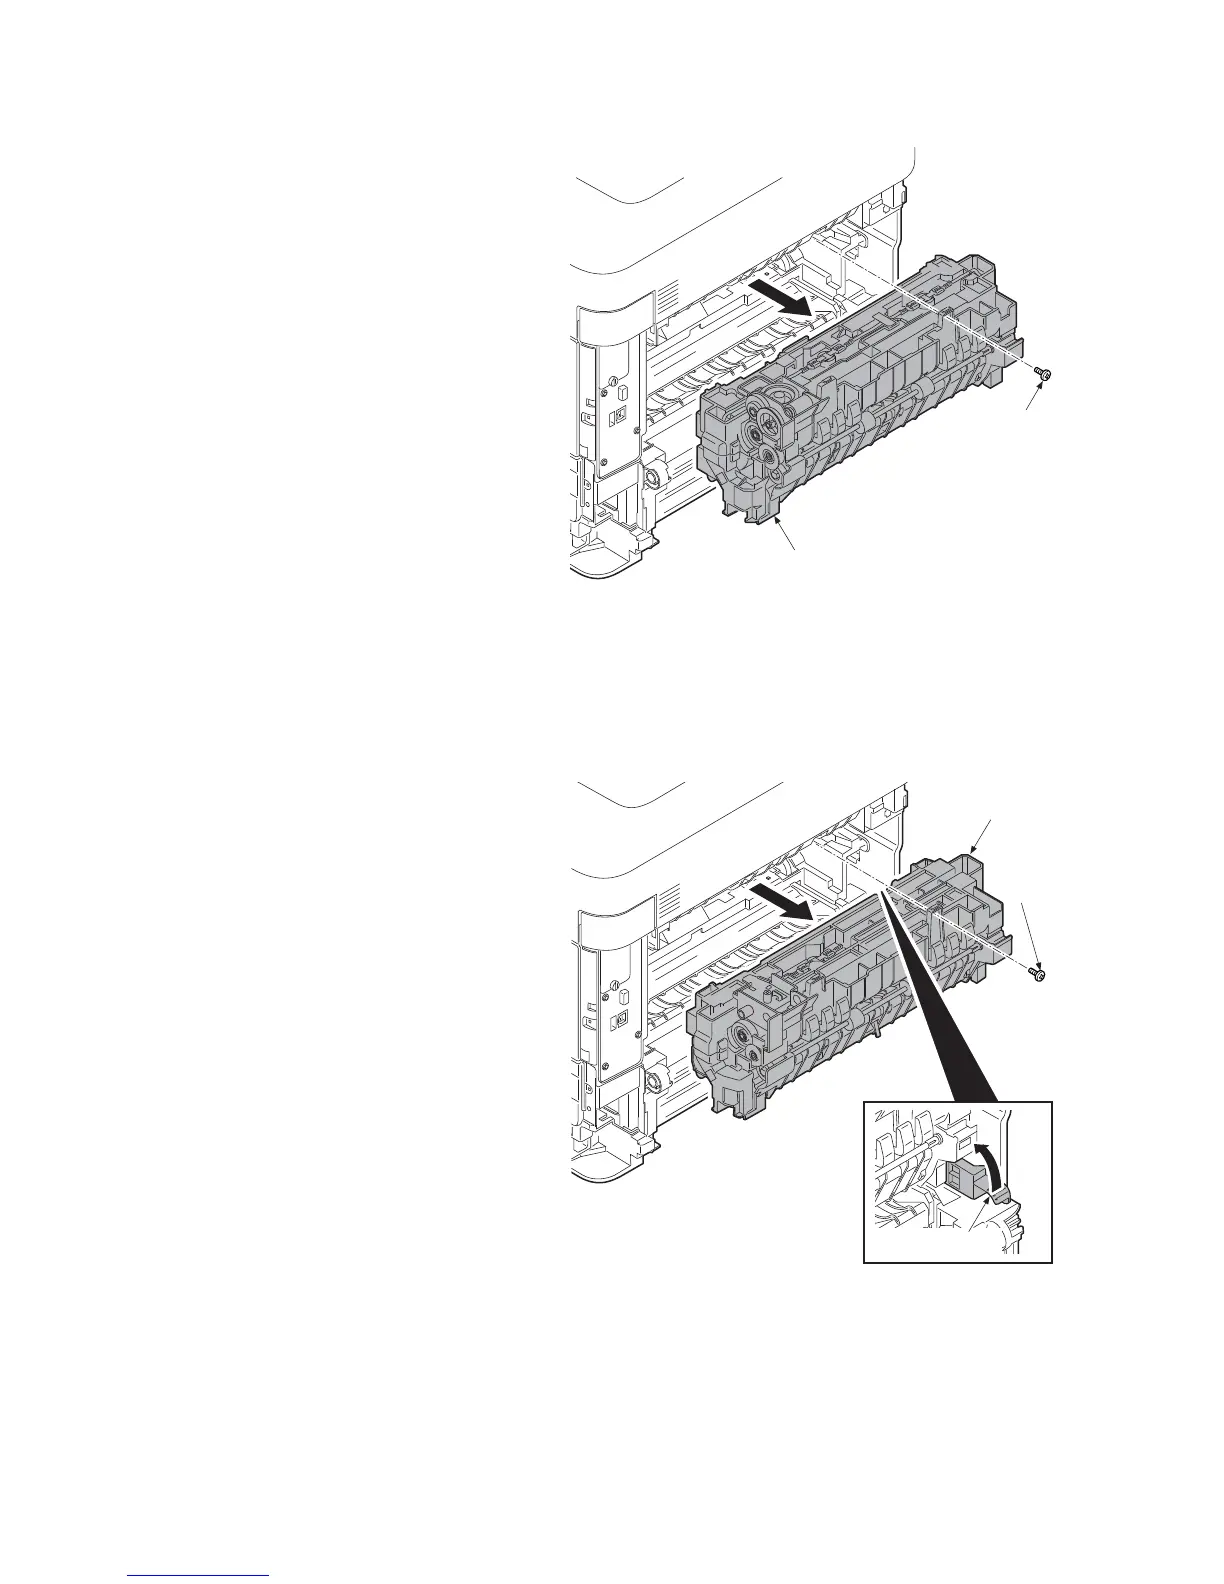
8. Remove the screw and then remove the
fuser unit forward.
9. Check or replace the fuser unit and refit
all the removed parts.
Caution: when refitting the fuser unit, per-
form the following procedures.
(1)Turn on the power switch while opening the
rear cover after removing the fuser unit.
(2)Turn off the power switch after 5-second or
more progress.
(release state of fixing pressure)
(3)Refit the fuser unit.
Figure 1-5-31
[40 ppm model]
8. Pull up the release lever of fixing pres-
sure.
9. Remove the screw and then remove the
fuser unit forward.
10. Check or replace the fuser unit and refit
all the removed parts.
Caution: Pull down the release lever of fix-
ing pressure after refitting the fuser
unit.(pressurization state)
Figure 1-5-32
Fuser unit
Screw
Screw
Fuser unit
Release lever
 Loading...