EasyManuals Logo

Kyocera ECOSYS FS-4300DN Service Manual

Kyocera ECOSYS FS-4300DN
208 pages
To Next Page IconTo Next Page
To Previous Page IconTo Previous Page
Page #123 background imageLoading...
Page #123 background image
2LV/2L1/2L2/2MS/2MT
1-5-27
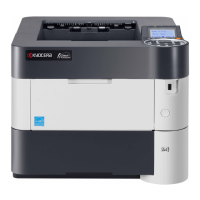
9. Remove seven screws.
10. Extract the feed roller axis by pushing
the joint part.
11. Remove the DU assy to the front.
Figure 1-5-44
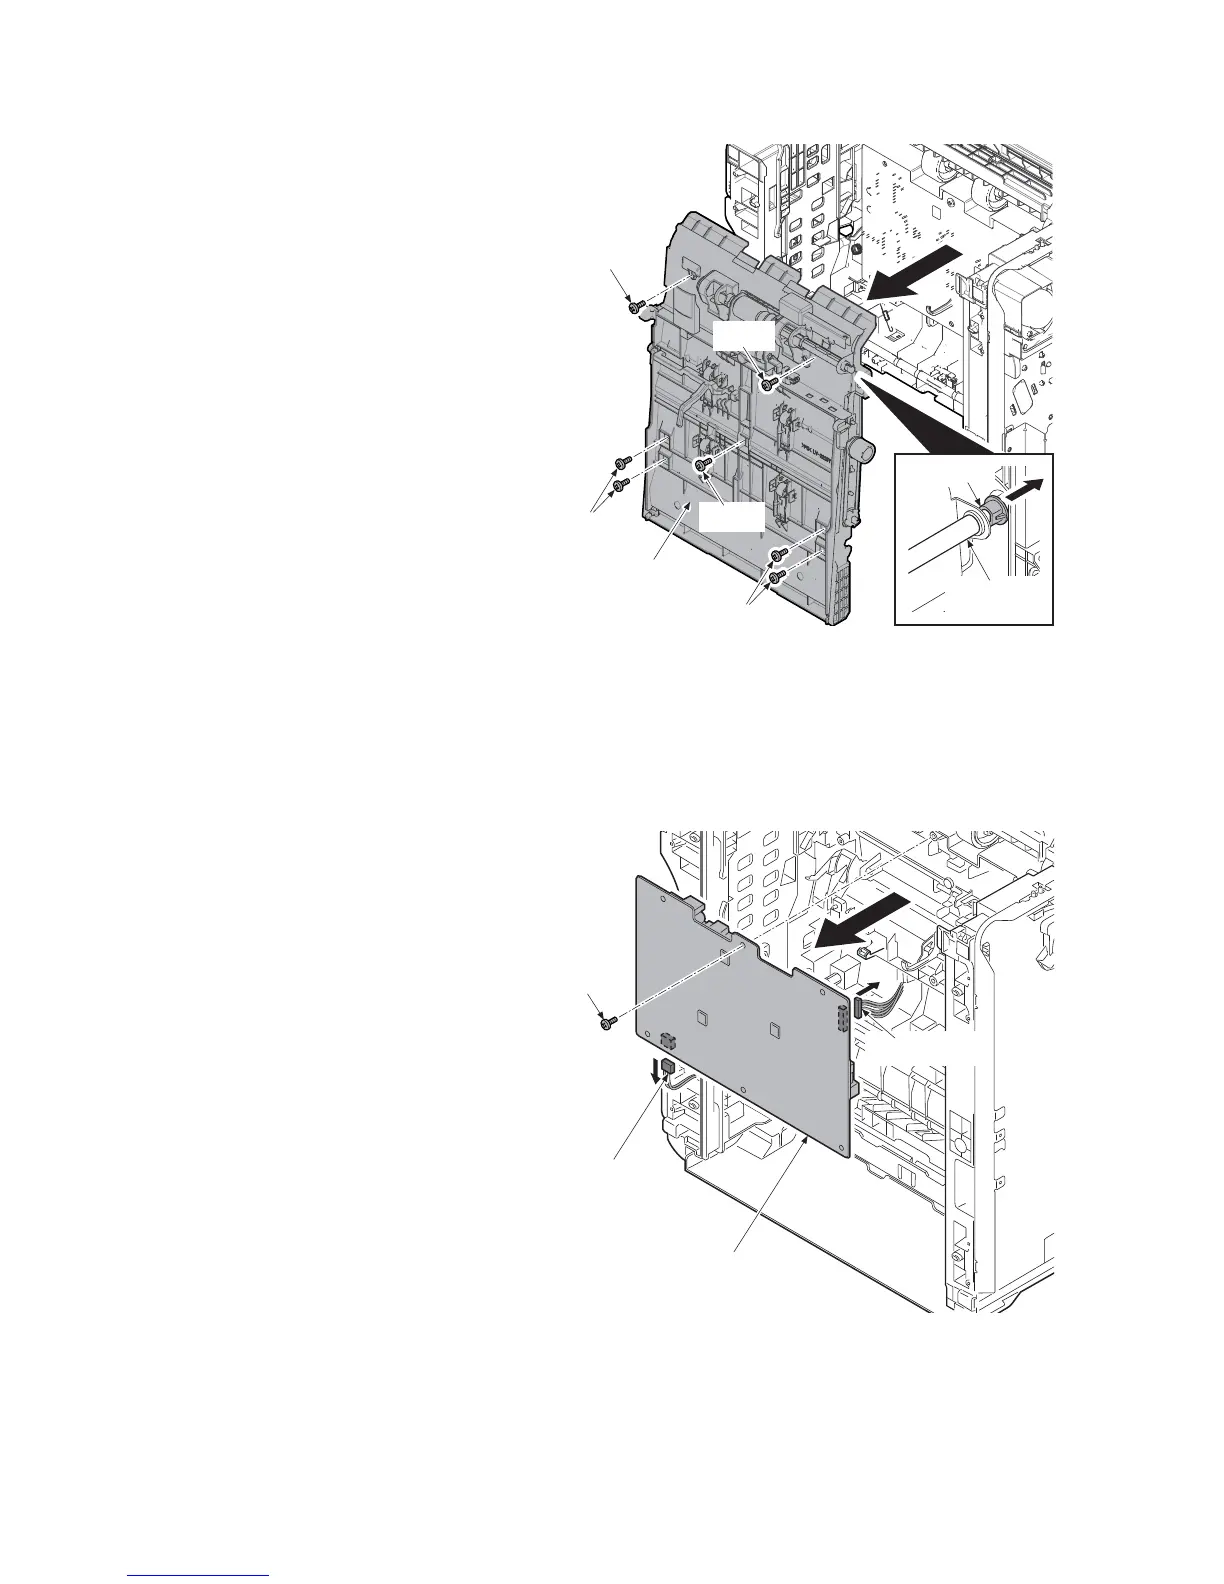
12. Remove the screw.
13. Pull two connectors out and then
remove the high voltage PWB.
14. Check or replace the high voltage PWB
and refit all the removed parts.
Figure 1-5-45
Screws
Screw
DU assy
Screw
Screw
Screws
Paper feed
roller axis
Joint part
High voltage PWB
Connector
Connector
Screw

Table of Contents

Questions and Answers:

Question and Answer IconNeed help?

Do you have a question about the Kyocera ECOSYS FS-4300DN and is the answer not in the manual?

Kyocera ECOSYS FS-4300DN Specifications

General IconGeneral
BrandKyocera
ModelECOSYS FS-4300DN
CategoryAll in One Printer
LanguageEnglish

Related product manuals