2PK/2PL/2PM/2PN
1-5-26
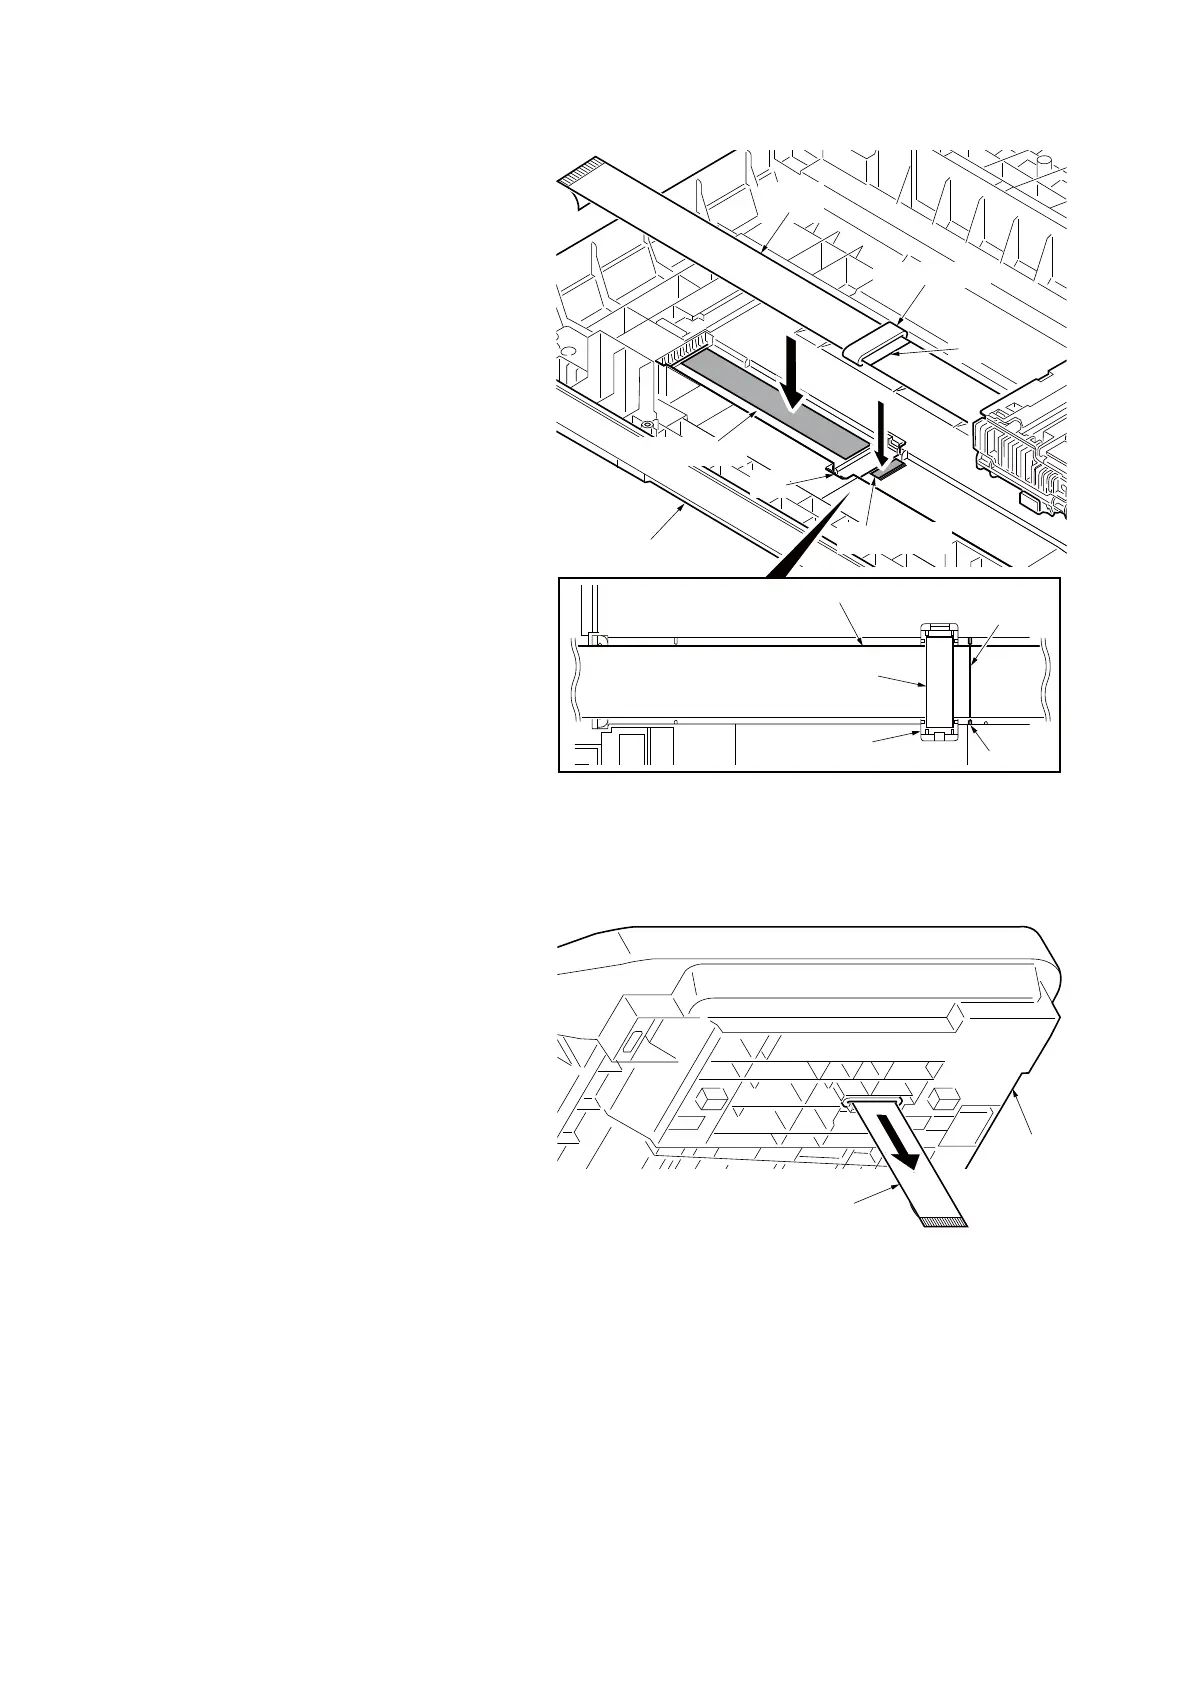
6. Peel off the protective seal from the
FFC tape D.
7. Align the line marking on the FFC with
the rib on the ISU lower frame, then fix
the FFC to the FFC tape D.
8. Install the ferrite core in the pit.
9. Peel off the released paper from the
FFC tape A.
10. Stick the FFC on the FFC tape A.
Figure 1-5-38
11. Thread an end of the FFC through the
ISU lower frame.
12. Refer to the step 11 to 1 and refit all the
removed parts.
NOTE:
When the replacing the image scanner
unit (ISU), perform following mainte-
nance modes.
1. U425 Setting the target (see page 1-3-
42)
2. U411 Adjusting the scanner automati-
cally (see page 1-3-39)
Figure 1-5-39
Ferrite core
Ferrite core
FFC tape A
Pit
Pit
FFC
FFC tape D
ISU lower frame
FFC
Line
RIb
Line
 Loading...