Options
3-9
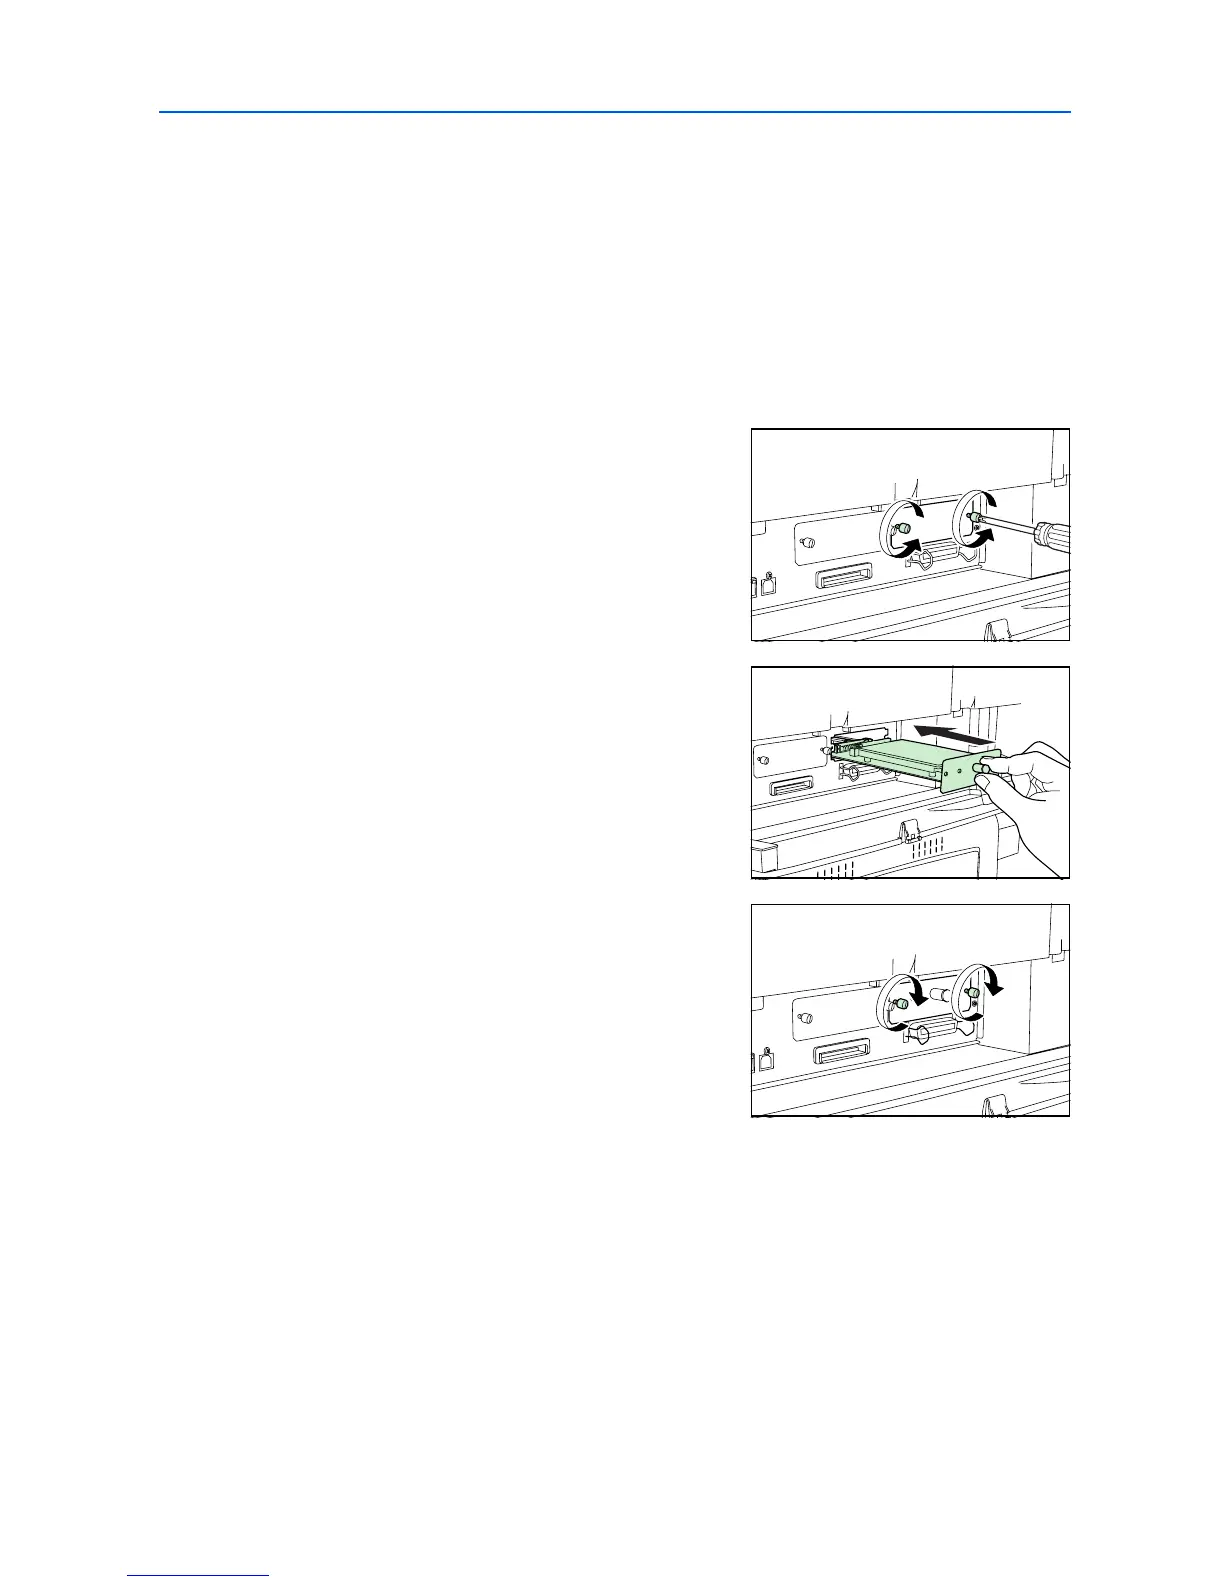
Hard Disk
Insert the hard disk into the option hard disk unit slot (HDD) on the printer. If a hard disk unit is
installed in the printer, received data can be rasterized and stored on this hard disk. This enables
high-speed printing of multiple copies using an electric sort function. Also, you can use the e-MPS
functions. For details, refer to e-MPS on page 2-15.
Further, by using the hard disk together with the Data Security Kit (D), data in the hard disk can be
encrypted and thereby enhance the security of hard disk data.
1
Turn off the printer and disconnect the power cord and printer cable.
2
Open the interface cover.
3
Remove the two screws and remove the option hard
disk unit slot cover (HDD).
4
Insert the optional hard disk unit into the slot.
5
Secure the hard disk unit with the screws removed in
step 3.
The hard disk must be formatted after installation.
Refer to Using the Optional Hard Disk on page 2-47 for
formatting instructions.

 Loading...