Troubleshooting
12-18
Clearing Paper Jams
If a paper jam occurs, the touch panel will display Paper
Jam. and the machine will stop. Refer to these
procedures to remove the jammed paper.
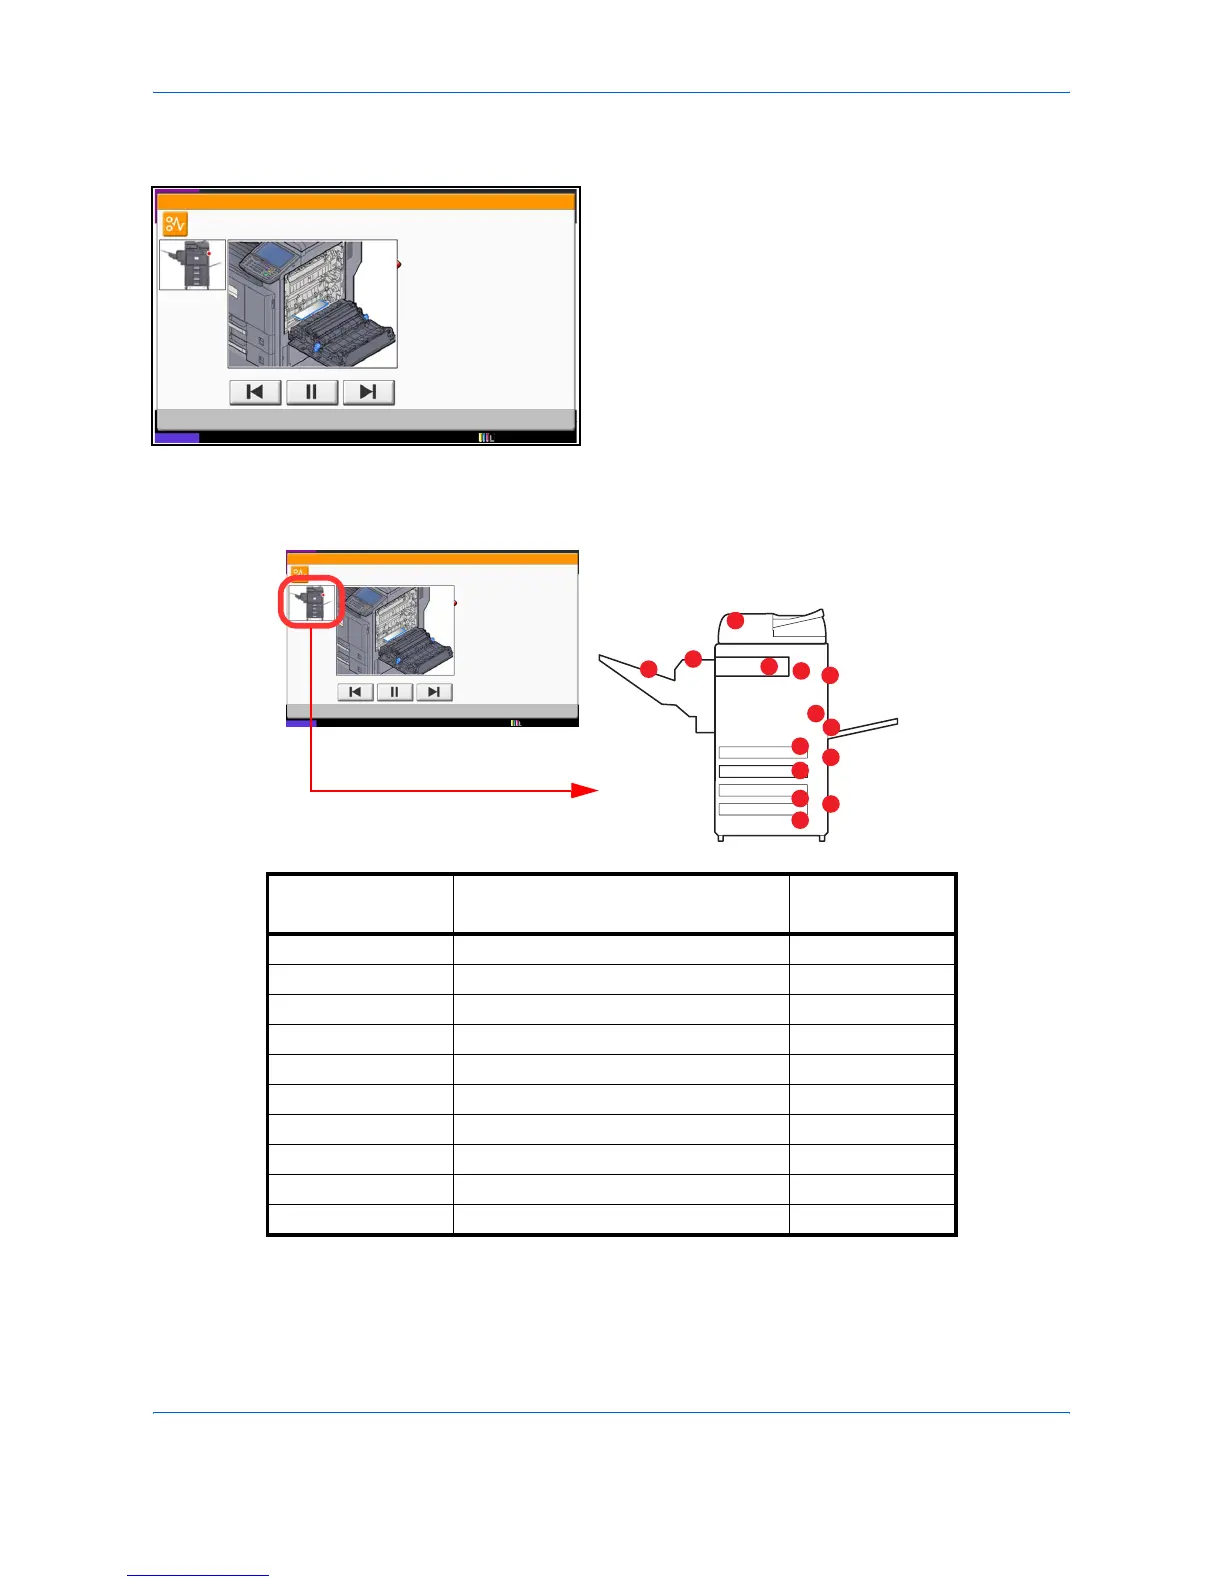
Jam Location Indicators
If a paper jam occurs, the location of the jam will be displayed as the following figure with a letter corresponding
to the affected component in the machine. Clearing instructions will also be displayed.
After you remove the jam, the machine will warm up again and the error message will be cleared. The machine
resumes with the page that was printing when the jam occurred.
JAM
Paper jam.
02/04
1. Remove the paper from
the paper ejector.
2. Open main unit right cover 1 and
re
move the paper.
Remove the paper from
the multi purpose tray.
3. Open fuser cover (A1) and
remove the paper.
4. Close the cover.
Status
12/12/2011 10:10
JAM
Paper jam.
02/04
1. Remove the paper from
the paper ejector.
2. Open main unit right cover 1 and
re
move the paper.
Remove the paper from
the multi purpose tray.
3. Open fuser cover (A1) and
remove the paper.
4. Close the cover.
Status
12/12/2011 10:10
A
D
E
G
J
J
H
B
C
C
B
I
F
C
Paper Jam
Location Indicator
Paper Jam Location Reference Page
A Cassette 1 12-19
B Cassette 2 12-20
C Cassette 3 or 4 (Option) 12-21
D Multi Purpose Tray 12-22
E Duplex unit 12-24
F Inner Tray / Fixing unit 12-25
G Document processor 12-27
H Job Separator 12-29
I Bridge Unit 12-30
J Document finisher (Option) 12-31

 Loading...