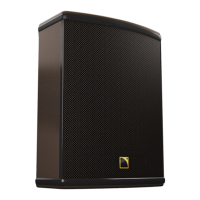
12XT_UM_ML_1.2
www.l-acoustics.com
23 en
EN
13. Insert the head/plate assembly in the switch and lift the red tongue clockwise: the head is locked to the switch.
When locked, the head white mark must be oriented slightly counterclockwise from the
“4” mark on the switch, so as to properly couple both parts of the switch mechanism.
14. Insert the head/plate/switch assembly inside the enclosure and screw in the 2 hex screws.
Orient the head white mark in the ACTIVE setting (see Section 6.2).
15.
Install the loudspeaker assembly in the enclosure and screw in the 8 hex screws with grower and standard
washers: into each hex screw insert a grower washer and then a standard washer (following this order
)
and screw in the assembly to one of the eight locations.
16.
Install the grill (logo oriented towards the active/passive switch) and screw in the 4 pozidrive screws
(pay attention for the tissue to slide along the inside of the cabinetry).
17. Put in place both rubber bands on the grill.
8.4 Spare parts and recommended tools
Table 7: Available spare parts
HS BC31 Diaphragm for 3’’ driver – 8 Ω
HP BC123 12’’ coaxial speaker – 8 Ω (including 3’’ driver – 8 Ω)
HS BC123 12’’ recone kit
HR BC123 12’’ recone kit including labor
CC 115BHEAD Active/passive switch head
CC 115B Complete active/passive switch
SE GR12XT Complete front assemble
Table 8: Recommended tools for service
Pliers
#2 pozidrive screwdriver
4 mm flat screwdriver
3 mm hex key
4 mm hex key
5 mm hex key
Medium strength threadlocker (blue)
!
!