Changing the Flashback Monitor Settings
Adjusting the Monitor Contrast Setting
Flashback3 & Flashback HD User’s Guide
L3 Mobile-Vision 6.23.2017 Page 235
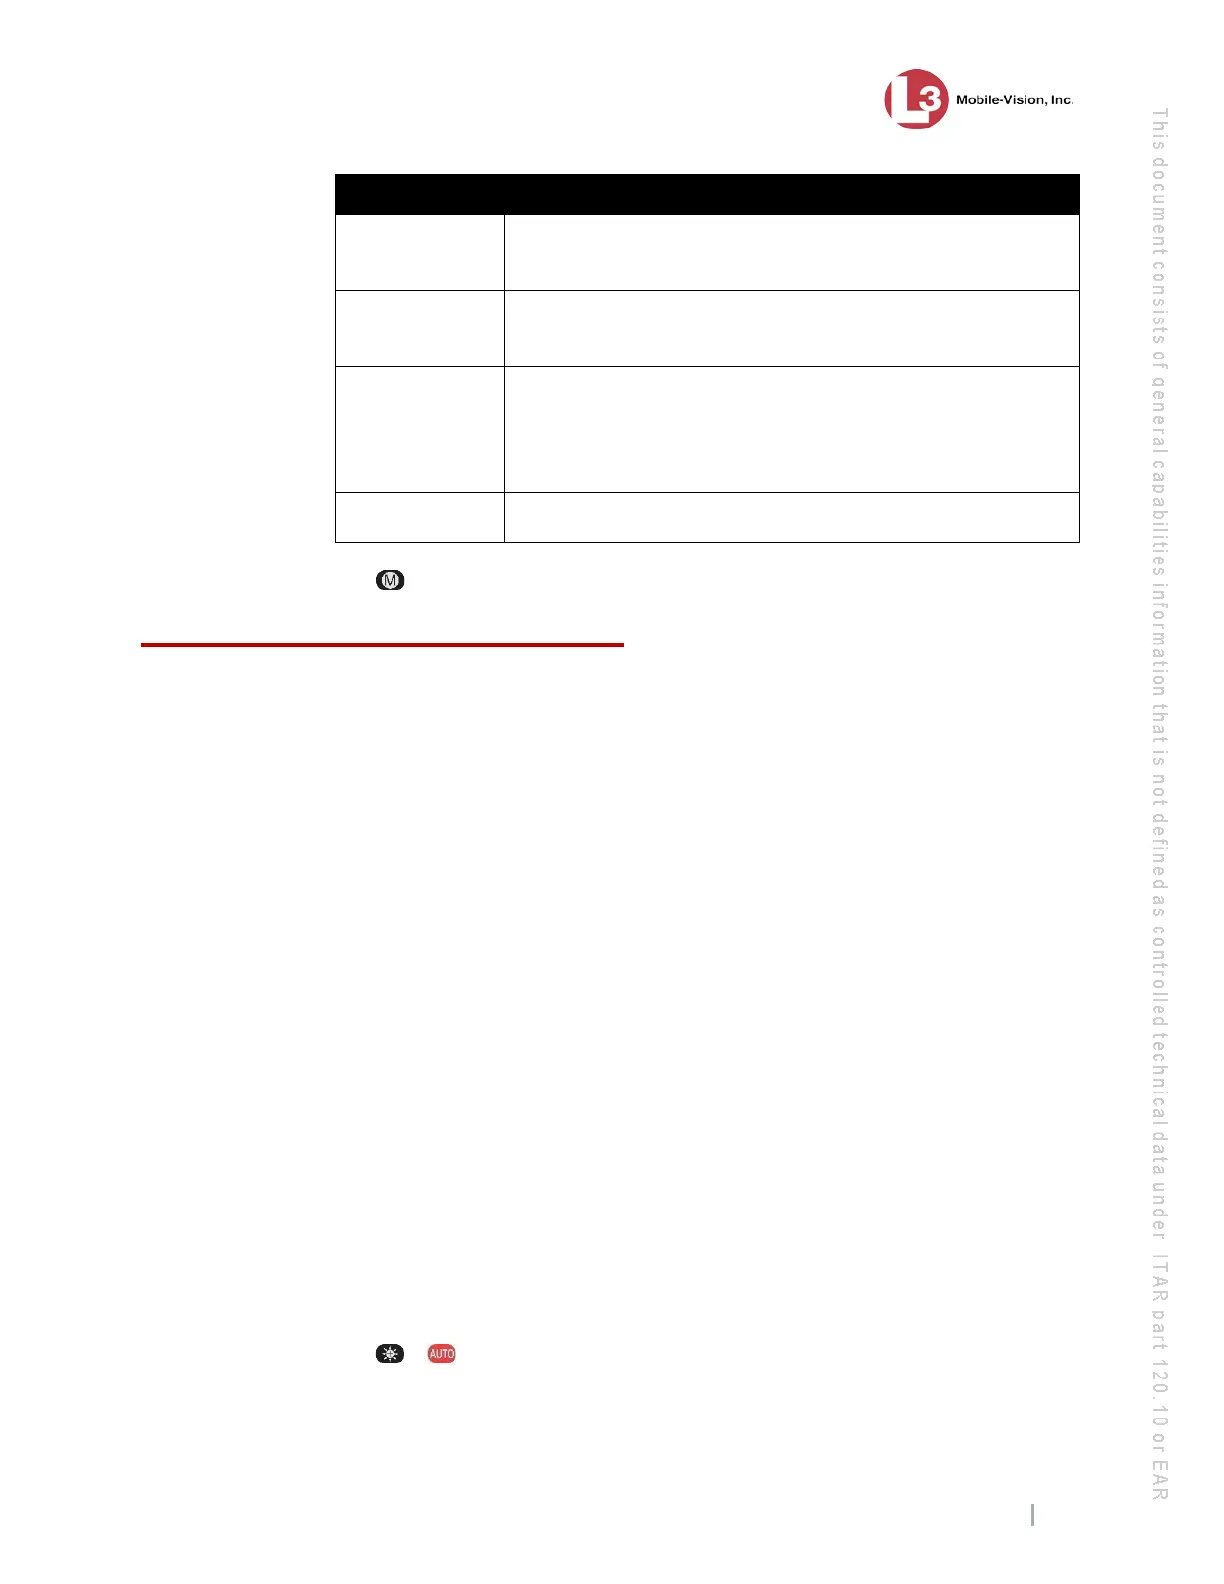
IP Address Description
LAN The media access control address (MAC) for the Ethernet
adapter located at the rear of your DVR. View-only field.
WIFI The media access control address (MAC) for your DVR’s
internal wireless card. View-only field.
AP The media access control address (MAC) of the Access Point
that the DVR is connected to. If the DVR is not connected to
an Access Point, the value of this field will be all zeros. View-
only field.
Fix AP This field is not currently used.
7 Press three times to exit this option.
Changing the Flashback Monitor Settings
This section describes how to change the various monitor settings that affect the
quality of your Flashback monitor display. Please note that the monitor settings affect
the monitor display only, not the quality of the actual video files.
F
or specific instructions, see:
Adjusting the Monitor Contrast Setting, below
Adjusting the Monitor Brightness Setting, page 236
Adjusting the Monitor Saturation Setting, page 237
Adjusting the Monitor Hue Setting, page 238
Adjusting the Monitor Sharpness Setting, page 238
Adjusting the Text Transparency of the Monitor Controls, page 239.
Adjusting the Monitor Contrast Setting
This section describes how to adjust the contrast setting for your Flashback monitor.
Levels range from 0 – 100. You can adjust this setting up or down in increments of
five (i.e., 5, 10 ,15, etc.).
O
nce you change the contrast level, it will remain at that setting until you or another
user changes it again.
Before you change this setting, it’s recommended that you turn the GPS monitor
display off, as it will make it difficult for you to see the Contrast bar. For instructions,
see “Turning the ‘GPS’ Display On/Off” on page 138.
1 P
ress + simultaneously to enter Monitor Setup Mode. The yellow Contrast
bar displays at the bottom of your monitor.