15
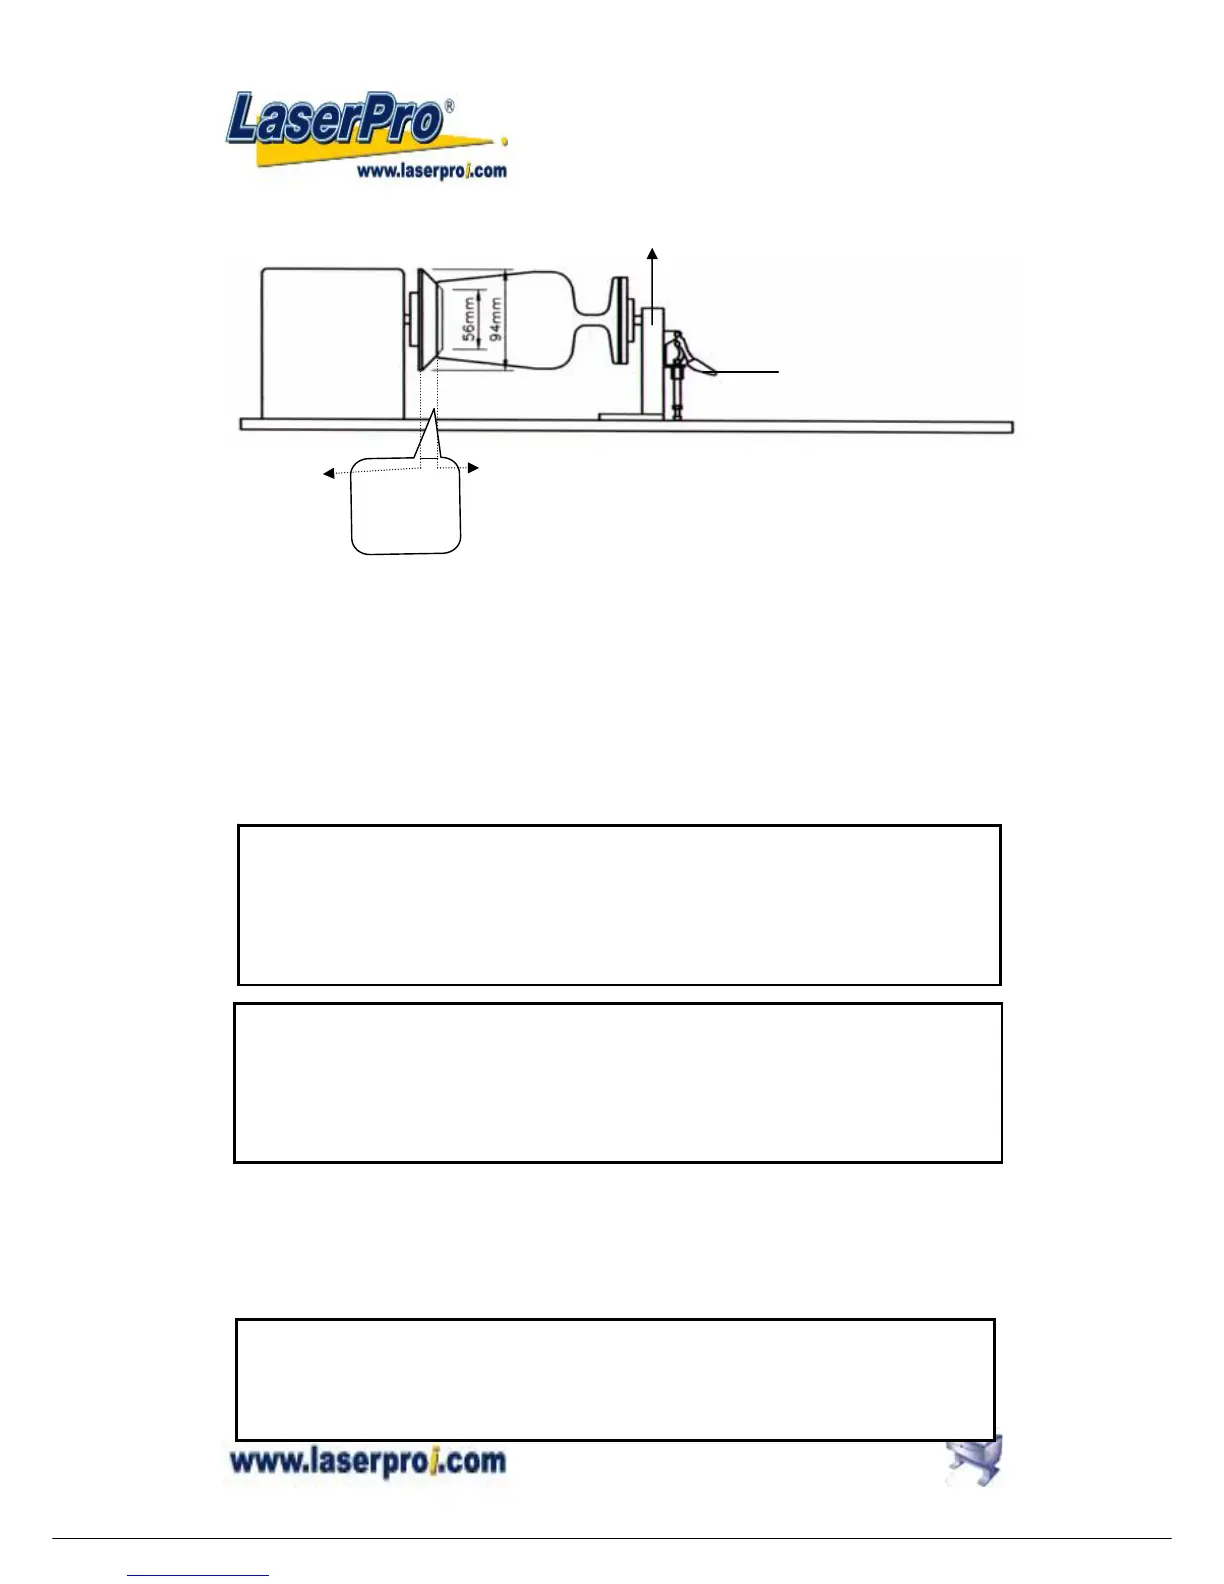
SIDE VIEW
4. Turn on the power. The rotary attachment is detected and the working table moves down
to the bottom automatically. The system initializes to the home position, at the same time.
5. Set up focus.
6. The following is an example of engraving process by using CorelDRAW V.11 or after
version
a. File
b. Print Setup, choose MERCURY
c. Properties
d. Paper, select Rotary Fixture
e. key in Offset value, X value and Diameter value
f. OK
Define engraving location by moving the arrow keys and the red point will show the right
position you want. Moving the red point from rotary home position (at the base of the
padded rubber wheel) to the open end of the engraving object, the Offset value (refer to
Fig. II & Software Operation, Fig.20) will be displayed on LCD.
Base of the
padded
rubber
wheel
Open end of the engraving object
lever
O
motor
Adjustable end
NOTICE:
When doing the Print Setup under print driver setting, please always choose Layout
→ Page Setup → Set From Printer, no matter operating with CorelDraw V.11, or
after version.
NOTICE:
Please always choose Portrait for Page Setup on CorelDraw V.11 no
matter X or Y value whichever is lager.
Layout → Page Setup → Set From Printer → Portrait
Caution:
z Adjust the working table and set up the focus under STOP status.
z Set up focus after initializing the system to prevent the carriage hit the engraving
object.