19
III. HARDWARE INSTALLATION
Caution:
z Turn all equipment off before making any connection.
z Check the plug of the power cord to see if it matches the wall outlet. If not, please contact
your dealer.
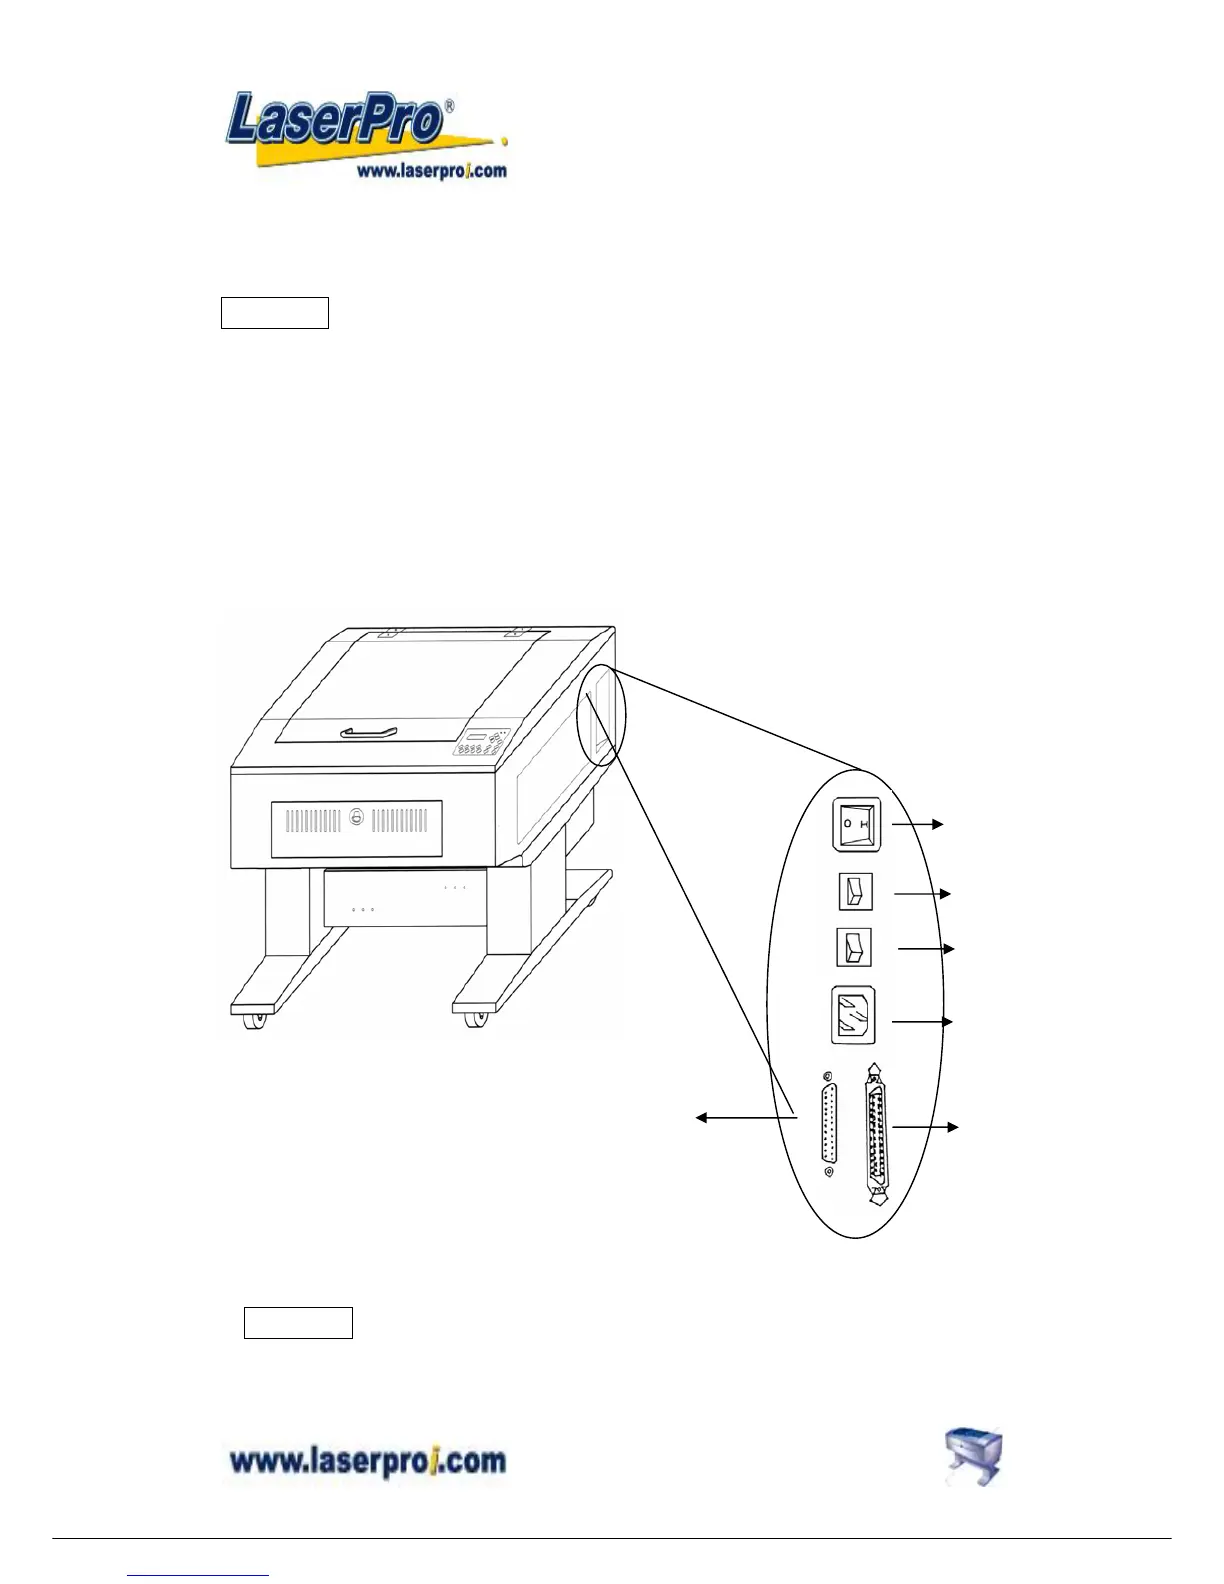
Cabling Connection:
1. Insert the power cord (male) into a grounded power outlet.
2. Plug the other end (female) into the engraver. The engraver has been design to
switch from 100 ~ 240 VAC automatically (100W engraver has to use 220~240 VAC only).
3. The engraver can communicate with a computer through either a serial (RS-232C) or a
parallel port (Centronics).
Parallel Transmission
Connect a parallel cable to the engraver (parallel port) then to the parallel port of the host
computer.
Caution:
Never use a mechanical switch box when a second printer port is required.
The electrical surges can cause damage to the computer and the engraver.
Power on/off
Switch
15 AMP
resetable fuse
3 AMP
resetable fuse
AC Power
Connector
Parallel
Interface
Connector
Serial Interface Connector