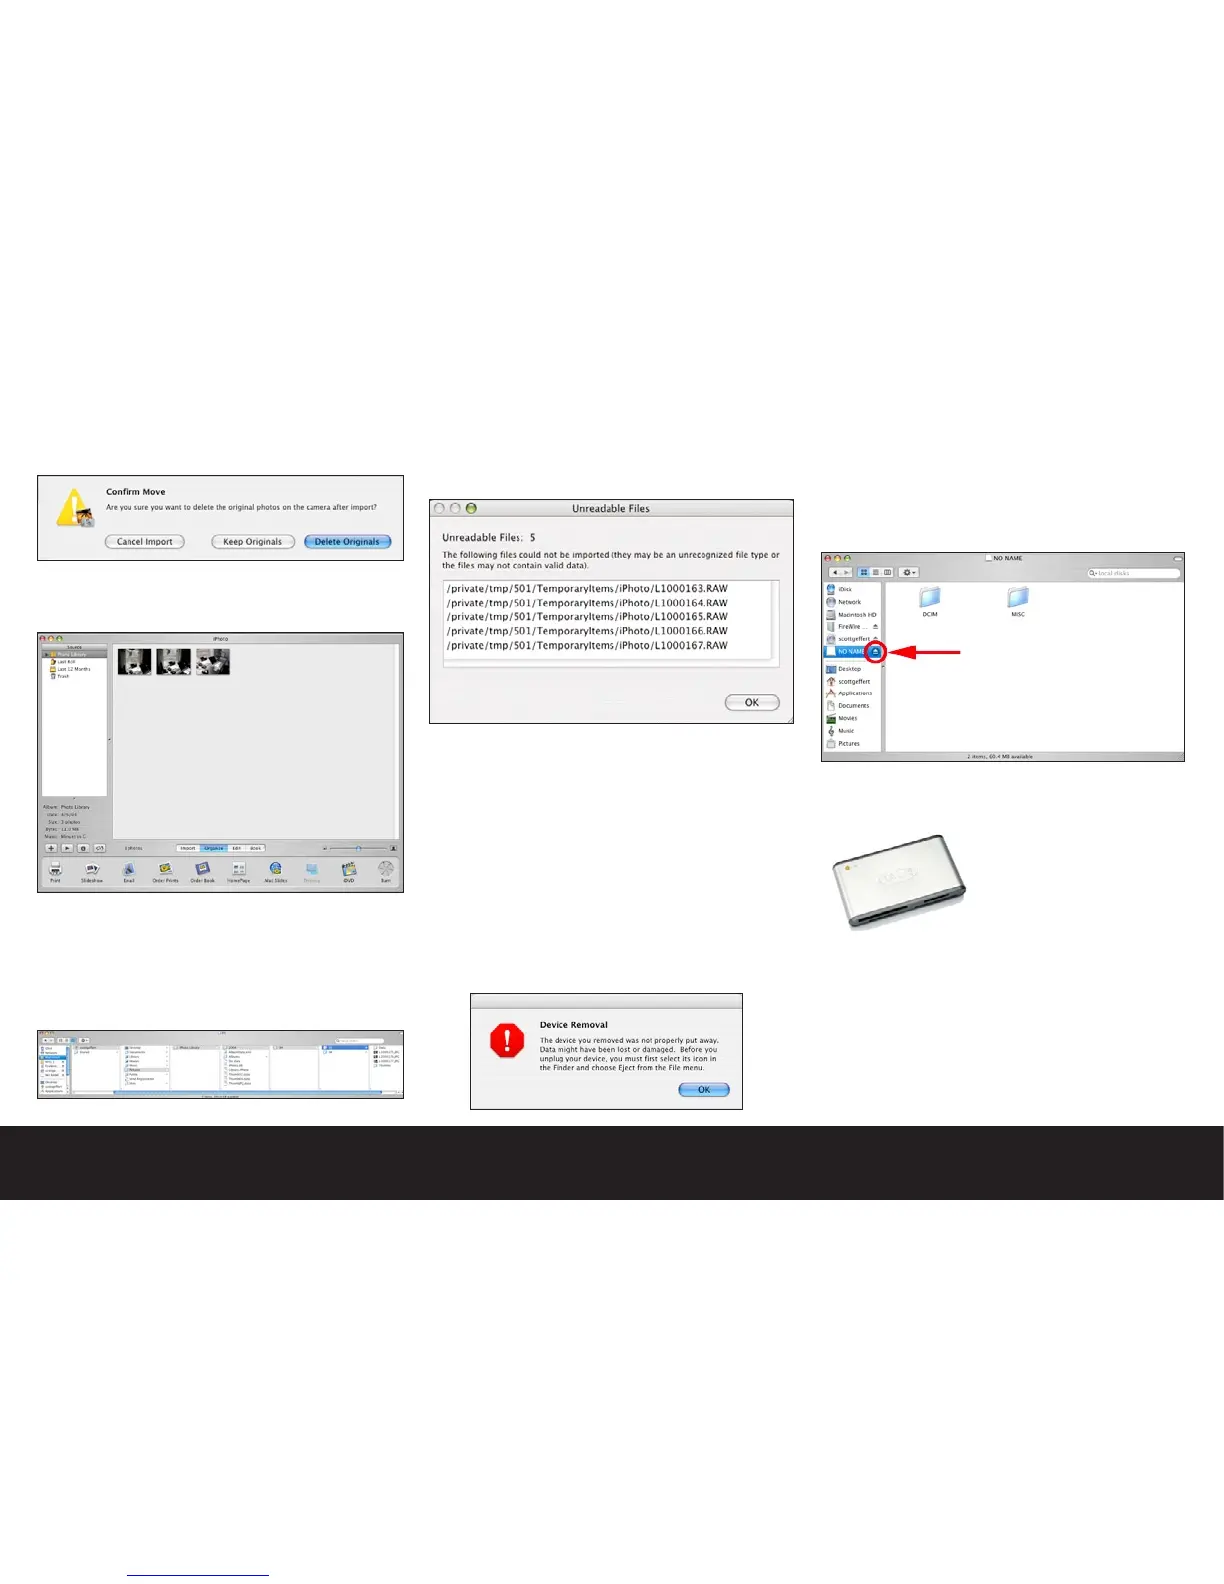
•iPhoto™ will present a confirmation dialog giving you a
second opportunity to delete the original images from
the camera card. Choose Delete Originals.
•Once the downloading process is complete, your
images will be shown in a contact sheet view, and all
iPhoto™ functions will be available.
•During the download process, all of the transferred
images are placed in the following default location on
your host computer:
Macintosh™ HD:Users:(Your)Home Folder:Pictures:
iPhoto™Library. Within the iPhoto™ Library your images
are parsed into folders based on the capture date.
Note: As iPhoto™ only recognizes the JPEG format
Digilux 2 images, any raw files will be skipped and will
not be deleted from your card. The following dialog
will verify the skipped files.
Disconnecting your Digilux 2 after downloading
When you plugged your camera into the Macintosh™,
the computer recognized the camera as a “Mass Stor-
age Device”. You may have noticed a generic drive icon
appear on your desktop called “NO NAME” during the
connection process. As with all removable media, you
need to properly remove the device to avoid possible
data corruption.
If you accidentally or improperly remove your camera
or media from the computer you will be presented with
the following dialog:
To properly remove the device from the desktop you
may click on the “NO NAME” drive icon, and drag it
over the trash can icon on the dock. The word “EJECT”
will appear as you drag the icon over the trash-can
icon. You may also remove the camera by double
clicking on the “NO NAME” Drive Icon, and clicking the
eject button next to the device in the Finder window.
Working with an external card reader or PCMCIA SD
card adaptor
The Mac OS and iPhoto™ will recognize the inserted
media, and will operate exactly as if you connected
to the camera via the USB cable. When you wish to
remove the media from the card reader or PCMCIA slot
follow the same process as disconnecting the camera
for ejecting removable media.

 Loading...


