Archival printing using the Epson® 2200 printer
Many digital photographers
become frustrated when
it comes to achieving high
quality print output from
their computer workstations.
To help with this situation
we have outlined a step-
by-step guide for creating
high quality prints using the
popular Epson® 2200 Ink Jet
Printer. This printer utilizes
high longevity pigment based inks, and is perfectly
suited for the Digilux 2 camera user. The instructions
are based on Adobe® Photoshop™ CS and the Apple®
Power Macintosh™ computer running under Mac OS X
(version 10.3.3)
Once you have opened, and edited an image to your
liking on your calibrated display, and are ready to print
from within Adobe® Photoshop™ CS follow these steps:
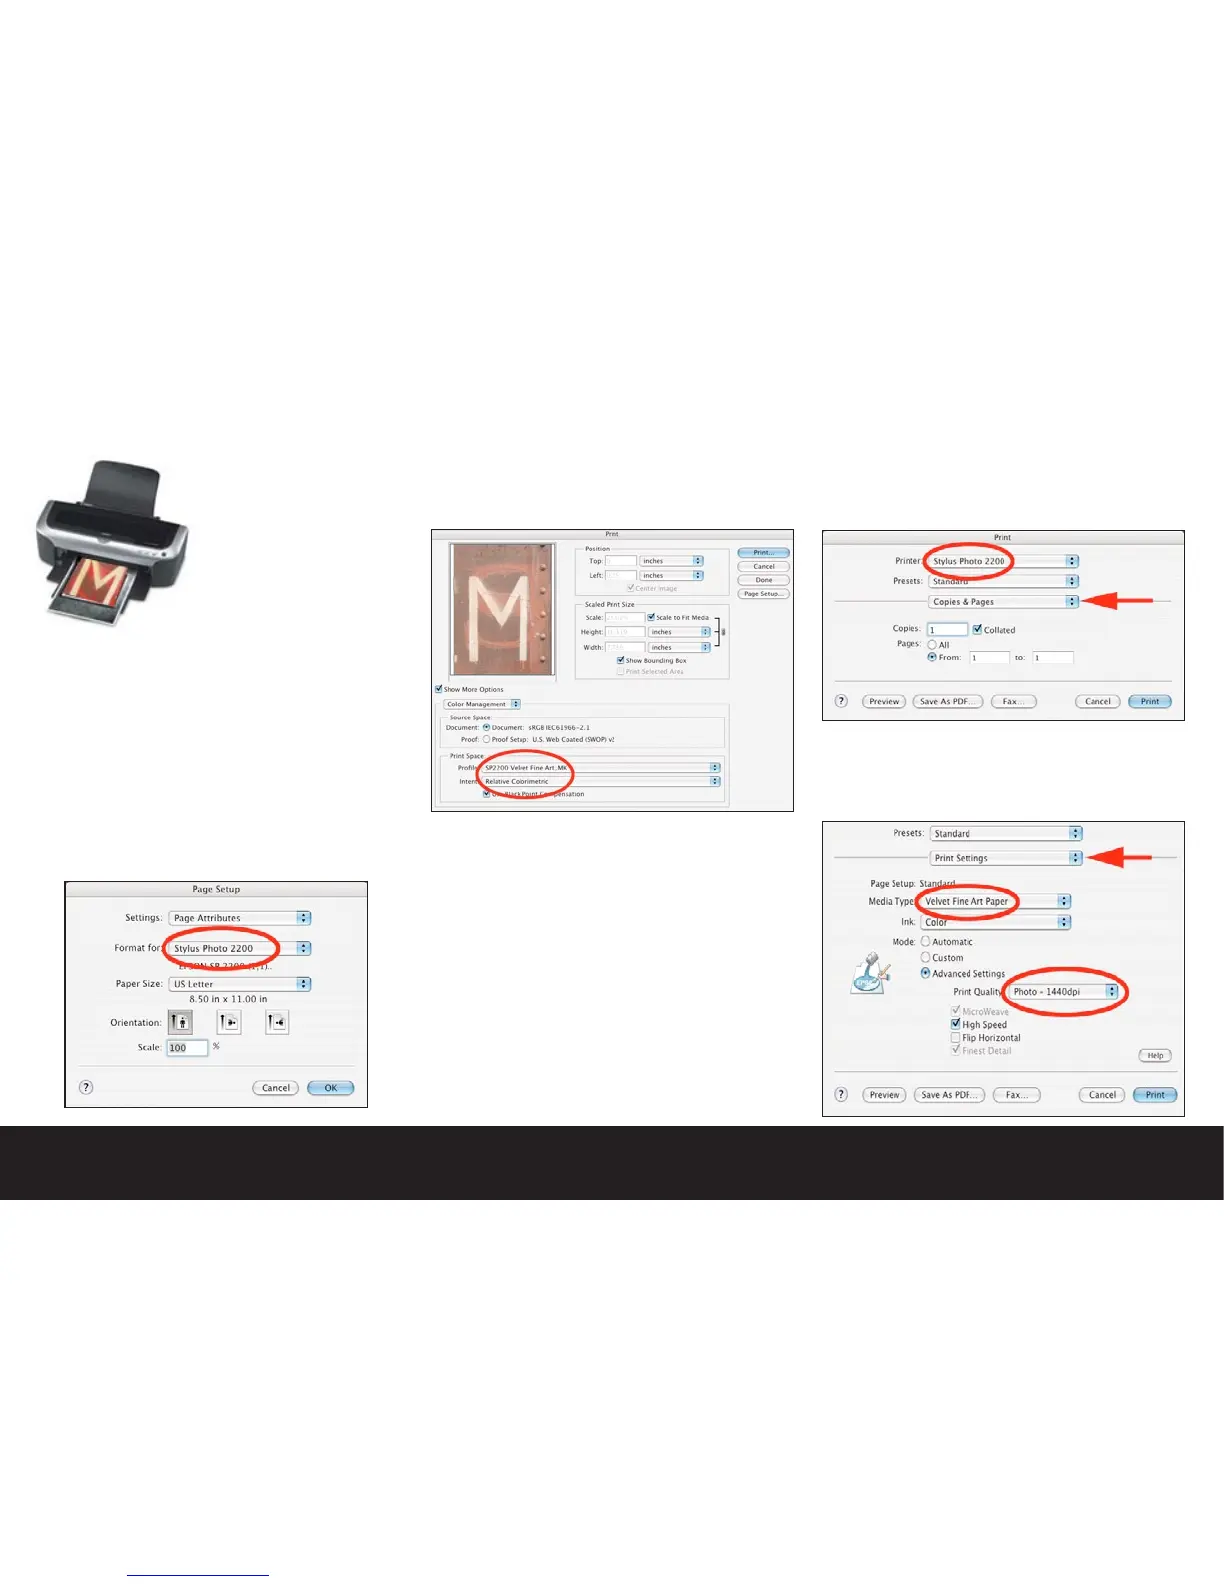
•Choose Page Setup from the File menu and check that
the Epson® 2200 is chosen, and select the paper size
you wish to use.
•Choose “Print with Preview” from the File menu, and
select the paper profile from the “print space” menu
for the ink and paper currently loaded in your printer.
In the example below, Epson®’s default profile for
Velvet FIne Art Paper and Matte Black Ink has been
selected.
Note: The 2200 prints best on matte surface media the
matte black ink cartridge installed. You may also check
“Scale to Fit Media” to avoid problems with sizing.
•Clicking on the “Print” button in the Photoshop™
“Print with Preview” panel will take you to the Epson®
print dialog. The settings of the Epson® print dialog are
critical to making a successful print.
•In the Epson® Print dialog the first step is to verify
that the printer you selected in the “Page Setup”
dialog exactly matches. Under the drop down menu
marked “Copies and Pages” you will need to select and
configure specific print options to achieve a successful
print.
•Under “Print Settings” select your paper type, and
under “Advanced Settings” mode, select your print
DPI. 1440 is excellent for all round work as it produces
excellent print sharpness while keeping print times
reasonable.

 Loading...