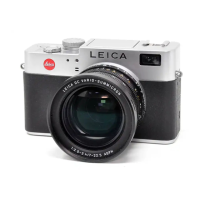
Manual Settings
Manual focus
Manual focus is one of the joys of using the Digilux 2
camera. Simply turn the focus ring past the automatic
lock, and you are free to focus from any distance from
two feet to infi nity. To assist with manual focus the
Digilux 2 is equipped with a digital focus magnifi er.
This unique feature may be enabled under the camera’s
setup menu. When the focus magnifi er is enabled, each
time you move the focus collar on the lens, you will
be presented with a real-time window showing your
image detail in the center of the frame. As soon as you
touch the shutter button, the frame is returned to the
full view.
Manual exposure
Setting BOTH the aperture and shutter dials on a
setting other than “A” places the camera in Manual
mode. When using the manual controls, you may use
the camera’s meter and histogram to evaluate the
exposure.
Note: If you are creating still life images, or copy work
under fi xed lighting conditions, you may use an 18%
grey card to assist in fi nding the optimum exposure
setting. If you photograph an 18% grey card and fi ll
the frame, adjust the aperture or shutter speed (or
both) to a point where the image histogram peak falls
midway between highlight and shadow, or you may use
the light balance meter on the camera display.
Custom white balance
If you use an 18% grey card
to set your exposure under
controlled lighting situations,
you may choose the custom
white balance setting to allow
the camera to automatically
conform color balance to
your specifi c lighting. When
you select the custom white
balance mode, you will be
prompted to take a picture.
When this exposure is made,
the camera adjusts the color
values to be equal for red
green and blue channels resulting in a neutral white
point. This balance setting will be held for subsequent
image captures, until the process is performed again,
or until the battery is removed.
EV exposure compensation
When automatic exposures are thrown off by predomi-
nant light or dark areas in relation to your subject the
EV compensation control is the best way to compen-
sate. Pressing the EV compensation button on the back
of the camera will bring up an on-screen window. Turn-
ing the control dial adjusts the exposure bias lighter or
darker in 1/3 stop increments.
Flash exposure compensation
When working with the built-in fl ash in the direct or
bounce position, you may vary the output of the fl ash
unit to match your ambient light exposure level. The
menu is accessed by pressing on the EV button three
times. (The selection will toggle through the three
menus options of EV adjustment, bracketing and fl ash
EV adjustment). When the fl ash EV adjustment is
selected, you may use the control dial to bias the fl ash
exposure in 1/3 stop increments.

 Loading...