Exposure
Exposure in digital photography is elusive for many
users. Often times an image will look different across
several computers and output devices. This variance
leads people to second guess their work, and is the
most difficult part of the digital imaging experience for
the vast majority of digital photographers.
The histogram is your key to interpret the quality of
your captured images. While most users rely on the
automatic exposure features of the camera, we will
show you a tried and true technique for finding the
perfect exposure.
When working with a digital camera you are essentially
working with a very accurate light meter. Try this
exercise:
1) Set your camera on a tripod in Manual Mode and set
the metering mode to the center weighted metering
mode
2) Place a Kodak 18% gray card on a white background,
and photograph the scene under a consistent light
source. Outdoors in daylight is ideal.
3) Using the camera’s Aperture and Shutter speed dials
to adjust the exposure until the camera’s built in meter
indicates “0” (this represents the ideal 18% value)
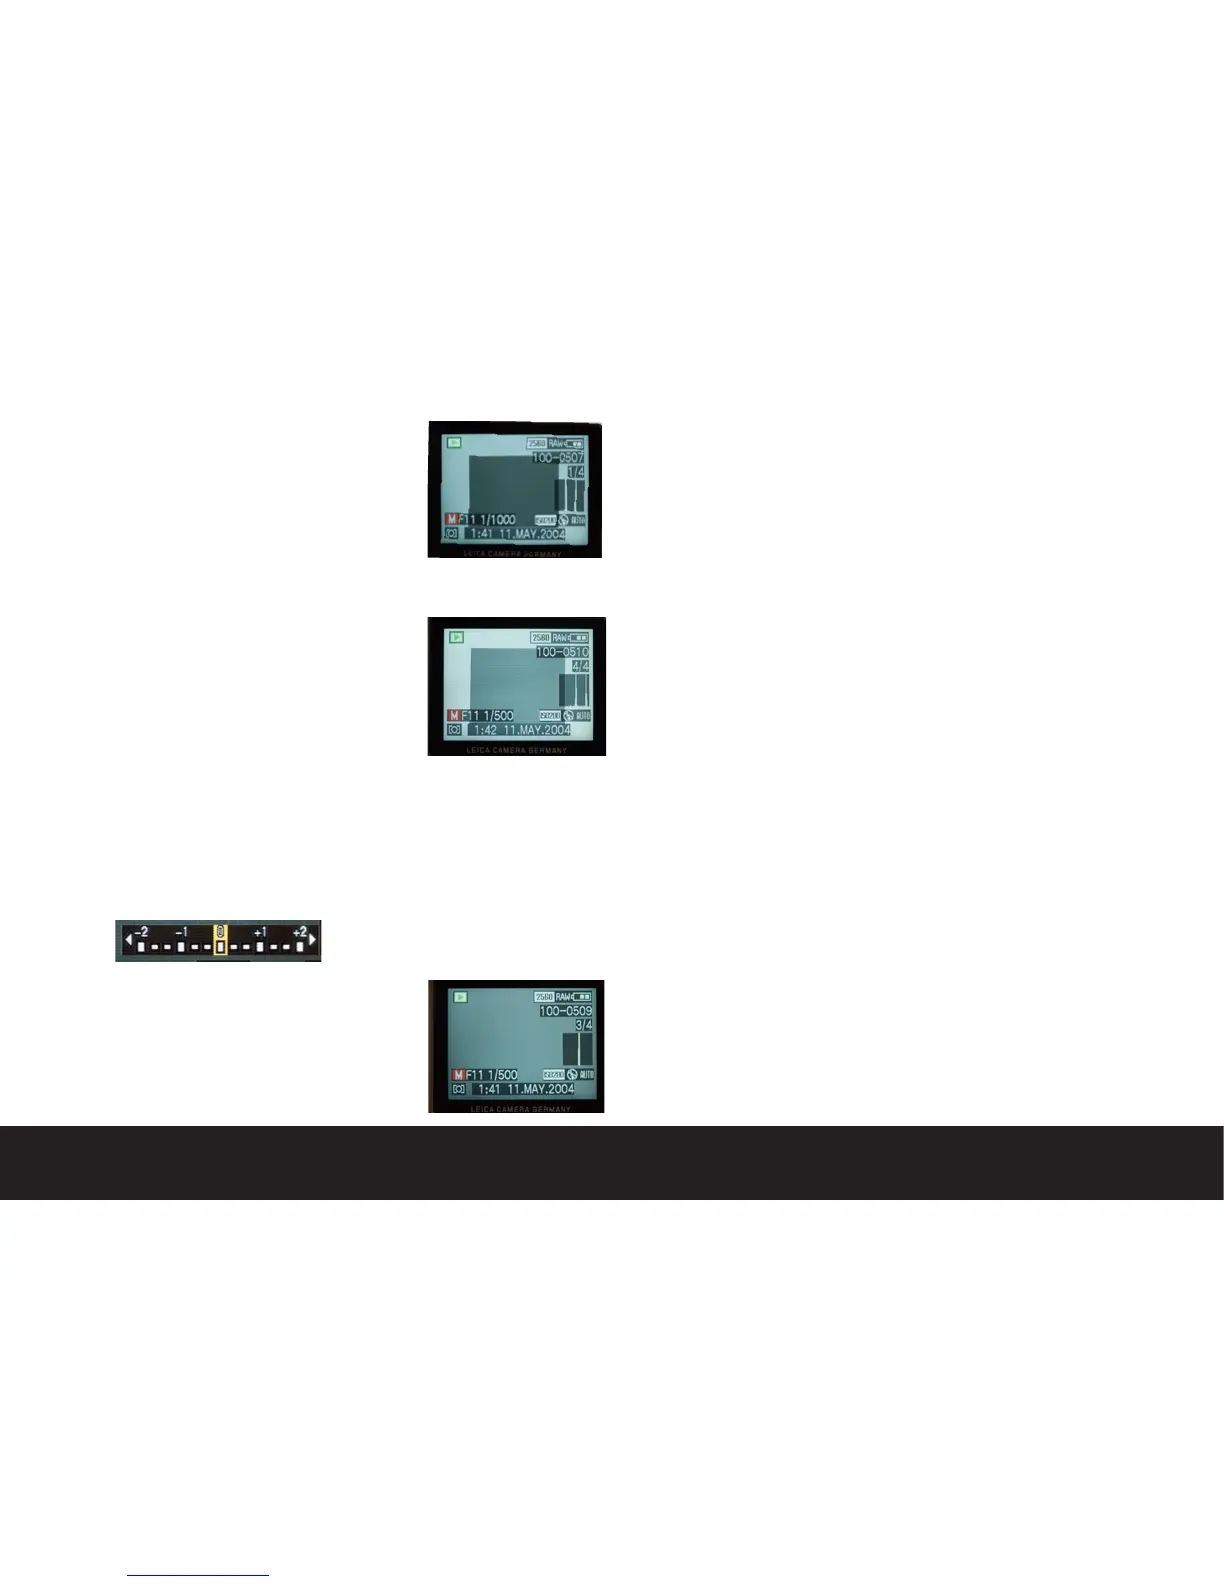
4) View the image histogram on the display
The image that appears should look something like the
following picture. The histogram is telling us that the
camera exposed the image slightly dark in an effort
to balance out the white background. The peak in the
histogram is shifted to the left of center. The Peak
represents the 18% middle gray card.
5) Adjust your exposure until the peak of the histogram
is centered in the histogram window.
6) Notice that the white board is now white, and the
gray value is also lighter. In this example, the differ-
ence in exposure was one full stop.
7) Place the camera in automatic mode and select spot
metering.
8) Make sure the gray card is in the center of the
frame, and take a picture. You will notice that the
histogram will look similar to the corrected histogram
from the previous test. This verifies that the spot me-
ter is well calibrated to the ideal 18% gray value.
Once you understand how the camera’s built in meter
operates, you may easily understand why automatic
metering has it’s limitations in scenes where tones
are predominantly light or dark. Experiment with us-
ing the various automatic metering modes using this
same procedure to gain a better understanding of the
exposure process.
As stated earlier in this guide, proper exposure is criti-
cal to high quality digital imaging, and will reduce the
amount of time wasted in computer post-production
and printing.
Color balance
Technically, digital cameras are color blind. In fact
they potentially capture tones that are outside the
human visible spectrum. In order to create accurate
color several processes are necessary. The first step is
neutral balance.
When we discussed bit depth and exposure earlier in
this chapter, we talked in terms of density only. Since
the sensor of the camera includes a matrix of red,
green, and blue filters to build color, the resulting file
ultimately ends up as three individual monochromatic
layers exposed through primary color filters each with
it’s own histogram. The colors do not naturally align in
any way, and if you were to look at a pure raw capture
file with no color balance it would appear teal or cyan
in color.
When you select auto color balance, or any of the
manual color balance settings in camera, you are
artificially defining the neutral point (or white point) of
the image. This is accomplished by shifting the image
histogram data so that all three layers align at a fixed
point in such a way that the defined point has no color
bias.
Under Exposure
Ideal Exposure

 Loading...


