Editing suggestions (Adobe® Photoshop™ CS)
If an image is poorly exposed and does not have a
pleasing tonal balance, work methodically from the
shadow point up through the mid-tone and highlight
areas. Your first corrections should be to the levels
adjustment in the shadow area. Using the RGB readouts
in the Info dialog adjust the black point to read values
in the 5-15 range on average, Next adjust the mid tone
values to the 110-127 range, and the highlight (if there
is a bright white value in your image) to a value of 240
to 245.
Think in terms of a 21 step Kodak Gray scale as high-
lighted earlier in this chapter. Tonal adjustments to
your images may be directly correlated to this target to
give you a road map to follow as you edit an image.
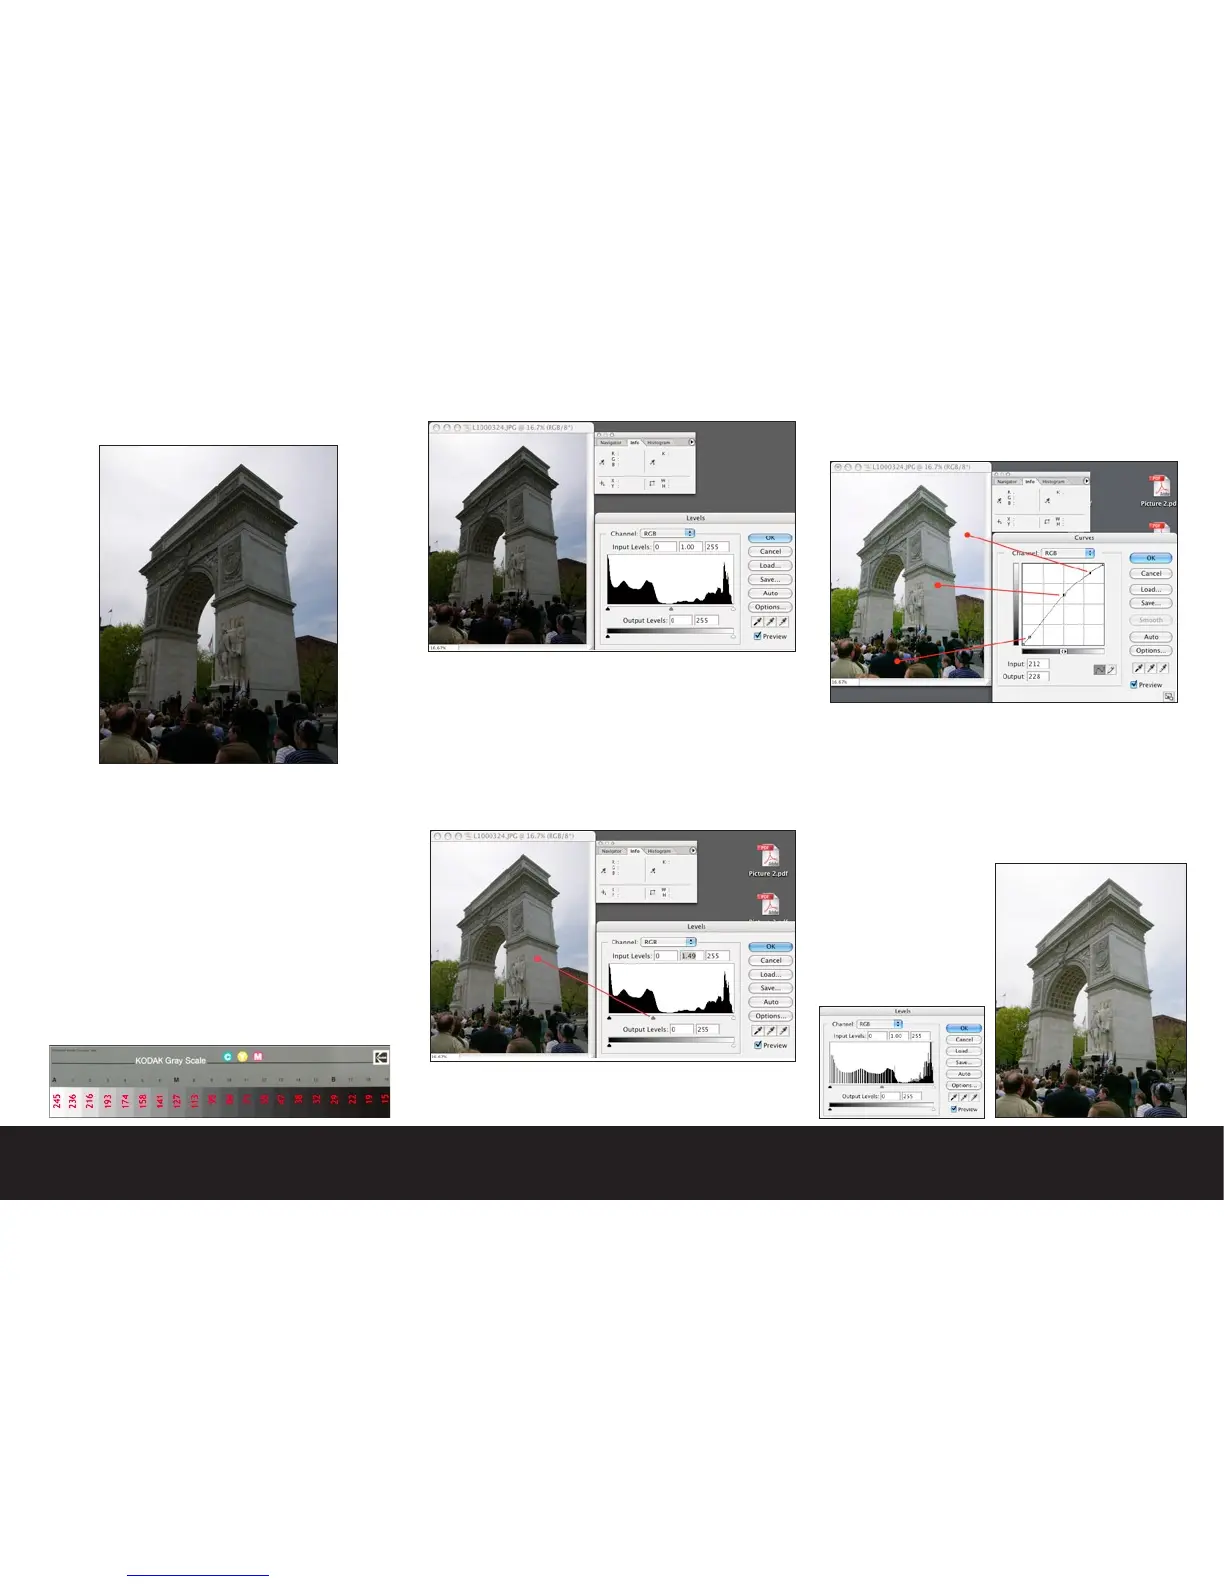
In this particular example, the camera was aimed
towards the sun on a hazy day. The cameras meter bi-
ased exposure to the sky causing the intended subject
to become underexposed. Using the tonal values (not
color) as a guide, the mid-tone was first adjusted in the
Levels dialog. It is always best to perform your initial
tonal adjustments in the Levels dialog. The mid tone
was lightened to a value of approximately 115.
After the Levels adjustments, the Curves dialog is used
to fine tune the tonal balance of the image.
In the curves dialog you may identify and alter specific
points, and alter the tonal distribution. In this case,
the dark suit in the foreground was mapped to a value
of 15, the monument was mapped to a value of 140 (as
it is lighter than 18% gray), and the sky was mapped to
a value of 240 to retain some detail. This method of
image editing is rooted in the traditional zone system
of photography.
Note:
When editing JPEG images
It is very important to
save your edited version
of the file as a copy of the
original file as the editing
process is destructive.

 Loading...


