39
Imaging the light sources to check adjustment
Using the adjustment lens R/F (method 1)
Screw the adjustment lens R/F (14.4) into the
objective nosepiece instead of an objective. Put
a piece of dark paper or similar on the specimen
stage and roughly focus the surface with a dry
objective of low to medium magnification. With
a felt or ballpoint pen, make a dot or cross at any
position on the paper and slide it into the small
illuminated field. Turn the adjustment lens into
the light path: the fluorescence light source
(29; 31) will then be imaged on the paper via the
beamsplitter/filter cube.
Projection on the microscope base (method 2)
Center the condenser at least roughly → p. 30.
Remove the specimen. Turn a 4x, 5x or 10x
objective into the light path. Switch the
condenser disc* to the BF position (23.8) or pull
out the light ring slide (7.7). Open the aperture
diaphragm. Put piece of paper on the micro-
scope base. Adjust the height of the stage (23.5)
or condenser (23.3) until the bright circle
(= image of the objective pupil) is quite sharply
defined. Mark the centre of the circle.
Centering the fluorescence lamps
Lamphousing 105/2 or 107
No adjustment necessary.
Lamphousing 105/2 or 107 (Fig. 29)
with 12 V 100 W halogen lamp
Adjust the collector (29.4) until you see the lamp
filament (Fig. 30).
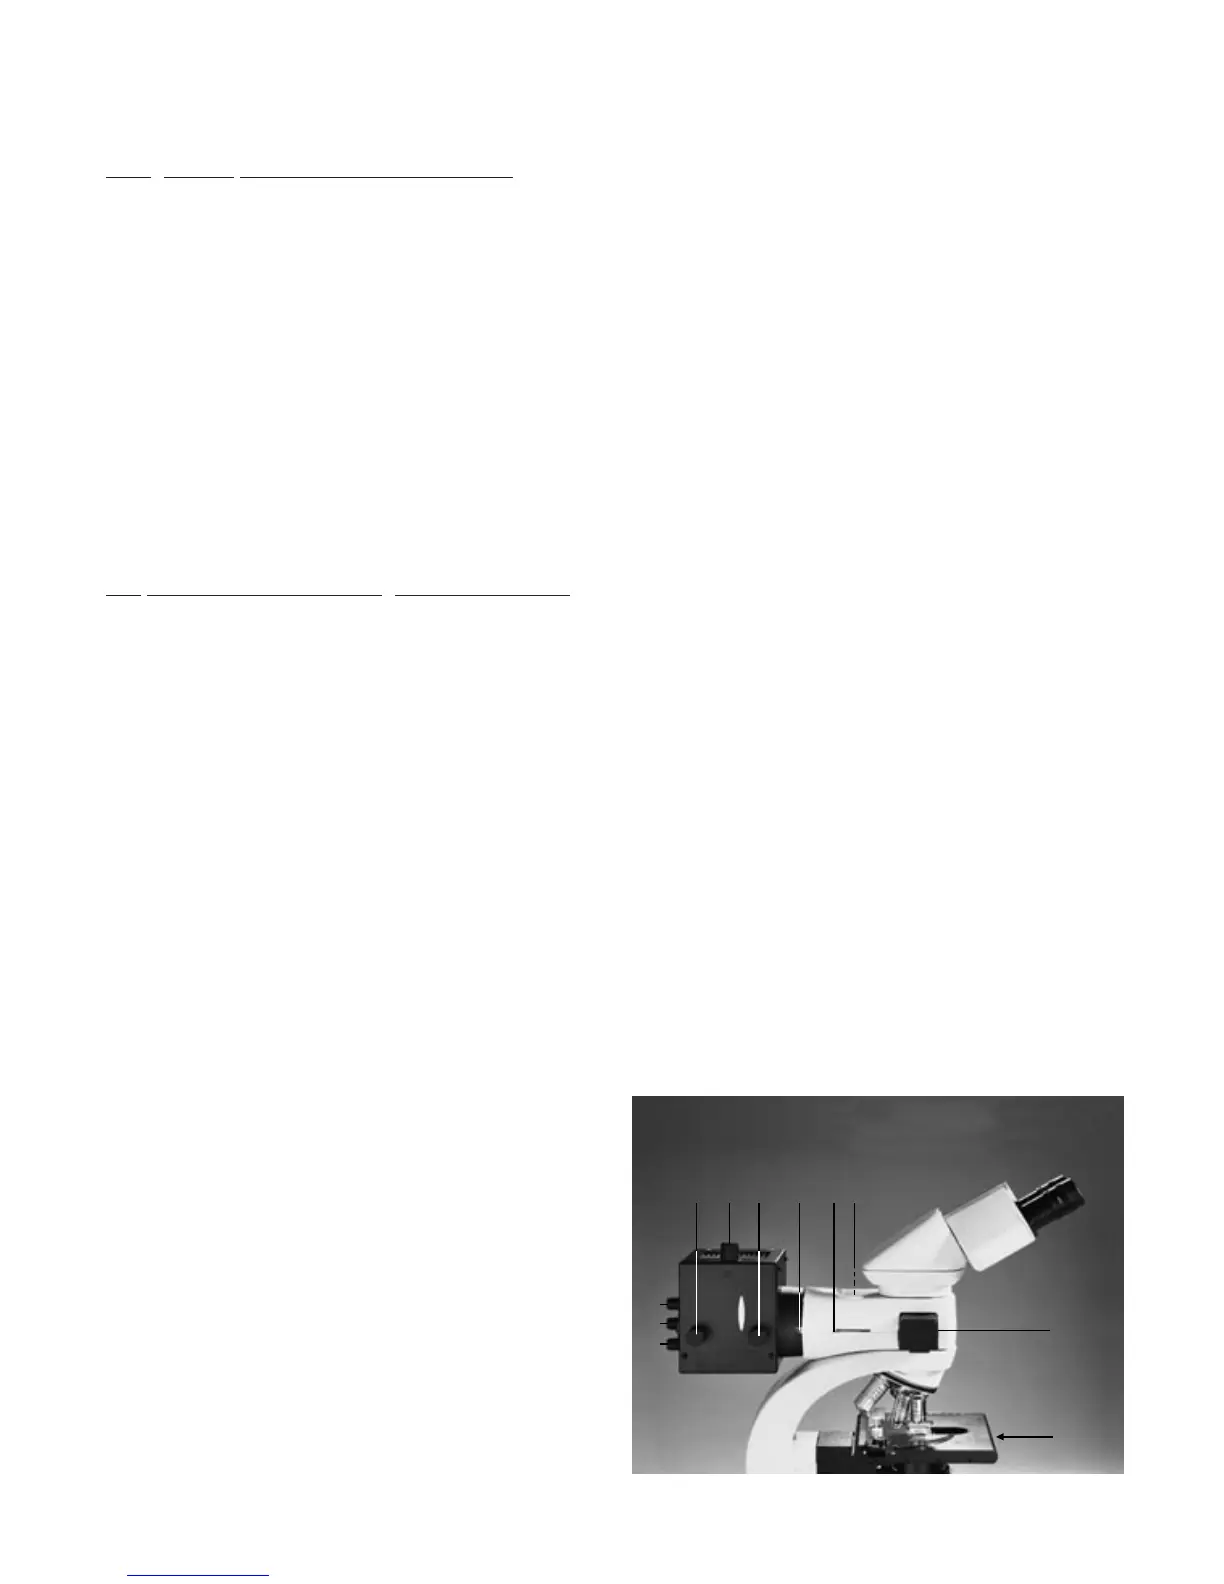
Fig. 31 Lamphousing 106z and controls for fluorescence with
LF illuminator
1 Vertical adjustment of lamp, 2, 4 Vertical and horizontal
adjustment of reflection, 3 Mirror focusing, 5 Horizontal
adjustment of lamp, 6 Collector (focusing of lamp image),
7 Fixing screw, 8 BG 38 filter, 9 Interruption of the incident
light path, 10 Slide for 2 filter systems (filter cubes),
11 Interruption of the transmitted light path (light trap 25.5)
2
3
4
10
11
5 61 7 8 9