36
Preparation
Assembling
l x
planapochromatic
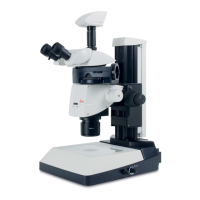
Objective
nosepiece
• Only for
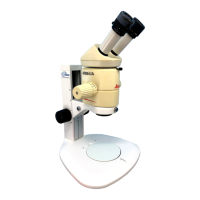
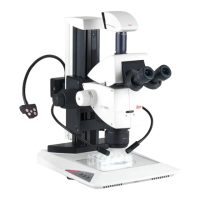
leica
MZ16
and MZ16 A
-
Hold objectives during assembly
and
disassembly to p
re
vent them from
falling
on
the stage plate. This applies particularly to t
he
2x planapochro-
matic objective,
whi
ch
is
very heavy.
Remo
ve the specimens f
rom
t
he
stage plate.
-
The
ad
justable ring nut w ith the 1 x plan apochromatic objective
is
fastened
with 2
Alien screws after the adjustment. loosen the Alien screws if you
need
to
remove the objective.
- Attach t
he
limit stop to the stand column.
lt
prevents the 2x objecti
ve
fr
om
hitti
ng
the limit stop when the objective nosepiece
is
rotating,
if
the work-
ing distance was changed
x
whi
le worki
ng
with the 1 objecti
ve
.
-
Caution:
Carefully rotate the objecti
ve
nosepiece
and
take care not to
pinch your fingers between
column
and
objective or objective nosepiece.
MZ16
A: When changing to objective l x or 2x, press the
OPT+
SEL
function
keys
simultaneously.
The
displ
ay
shows the curr
enttotal
magnification,
and
in
REF
mode it shows the current measurement with objecti
ve
1x or 2x.
A
1 or 2
in
front of the value indicates the selected objective.
Remove the securing strap from the objective nosepiece:
~
Remove both screws (at the bottoml.
Leica MZ16
and
MZ16
A are delivered with a threaded adapter for objectives.
Remove the adapter to use the objective nosepiece.
~
Invert the optics carrier.
~Loo
sen
3 screws
and
remove the adapter.
The objective nose piece features two threads:
- a fixed thread for the 2x planapochromatic objective
- a thread with 2
Alien screws for the l x planapochromatic objective with
adjustable ring nut.
Th
e adjustable ring nut is supplied separately
and
used
to adjust the
parfocality between both objectives.
Invert the objective nosepiece to simplify the assembly of the objectives.
~Sc
r
ew
on
the adjustable ring nut
on
the thread
ofthe
l x planapochromatic
objective until the
limit stop and tighten
it
with the enclosed wrench.
~Sc
r
ew
in the 1x planapochromatic otJjective with the ring nut in clockwise
directi
on on
the side with the 2 Alien screws.
• The fine-pitch thread
on
the ring nut consists of
24
threads.
You
should expect at least
40
turns.
The
ad
justable ring
nu
t must never
be
set higher than the top
su
rf
ace
of
the
nosepiece
plate to prevent the nose piece from locking while
ro
tating
l eica M Stereomicroscopes - Ass
emb
lv
Assembling
2x
planapochromatic
Assembling
objective
nosepiece
Adjusting
parfocal
~
Carefully turn and ti
gh
t
en
the 2x planapoch
ro
matic objective clockwi
se
to
the
limit stop
without
applying excessive force.
~
Raise
the focusing drive with the drive heads to
provide sufficient space for the 2x
planapoch
ro
-
matic objective.
~F
it
the objective nosepiece like a microscope car-
rier
wit
h the Alien
screw
(see page
34
, position 1
).
~
Insert the optics carrier in the objecti
ve
nosepiece.
~
Retighten the clamping
screw
~Att
ach
the limit stop to the column of the st
and
so
that the working distance beneath the 2x objective
will always measure approx.
15
mm.
I
1i
• Fit
and
adjust the l x
and
2x planapochromatic objectives
as
described.
The
image then remains parfocal in the range of < 0.
05
mm,
and
refocusing
after changing the otJjective
is
no
longer requir
ed
.
•
Use
a very fine, flat otJject
(e
.
g.
an
object micrometer) for the adjustment,
which
allows maximum focusing even at highest resolution.
~Scr ew
the 2x planapochromatic objective into the beam path.
~Ad
justing
the diopter settings
and
parfocality (seep.
20)
.
~Screw
the 1x planapochromatic objective into the
beam path.
~
Observe the same object with smallest magnifica-
tion without changing the settings made with the
2x planapochromatic objective.
~Turn
the 1 x planapochromatic
ob
jective counter-
clockwise until the object can
be
seen in focus
at the
smallest magnification.
~Sl
owly
zoom
to the highest magnification. At
the same time correct the focus
by
turni
ng
the
1 x planapochromatic objective.
• Verify that the object
is
in
focus at highest magnification with t
he
2x planapochromatic
as
well
as
the l x planapochromatic objecti
ve
without
re
focusing. Otherwise turn the objective at the ri
ng
nut until
the object
is
focused.
~F
asten
the ring nut w ith both screws.
Do
not overtight
en
both screws.
le
ica M
St
e
reom
i
croscop
es -
Asse
n
t>
ly
37
 Loading...