S
a
mpl
e
8
3.0 AUTO GLIDE ELECTRICAL INSTALLATION
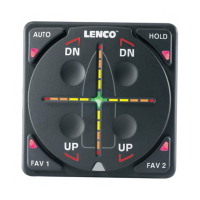
AUTO GLIDE
TM
3.2 Auto Glide Control Box Harness Installation
DOWNLOAD YOUR REQUIRED DRAWING FROM THE WEBSITE: WWW.LENCOAUTOGLIDE.COM
- See sample drawing below
Connect the large black plug on the Auto Glide Control Box Harness into the Auto Glide Control Box.
- Make sure to line up the grooves.
Screw in the brass hex bolt on the plug into the control box with a 1/4” socket or 1/4” nut driver.
Connect the actuator lead connections on the control box harness and plug them into the actuator leads or actuator
extension harnesses.
- Make sure to connect the wire(s) with the red to the port (left) actuator(s) and the wire(s) with the green to
the starboard (right) actuator(s).
- See your Trim Tab Owner’s Manual for detailed instructions on Trim Tab installation and actuator hook up.
WARNING
!
CAUTION
CAUTION
1
2
3
4
Rev 03-10-11
As per your specific drawing (downloaded / printed from website) connect CAN #1 cable to Engine (for engine data) as
shown.
- If the Mercury or Yamaha hub is full, you will need to add an additional hub and jumpers.
As per your specific drawing (downloaded / printed from website) connect CAN #2 (Key Pad and GPS Data) as shown.
If your Lenco Trim Tab system is OEM - wired with a power harness, simply connect to the wires as shown in your drawing.
If you must run power to the system, you should purchase a power pigtail to plug into the Auto Glide main harness and
complete the wiring installation. Lenco also recommends the installation of a battery switch in the system. (See Page 9)
- NOTE: Lenco does not recommend the removal of our Deutsch connectors and replacing with hard wiring / butt splicing
to connect power to system.
Power Pigtail Choices: (May be purchased at all marine dealers and marine retail outlets)
Single Actuator Systems - Part # 30140-001 36” Power Pigtail or Part # 30140-202 72” Power Pigtail
Dual Actuator Systems - Part # 10249-001 72” Power Pigtail
30140-001 36” Power Pigtail
30140-202 72” Power Pigtail
10249-001 72” Power Pigtail
5
6
7
The power connections should always be the last
connection made.
Power connections should only be made while the
battery switch in the OFF position.
Please read through the instructions in their entirety
prior to beginning installation! Proper function of this
product cannot be assured unless you follow these
instructions.