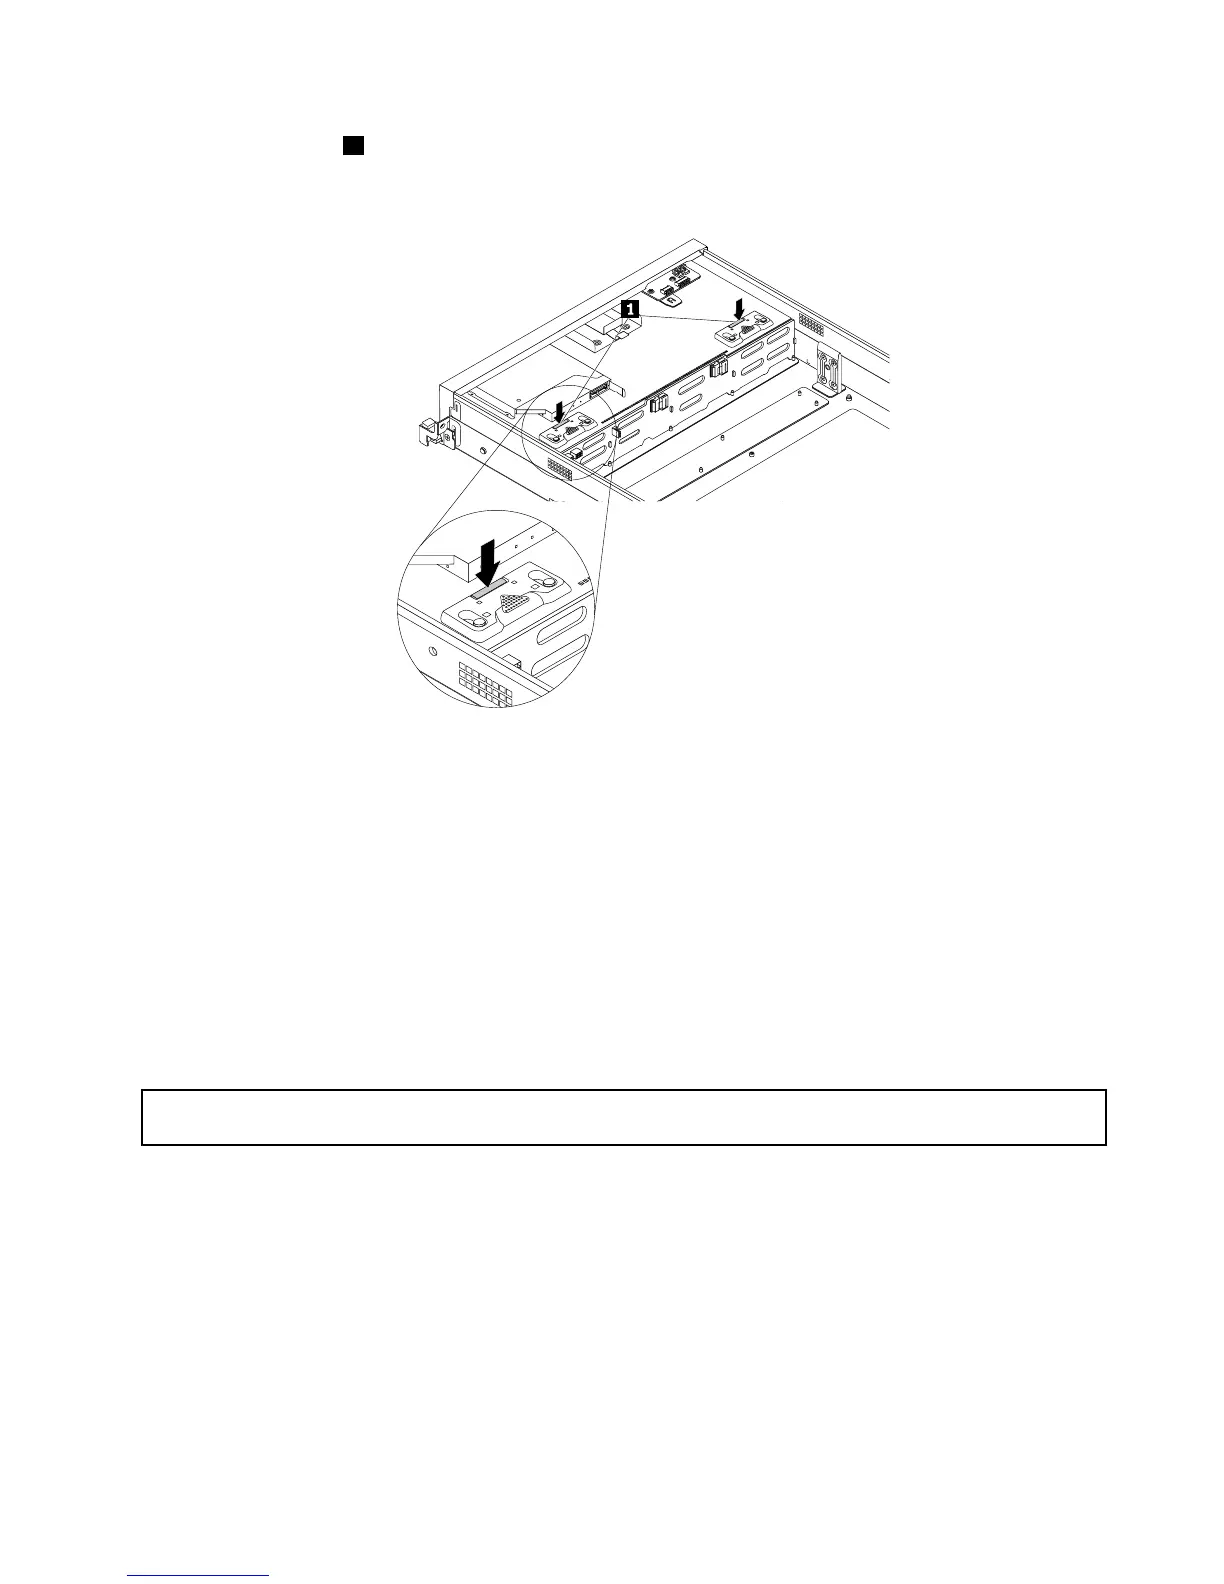
11.Pressthebuttons1toputthelatchesonthechassistotheclosedpositionsothatthelatchessecure
thenewbackplaneinplace.
Figure114.Securingthebackplaneforservermodelswitheight3.5-inchharddiskdrivebays
12.Reinstallallthehot-swapharddiskdrivesanddummytrays(ifany)intheharddiskdrivebays.See
“Installingorreplacingahot-swapharddiskdrive”onpage148.
13.Refertoyournotetoconnectthecablestothenewbackplane.
14.Ifyouareinstructedtoreturntheoldhot-swapharddiskdrivebackplane,followallpackaging
instructionsanduseanypackagingmaterialsthataresuppliedtoyouforshipping.
Whattodonext:
•Toworkwithanotherpieceofhardware,gototheappropriatesection.
•Tocompletethereplacement,goto“Completingthepartsreplacement”onpage174.
Replacingthebackplaneforservermodelswith123.5-inchharddiskdrivebays
Attention:Donotopenyourserverorattemptanyrepairbeforereadingandunderstanding“Safetyinformation”
onpageiiiand“Guidelines”onpage81.
Thistopicprovidesinstructionsonhowtoreplacethebackplaneforservermodelswith123.5-inchhard
diskdrivebays.
Beforeyoubegin,printalltherelatedinstructionsorensurethatyoucanviewthePDFversiononanother
computerforreference.
Note:Toclearlyshowthebackplane,thesystemfansareomittedfromtheillustrationsinthistopic.
Toreplacethebackplaneforservermodelswith123.5-inchharddiskdrivebays,dothefollowing:
1.Removeallmediafromthedrivesandturnoffallattacheddevicesandtheserver.Then,disconnectall
powercordsfromelectricaloutletsanddisconnectallcablesthatareconnectedtotheserver.
Chapter6.Installing,removing,orreplacinghardware155