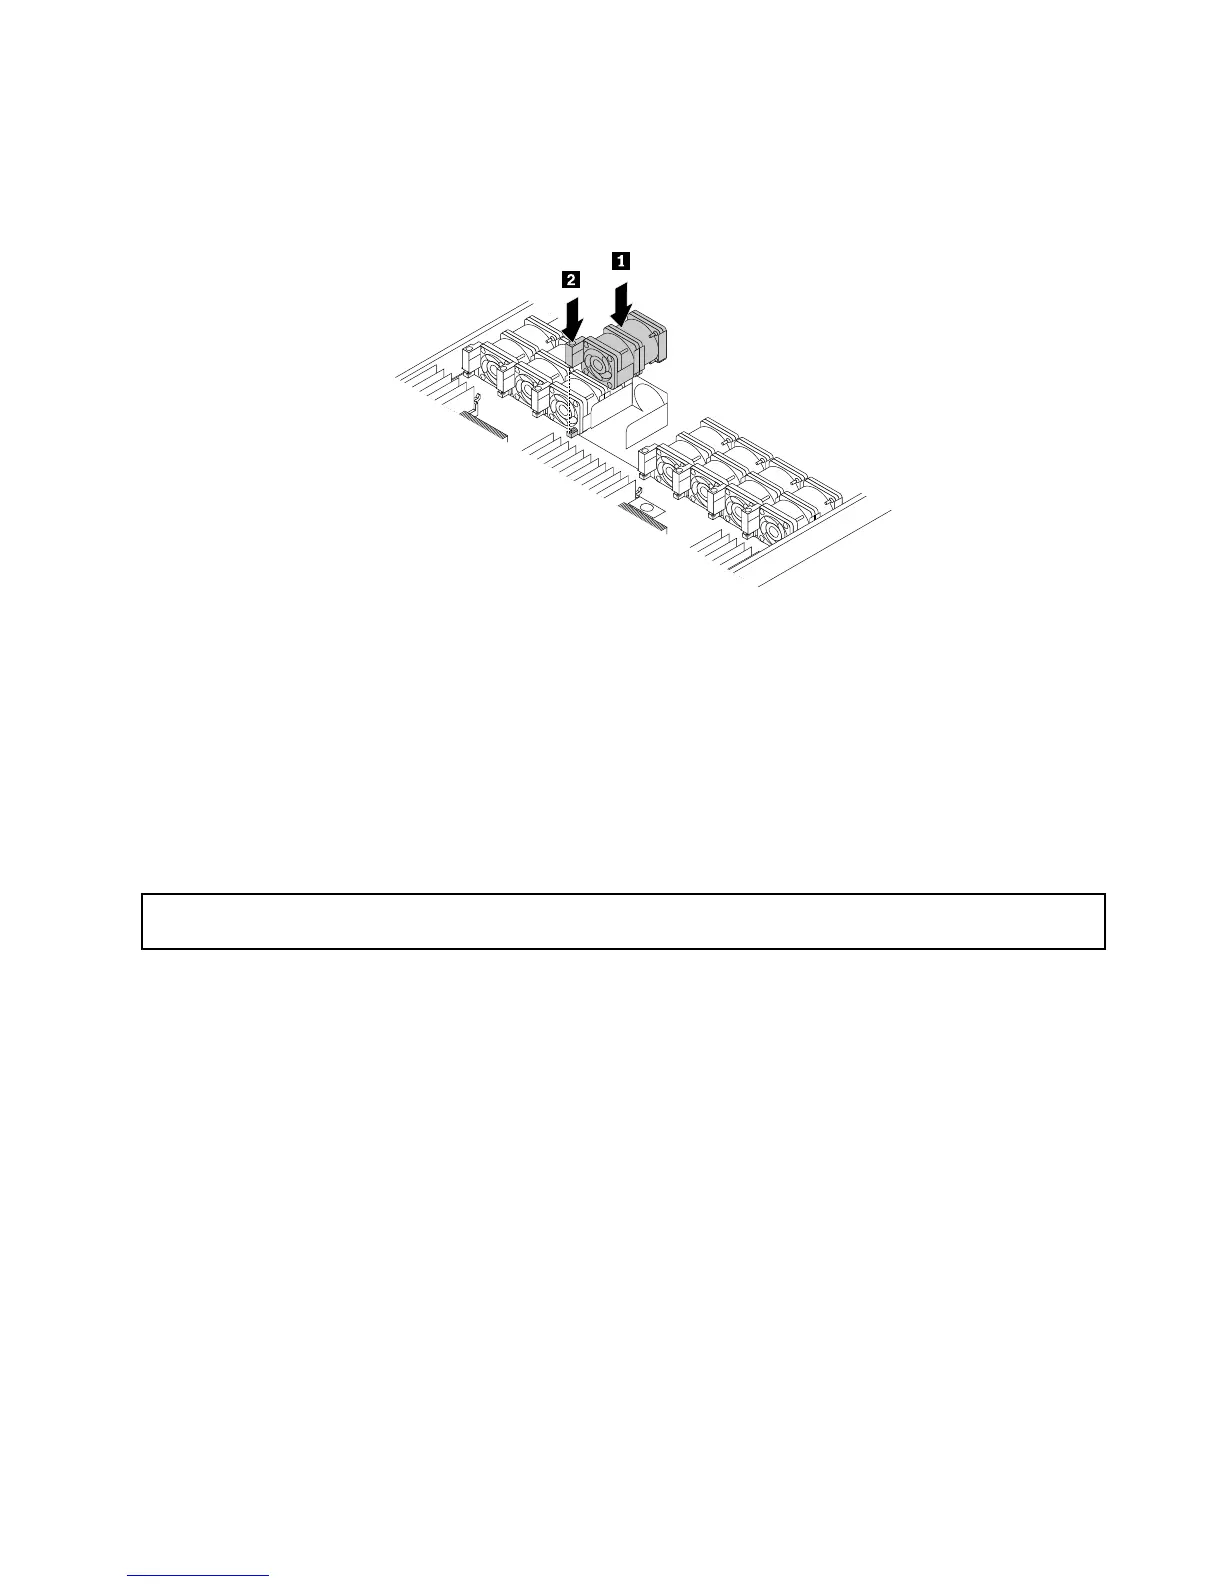
7.Positionthenewsystemfansothatthesystemfanconnectoronthebottomofthenewsystemfanis
alignedwiththesystemfanconnectoronthesystemboard.Then,pressthenewsystemfanstraight
downuntilitisseatedintoplace.
Figure121.Installingthesystemfan
8.Ifyouareinstructedtoreturntheoldsystemfan,followallpackaginginstructionsanduseany
packagingmaterialsthataresuppliedtoyouforshipping.
Whattodonext:
•Toworkwithanotherpieceofhardware,gototheappropriatesection.
•Tocompletethereplacement,goto“Completingthepartsreplacement”onpage152
.
Replacingthefrontpanelboard
Attention:Donotopenyourserverorattemptanyrepairbeforereadingandunderstanding“Safetyinformation”
onpageiiiand“Guidelines”onpage59.
Beforeyoubegin,printalltherelatedinstructionsorensurethatyoucanviewthePDFversiononanother
computerforreference.
Notes:
•Dependingonthemodel,yourservermightlookslightlydifferentfromtheillustrationsinthistopic.
•Theillustrationsinthefollowingprocedureshowthefrontpanelboardfor3.5-inchharddiskdrives.For
thefrontpanelboardfor2.5-inchharddiskdrives,thereplacementprocedureissimilar.
•ThefrontpanelboardisextremelysensitivetoESD.Ensurethatyoureadandunderstand“Handling
static-sensitivedevices”onpage60
firstandcarefullyperformtheoperation.
Toreplacethefrontpanelboard,dothefollowing:
1.Removeallexternalmediafromthedrivesandturnoffallattacheddevicesandtheserver.Then,
disconnectallpowercordsfromelectricaloutletsanddisconnectallcablesthatareconnectedto
theserver.
2.Prepareyourserver.See“Removingorextendingtheserverfromtherackcabinet”onpage61.
3.Removetheservercover.See“Removingtheservercover”onpage61.
4.Locatethefrontpanelboard.
Chapter6.Replacinghardware141