Whattodonext:
•Toworkwithanotherpieceofhardware,gototheappropriatesection.
•Tocompletetheinstallation,goto“Completingthepartsreplacement”onpage83
.
Removingtheslimopticaldriveandthefourthharddiskdrive
Attention:Donotopenyourserverorattemptanyrepairbeforereadingandunderstanding“Safetyinformation”
onpageiii
and“Guidelines”onpage35.
Thistopicprovidesinstructionsonhowtoremovetheslimopticaldriveandthefourthharddiskdrive.
Toremovetheslimopticaldriveandthefourthharddiskdrive,dothefollowing:
1.Removeallmediafromthedrivesandturnoffallattacheddevicesandtheserver.Then,disconnectall
powercordsfromelectricaloutletsanddisconnectallcablesthatareconnectedtotheserver.
2.Removetheservercover.See“Removingtheservercover”onpage37.
3.Removethefrontbezel.See“Removingandreinstallingthefrontbezel”onpage38.
4.Disconnectthesignalcablesandthepowercablesfromtheslimopticaldriveandthefourthhard
diskdrive.
5.Disconnectthecableofthefanforthefourthharddiskdrivefromtheharddiskdrivefanconnectoron
thesystemboard.See“Locatingpartsonthesystemboard”onpage13.
Note:Ifyourserverhasatertiaryharddiskdriveinstalled,disconnectthecableofthefanforthefourth
harddiskdrivefromthefanpowerconvertercable.
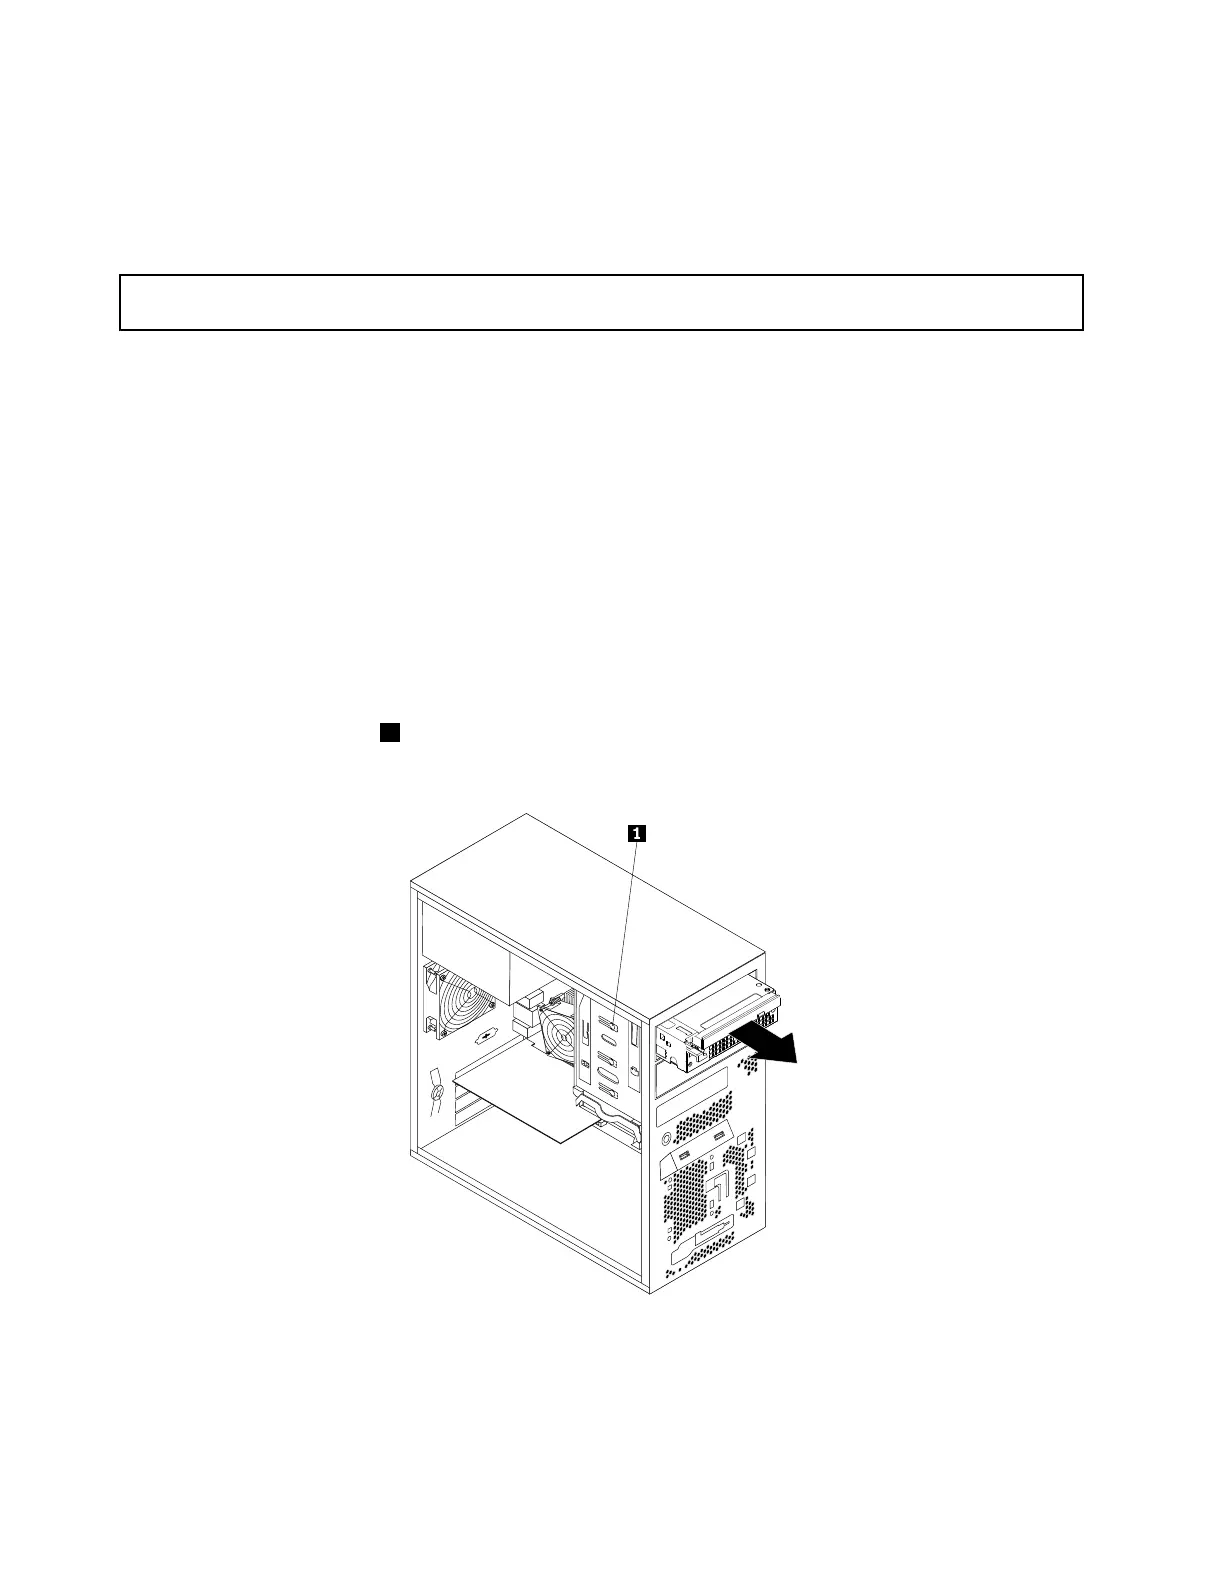
6.Pressthereleasebutton1andslidethecagewiththeslimopticaldriveandthefourthharddiskdrive
outofthefrontoftheserver.
Figure40.Removingthecagewiththeslimopticaldriveandthefourthharddiskdrive
60ThinkServerTS140UserGuide