User Manual for BPS-200
www.levitronix.com
PL-4012-00, Rev07, DCO# 20-144
4.2 Mechanical Installation of the Pump/Motor
• The motor can be fixed with four screws on the motor bottom (see Figure 8)
• As an alternative the Mounting Base Plate MBP-1.1 (see Table 4) can be used to fix the motor.
• The motor can either be mounted in horizontal or vertical position
4.3 Mechanical Installation of Motors in Ex Classified Areas
Motors for ATEX / IECEx applications. Only specific types of motors BSM-1.x
are classified for the use in Ex classified locations.
An Ex conform solution is needed for the motor cable to leave the Ex classified area (see Figure 5). One
option is an Ex certified cable sealing system as listed in Table 4 (see Pos. 9) and shown in Figure 5.
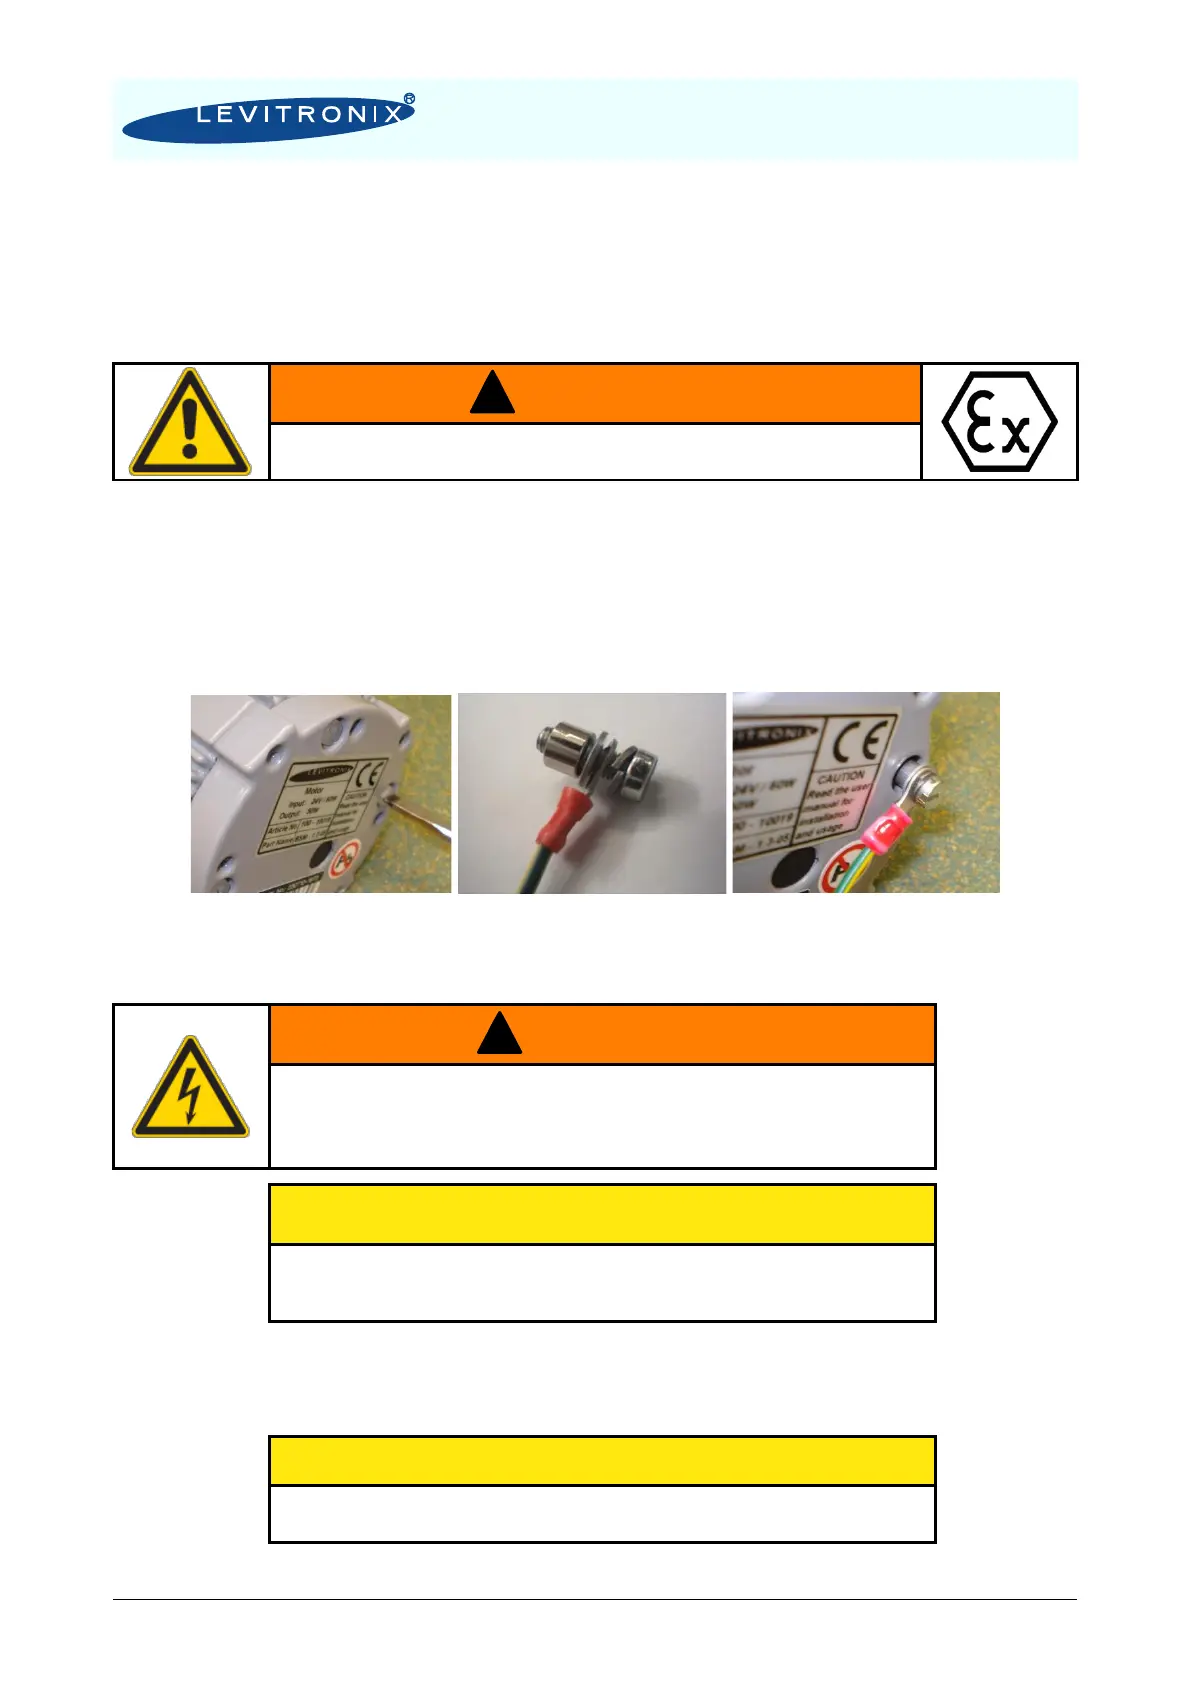
A protective earth wire shall be attached to the motor placed in the Ex classified area by using one of the four
M4 threads on the backside of the motor.
• Remove one of the four M4 screws on the backside of the motor
• Use a crimp-type end together with a spacer sleeve to connect a earth wire
• Attach the grounding wire with a M4 stainless steel screw to the motor according to Figure 27.
Figure 27: Attachment of a protective earth wire to the backside of the motor
4.4 Mechanical Installation of the Controller
Hazardous voltage may be present.
In order to avoiding fluid spills shorting mains or other voltages within the
controller, place the controller in a spill protected electrical cabinet. If explosive
flammable gases are present, place the controller in an explosion-proof cabinet.
Make sure the controller is mounted in a position that allows free air circulation
below the controller casing is recommended.
• Use the Din-Rail bracket to mount the controller.
• If no forced air-cooling is used, mount the controller in upright position.
• The Din-Rail brackets can also be mounted on the controller back side according to Figure 9
Use only 3,5 x 6,5mm self-tapping screw for the fixation of the Din-Rail brackets.
The controller may be damaged if other type or too long screws types are used!