EN
7
GETTING STARTEDREMOTE CONTROL
1. Remove all packaging.
2.
screwdriver to attach the stand to the
water tank with the 4 included screws.
[
Figure 2.1
]
Note: Do not
Note:
Note:
•
•
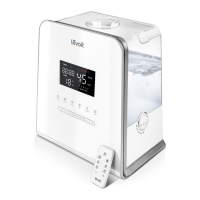
The remote control can be used to control any
The remote must be within 16 ft / 5 m of the
•
• Press any button to turn the display
back on.
Humidity Level Button
• Press to set a target humidity level from
40–80% that’s used with Auto Mode.
• Continue pressing to cycle through target
humidity options in increments of 10%.
Night Light Button
•
Timer Button
• Press to cycle through timer options from
1–12 hours.
• Press and hold to quickly cycle through
options in increments of 1 hour.
3.
4.
tank.
5.
the cable winder and attach the cable
[
Figure 2.2
]
6.
from any walls. The surface must be
water-resistant. [
Figure 2.3
]
Note:
1. Remove the top cover.
[Figure 2.5
]
2.
inlet tank with room-temperature water.
You can also add water directly to the
water tank. [
Figure 2.6
]
Remote Diagram
AN.
AO. Auto Mode Button
AP. Mist Level Button
AQ. Humidity Level Button
AR.
AS. Sleep Mode Button
AT. Night Light Button
AU. Timer Button
7. Mist should be directed away from walls,
furniture, bedding, and appliances.
[
Figure 2.4
Avoid letting too much mist
aroma box, as this may interfere with the
sensor inside the aroma box
Note:[
Figure 1
]
 Loading...
