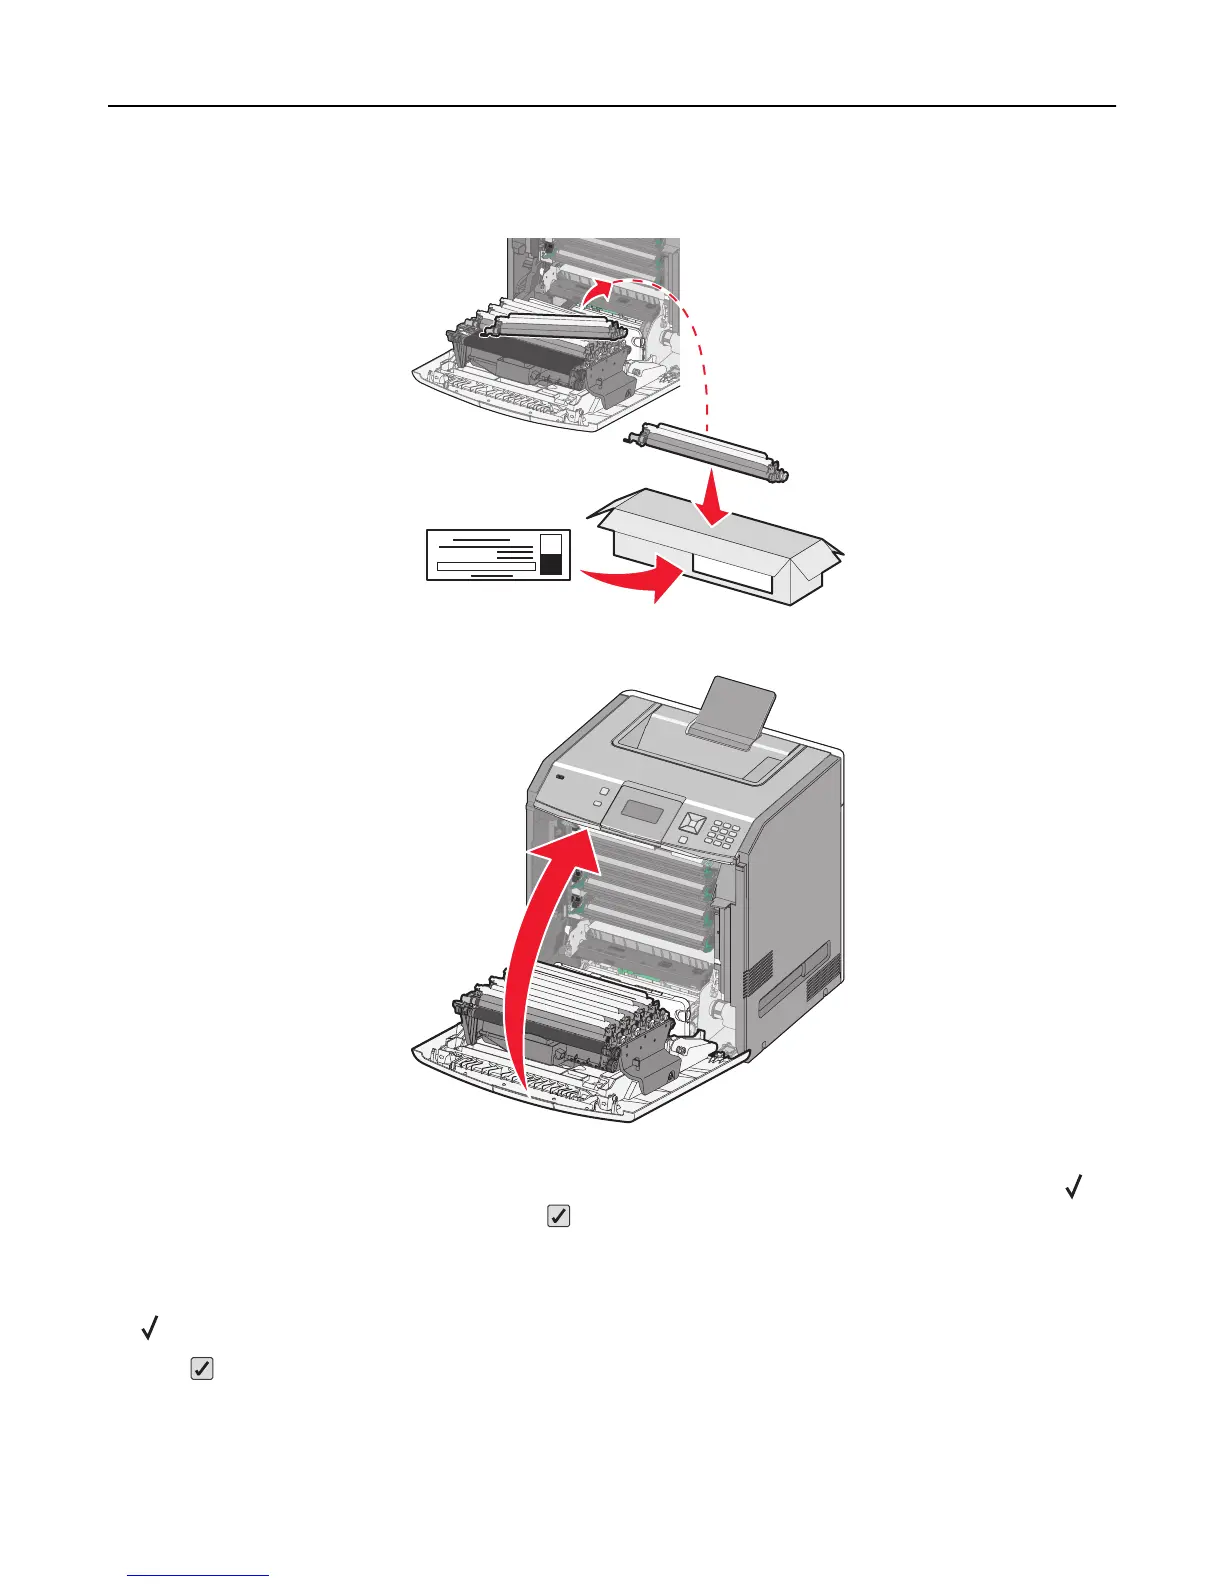
6 Place the old photoconductor into the replacement photoconductor box, and then place the return label on the
box for shipping to Lexmark for recycling.
7 Close the front door.
8 If you see 84 Replace <color> photoconductor, 84 <color> photoconductor nearly low,
or 84 <color> photoconductor low on the display, then press the up or down arrow button until
Supply Replaced appears, and then press .
Note: Failure to reset the life count may result in degraded print quality.
Replaced <color> photoconductor appears.
Yes appears.
9 Press to clear the message.
If you are prompted to replace only one photoconductor, then the Ready screen appears, and the task is complete.
If you are prompted to replace additional photoconductors, repeat steps 1 to 9 for each additional photoconductor.
After all photoconductors have been replaced, Ready appears, and the task is complete.
Maintaining the printer 140
 Loading...