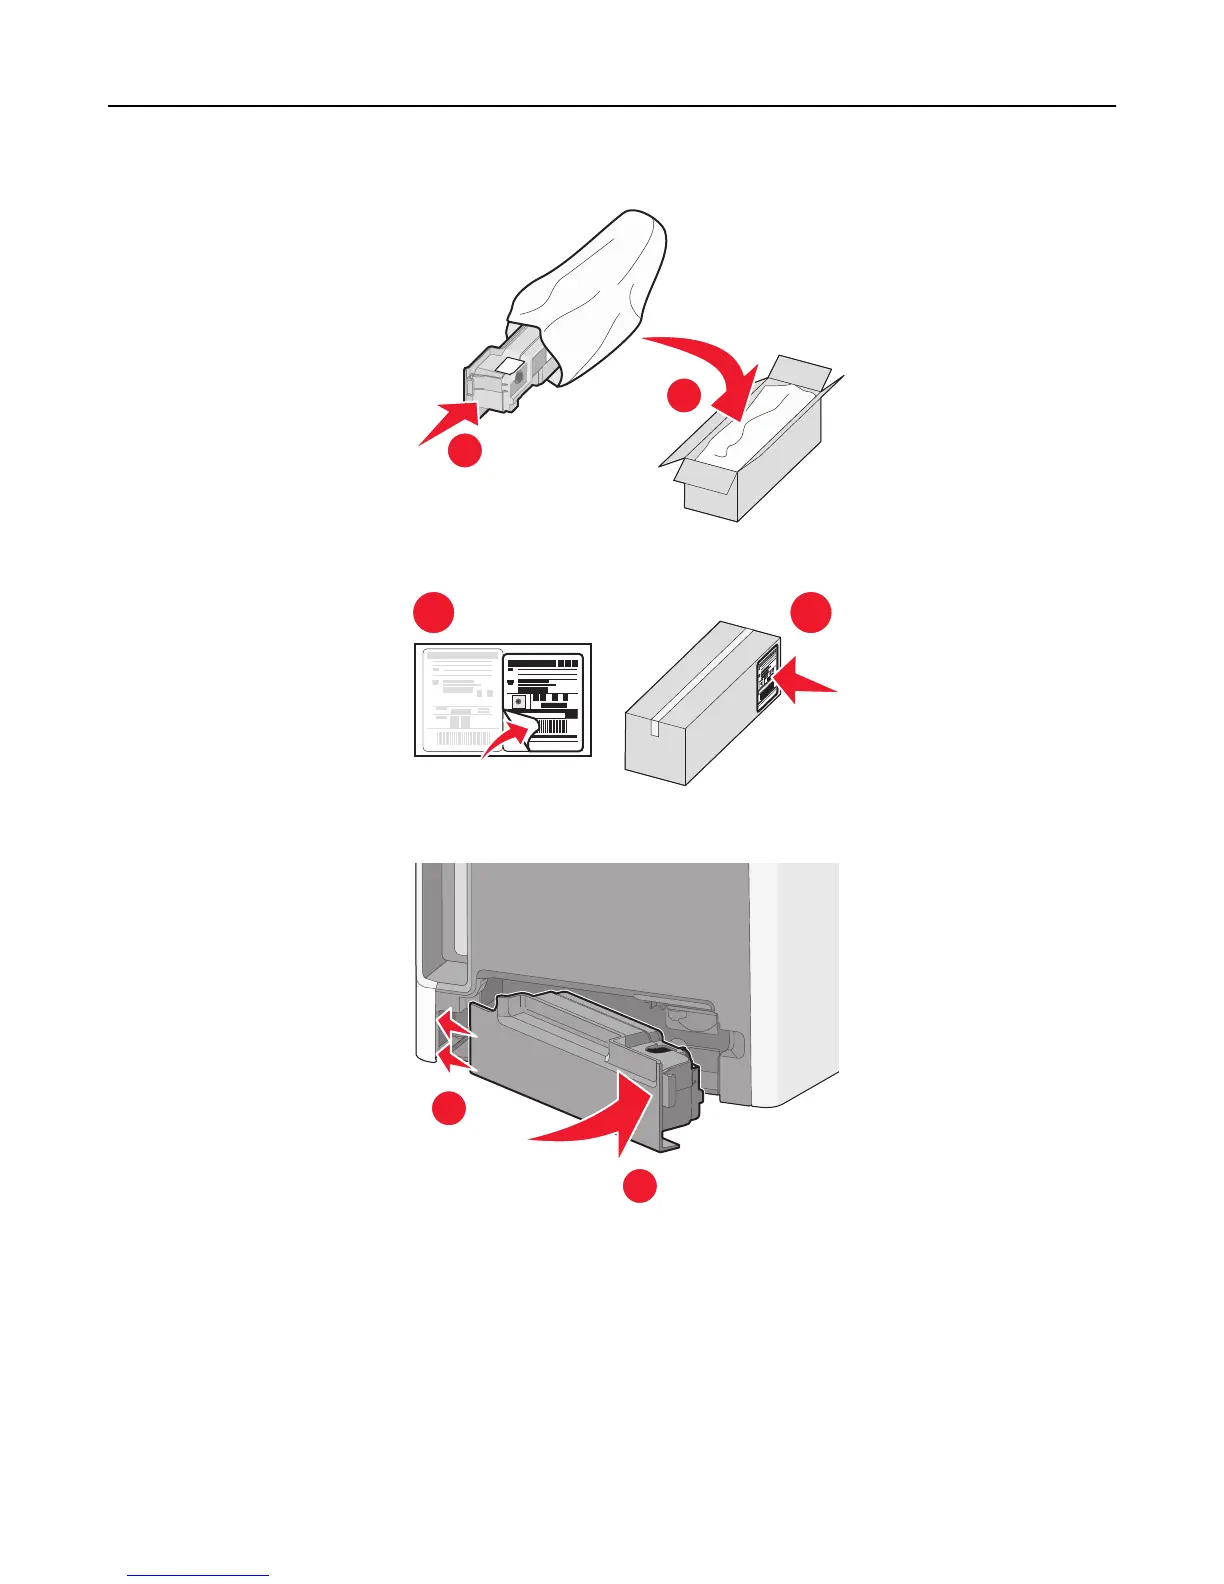
6 Place the bag into the shipping box used for the replacement part.
1
2
7 Peel the recycling label off and place it on the shipping box.
1 2
8 Insert the new waste toner bottle into the printer.
1
2
Replacing a photoconductor
Notes:
• Replace all four photoconductors at the same time for optimum print quality.
• Print quality is affected when the photoconductor is replaced without resetting the supply counter.
1 Open the front door.
Maintaining the printer 194