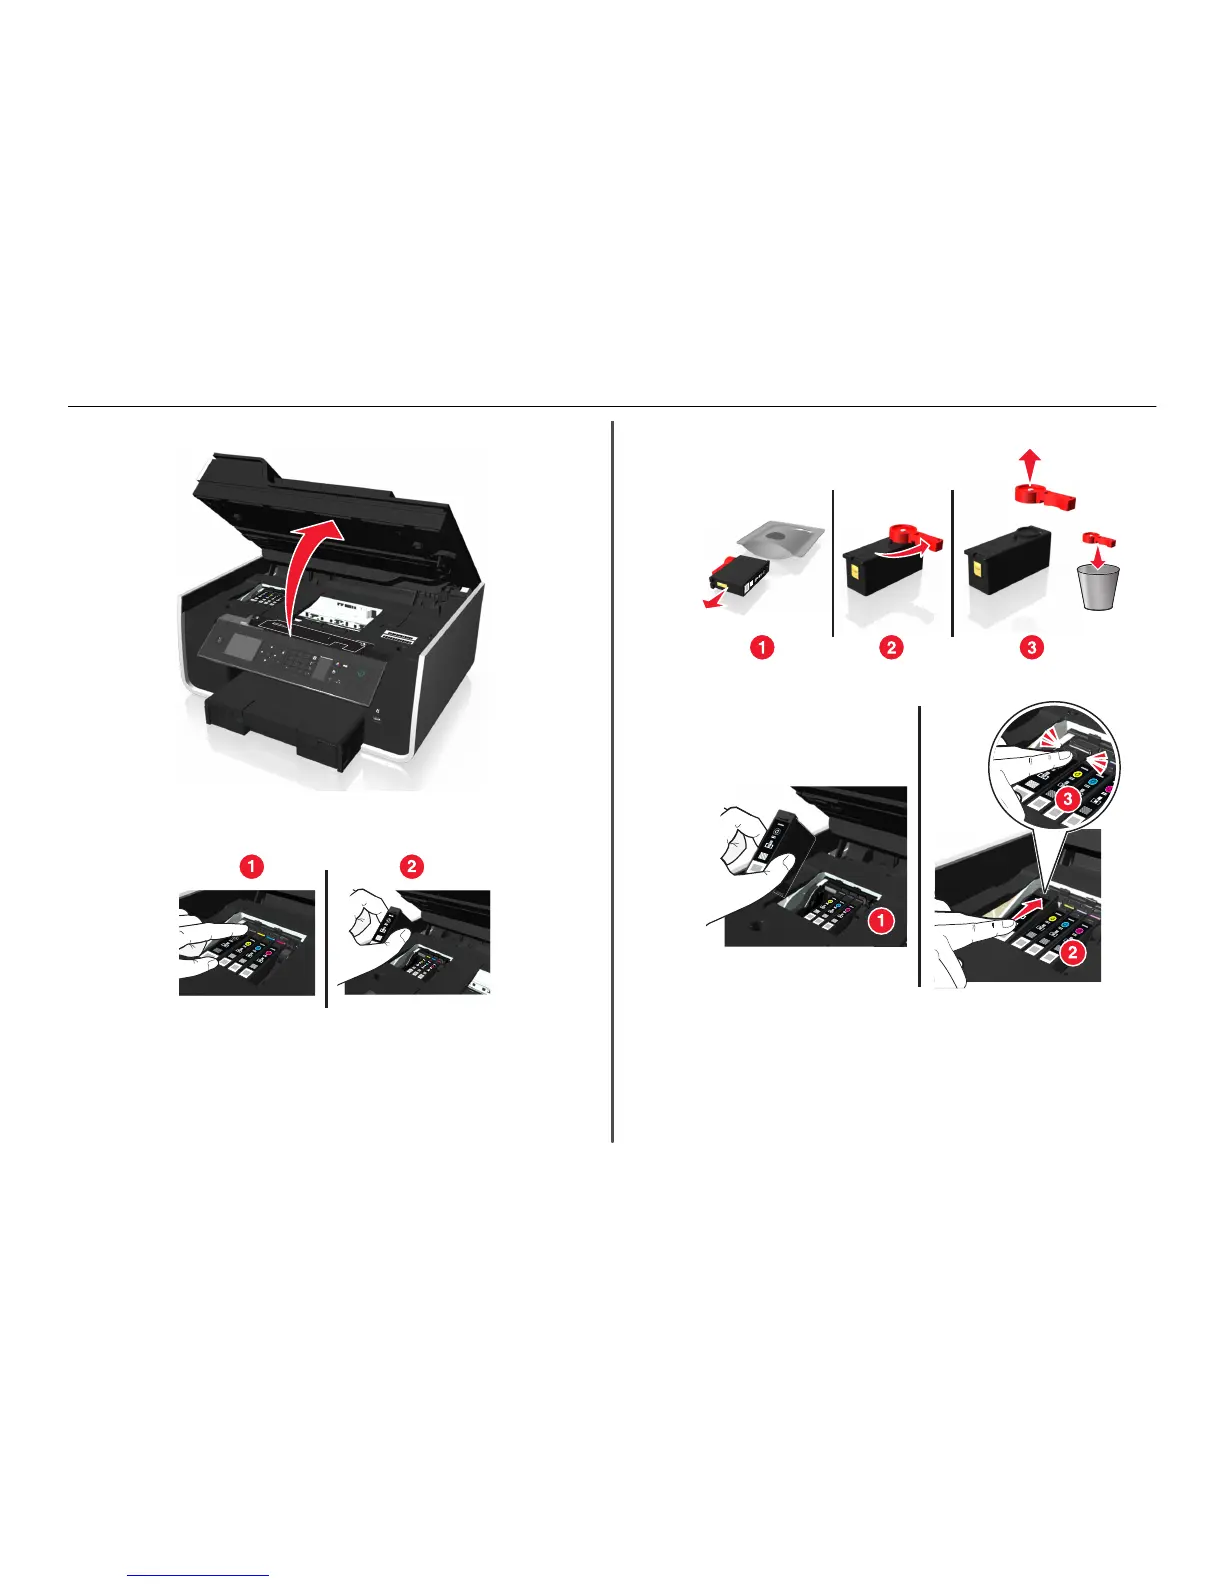
2 Open the printer.
I
N
K
C
O
M
PA
TIBILI
T
YC
H
AR
T
1
5
0
,
1
5
0
A
,
1
5
0
X
L
,
1
5
0
X
L
A
,
1
5
5
,
1
5
5
A
M
a
g
e
n
t
a
1
5
0
,
1
5
0
A
,
1
5
0
X
L
,
1
5
0
X
L
A
,
1
5
5
,
1
5
5
A
Ye
l
l
o
w
1
5
0
,
1
5
0
A
,
1
5
0
X
L
,
1
5
0
X
L
A
,
1
5
5
,
1
5
5
A
,
1
5
5
X
L
,
1
5
5
X
L
A
B
l
a
c
k
1
5
0
,
1
5
0
A
,
1
5
0
X
L
,
1
5
0
X
L
A
,
1
5
5
,
1
5
5
A
C
y
a
n
MT/MN: 4449-70E
w
w
w
.
l
e
xmark
.
co
m
V725w
M
A
C
:
X
X
X
X
X
X
X
X
X
X
X
X
xxxxxxxxxxxxxx
Note: The printhead moves to the cartridge installation position.
3 Press the release tab, and then remove the used ink cartridge or cartridges.
Installing ink cartridges
1 Remove the ink cartridge from the pack, and then remove the protective cap from the ink cartridge.
If your ink cartridge comes with a twist cap, then remove the cap.
2 Insert each ink cartridge. Slide your finger along the ink cartridge until the cartridge clicks into place.
Notes:
• Insert the color cartridges first, and then the black cartridge.
• Insert the new ink cartridges immediately after removing the protective cap to avoid exposing
the ink to air.
3 Close the printer.
Ordering and replacing supplies 17