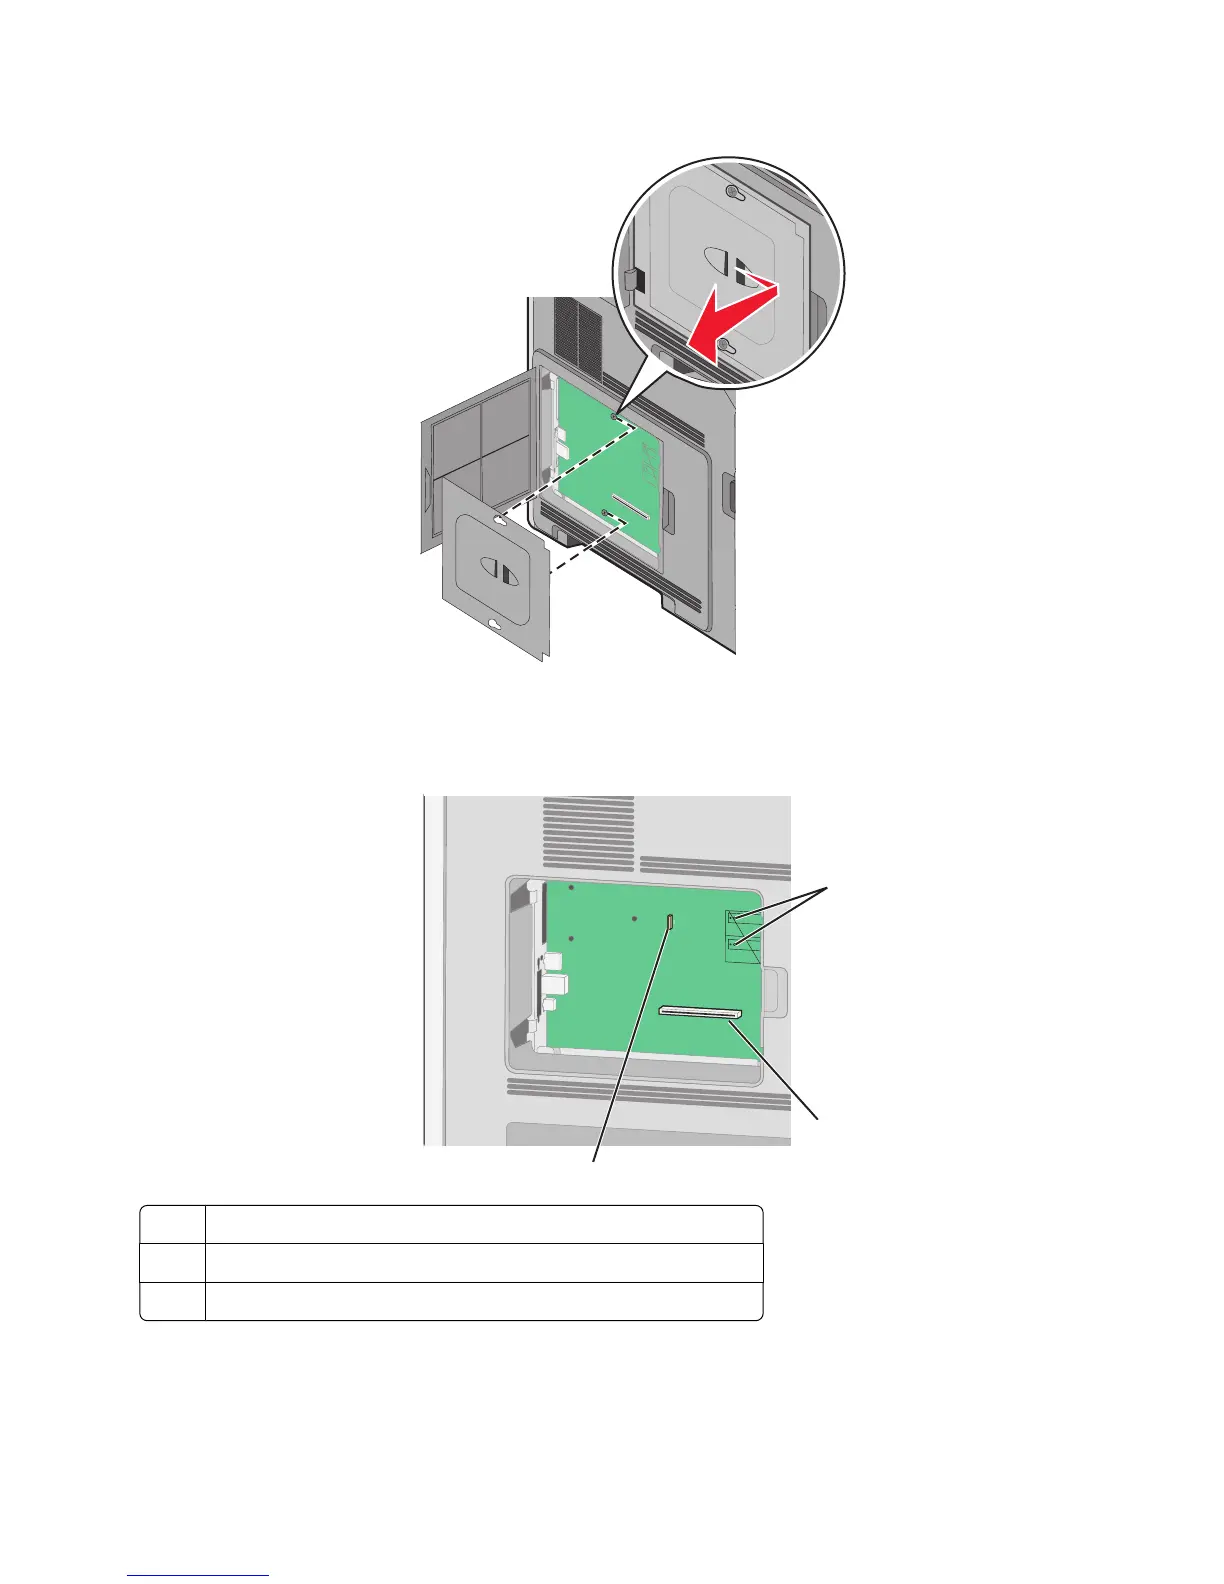
3 Remove the system board cover.
4 Use the illustration below to locate the appropriate connector.
Warning—Potential Damage: System board electronic components are easily damaged by static electricity.
Touch something metal on the printer before touching any system board electronic components or connectors.
1
2
3
1
Firmware and flash memory card connectors
2
Memory card connector
3
Lexmark Internal Solutions Port or printer hard disk connector
Additional printer setup
19