Use the To
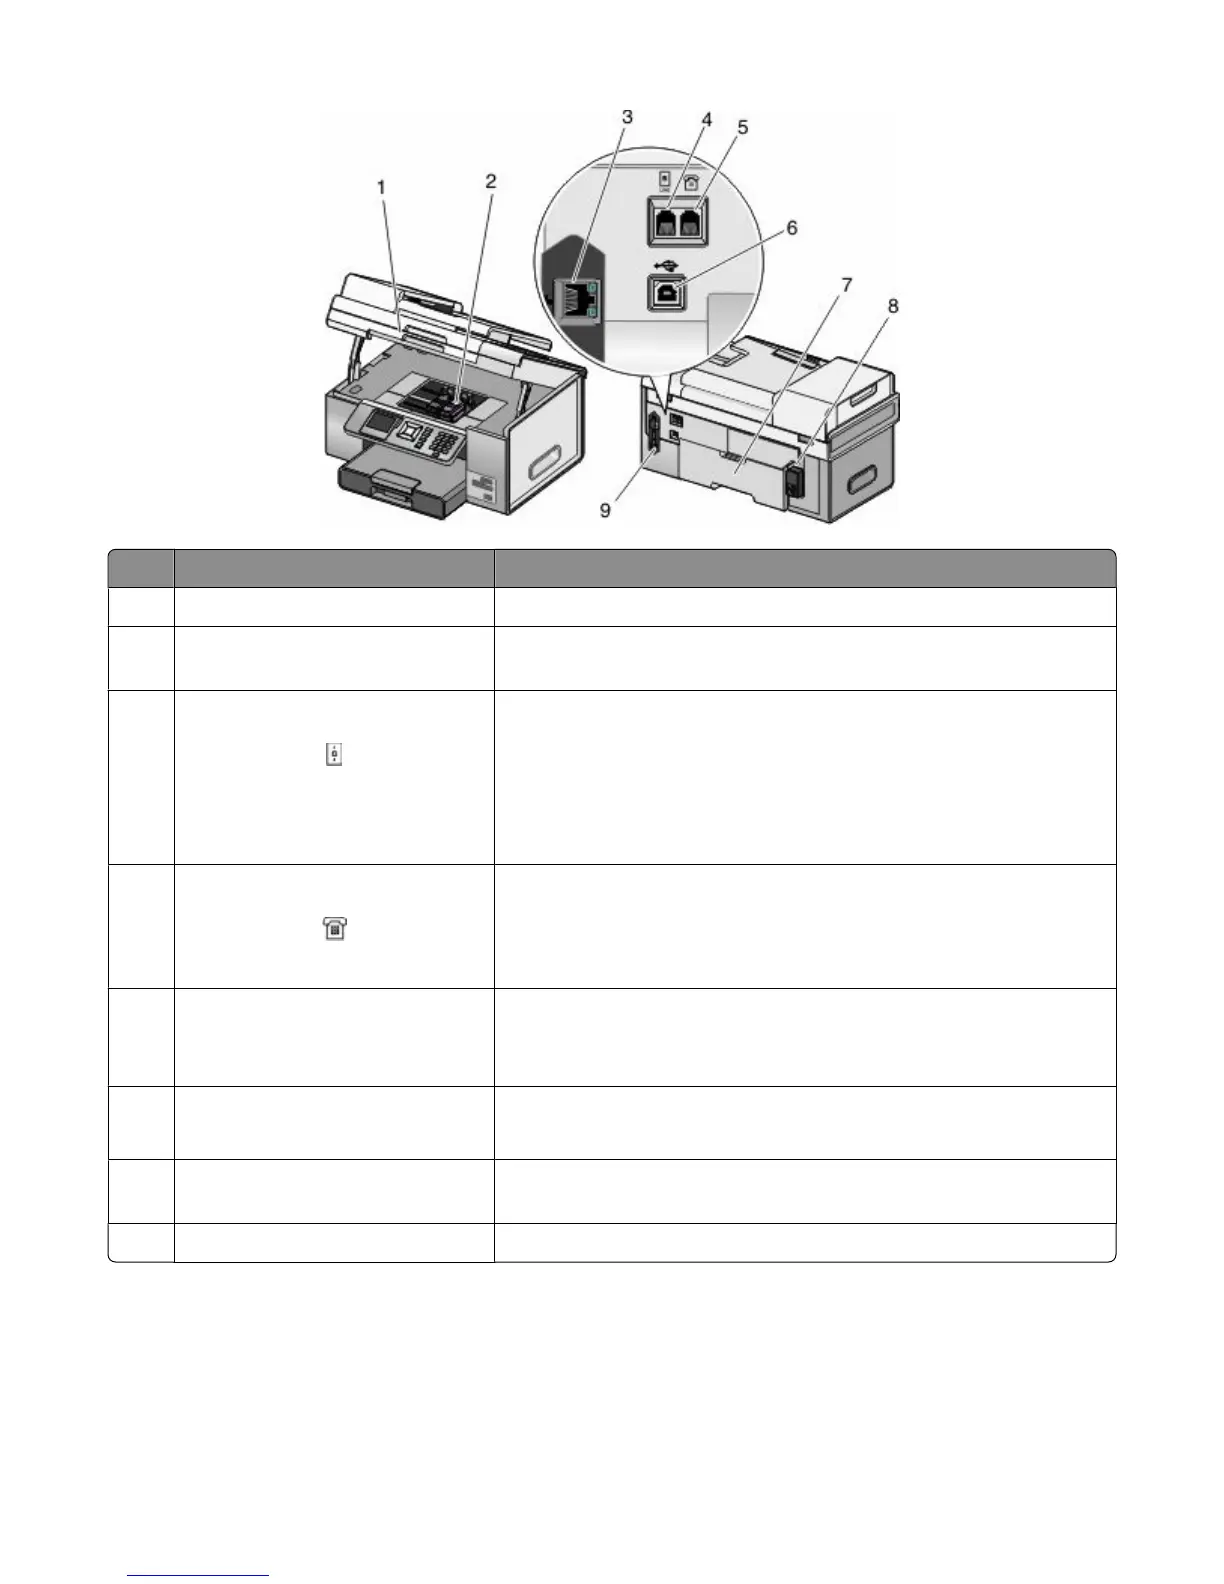
1, 2
Scanner unit, print cartridge carrier Access the print cartridges; install, replace, or remove a print cartridge.
3
Ethernet port Connect your computer to another computer, a local network, an
external DSL, or cable modem.
4
LINE port Connect the printer to an active telephone line to send and receive
faxes. The printer must be connected to a telephone line to receive
incoming fax calls.
Note: Do not connect additional devices to the LINE port, and do not
connect a DSL (digital subscriber line), ISDN (integrated services digital
network), or cable modem to the printer.
5
EXT port Connect additional devices, such as a data/fax modem, telephone, or
answering machine, to the printer. This connection method may not
be available in all countries or regions.
Note: Remove the plug to access the port.
6
USB port Connect the printer to a computer using a USB cable.
Warning—Potential Damage: Do not touch the USB port except
when plugging in or removing a USB cable or installation cable.
7
Duplex unit
• Print on both sides of the paper automatically.
• Pull out to remove paper jams in the duplex unit.
8
Power supply with port Connect the printer to a power source. Plug the power cord into the
power supply at the back of the printer and then into the wall outlet.
9
Internal wireless print server Communicate with other devices on a wireless network.
Understanding the printer software
The software that came with your printer includes the Productivity Studio, the Solution Center, the Fax Setup Utility,
the Fax Solutions Software, and Printing Preferences.
Note: Depending on the printer you have, some of these programs may not be applicable.
Using the printer
16