Do you have a question about the LG GCWM1069CS7 and is the answer not in the manual?
Essential precautions to minimize risks of fire, electric shock, and injury during washer operation.
Guidelines for proper grounding of the appliance to prevent electric shock.
Details on features like Direct Drive, Tilted Drum, Ultra Capacity, and Tub Clean.
Explanation of the pressure sensor system for water level management.
Information on how the washer door operates, including lock status.
Conditions under which the washer door cannot be opened.
Criteria that trigger the door lock indicator lights.
List of accessories provided with the washing machine.
Step-by-step guide to remove shipping bolts before operation.
Recommended spacing for installation and appliance dimensions.
Guidance on installing the auto dosing system and its interface.
Instructions for placing the appliance on a firm surface and connecting power.
Steps for leveling the washing machine to prevent noise and vibration.
Details on electrical hookup and connecting water supply hoses.
Instructions for correctly installing the drain hose to prevent issues.
Description of the control panel layout and its main sections.
Explanation of display, buttons, LEDs, and optional functions.
Schematic representation of electrical connections within the unit.
Table detailing cycle options, fabric types, and water/rinse temperatures.
Diagram showing the main printed circuit board and its component connections.
Safety precautions and initial checks before troubleshooting.
Procedure for entering and operating the Quality Control test mode.
Method to check the water level sensor frequency.
Method to check the drum's revolutions per minute.
List of error codes, their symptoms, and potential causes.
Information on the detergent dispenser and its compartments.
Flowchart for diagnosing and resolving 'No Power' issues.
Troubleshooting steps for the IE error indicating no water supply.
Troubleshooting steps for the OE error related to drain problems.
Troubleshooting for FE error, relating to inlet valve malfunctions.
Troubleshooting steps for PE error concerning the pressure switch.
Diagnosing issues related to the pressure sensor and its connections.
Steps to resolve door-related errors (dE1/dE2).
Identifying causes and solutions for vibration and noise during spin.
Troubleshooting when detergent, softener, or bleach does not flow.
Diagnosing and resolving abnormal sounds originating from the motor.
Addressing issues of suds overflowing from the appliance.
Troubleshooting water overflow from the drawer or dispenser.
Ensuring all packing materials are removed for proper operation.
Steps to check and ensure the unit is properly leveled.
Instructions for adjusting the leveling feet for stability.
Guidance on how uneven floors can affect operation and solutions.
Tips for adjusting legs and ensuring proper contact with the floor.
Factors related to the floor and leg placement affecting vibration.
Understanding how load balance affects vibration.
Ensuring adequate space around the unit to prevent operational issues.
Introduction to the LG Laundry Lounge remote monitoring and control system.
Technical details for the wireless LAN module, including FCC and IC compliance.
Steps to remove the control panel assembly from the unit.
Procedure for disassembling the display printed circuit board assembly.
Instructions for removing the top plate assembly.
Steps for disassembling and replacing the main printed circuit board assembly.
Procedure for disassembling the detergent dispenser assembly.
Steps for removing and replacing the inlet valve assembly.
Instructions for disassembling the main cabinet cover.
Steps for removing and replacing the tub gasket.
Procedure for disassembling the washing machine door.
Steps for replacing the door lock switch assembly.
Instructions for disassembling and replacing the pump assembly.
Steps for removing and replacing the heating element.
Procedure for disassembling and replacing the noise filter.
Steps for disassembling the motor assembly.
Instructions and notes for replacing the damper components.
Exploded view of the cabinet and control panel assembly.
Detailed exploded view of the cabinet and control panel.
Exploded view illustrating the drum and tub components.
Exploded view of the dispenser assembly for single model units.
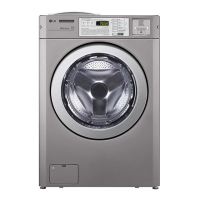
| Color | Silver |
|---|---|
| Energy Star Certified | Yes |
| Wash Cycles | 14 |
| Spin Speed | 1400 RPM |
| Dimensions (H x W x D) | 850 x 600 x 610 mm |
| Noise Level (Wash/Spin) | 52 dB / 75 dB |
| Type | Front Load Washer Dryer Combo |