Do you have a question about the LI-COR Odyssey and is the answer not in the manual?
Covers laser safety, interlocks, and general precautions for safe operation.
Guidelines for positioning the instrument on a sturdy bench.
Recommended temperature, humidity, and location to avoid heat or water hazards.
Importance of unobstructed airflow for cooling and filter access.
Dimensions of the instrument, including open drawer space.
Safety and procedural advice for transporting the instrument.
Handling biochemicals and avoiding radioactive materials with the imager.
Safety guidelines regarding power cords, outlets, and extension cords.
Information that there are no user-replaceable fuses.
Location and purpose of the hole for ESD protection.
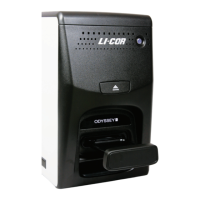
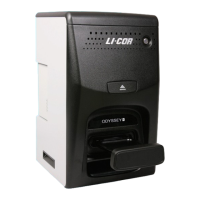
Overview of the instrument's physical interface and components.
Detailed description of the front panel features and indicators.
Function of the red light indicating an error condition.
Operation of the button for opening/closing the imaging drawer.
How the drawer moves the tray for imaging.
Precautions for avoiding finger entrapment and handling power loss.
How to position membranes or gels in the imaging tray.
Tips for handling and imaging membranes, including handling precautions.
Guidelines for imaging DNA and Coomassie-stained gels.
Explanation of the imager's detection channels, lasers, and camera.
Connecting the imager to a computer via Ethernet.
Overview of the software used for image acquisition and analysis.
Resources for understanding the software's functions and features.
General guidelines for cleaning and inspecting the instrument.
Procedure for inspecting and cleaning the air intake fan filter.
Explanation of error indicators and audible alarms.
How to reset the instrument if it becomes unresponsive.
When and how to replace the desiccant for the CCD camera.
Contact information and procedures for getting technical assistance.
Technical details including operating conditions, dynamic range, and lasers.
| Imaging Modes | Fluorescence |
|---|---|
| Excitation Sources | Laser diodes |
| Laser Wavelengths | 685 nm and 785 nm |
| Detection Channels | 700 nm and 800 nm |
| Compatible Dyes | IRDye fluorescent dyes |
| Software | Image Studio™ Software |
| Computer Interface | USB |
| Power Requirements | 100–240 VAC, 50/60 Hz |
| Image File Format | .tif |