Odyssey
®
Fc Imager
Page 15
www.licor.com/bio
CAUTION: Remove the tray and its contents from the instrument prior to any maintenance that requires moving or tilt-
ing the instrument.
1) If necessary, turn off the Odyssey
®
Fc Imager by first disconnecting the instrument from Image Studio and then
briefly pressing the power switch on the Odyssey Fc front panel.
2) Disconnect the power cord from rear of the instrument.
3) Disconnect the ethernet cable from rear of the instrument.
5) The top panel should now be removable. If not, check to make sure all of the screws are fully loosened. Once they
are, the top should easily lift off.
7) Remove the desiccant cartridge and discard.
8) Remove the new desiccant cartridge from the shipping bottle and place it into the cap. Ensure the hook and loop fas-
teners engage.
9) Replace the brass cap and desiccant by turning clockwise back into the camera. Some resistance will be felt while
turning as the o-ring is being engaged. When the cap abruptly stops turning, it is correctly installed. No need to
tighten any further.
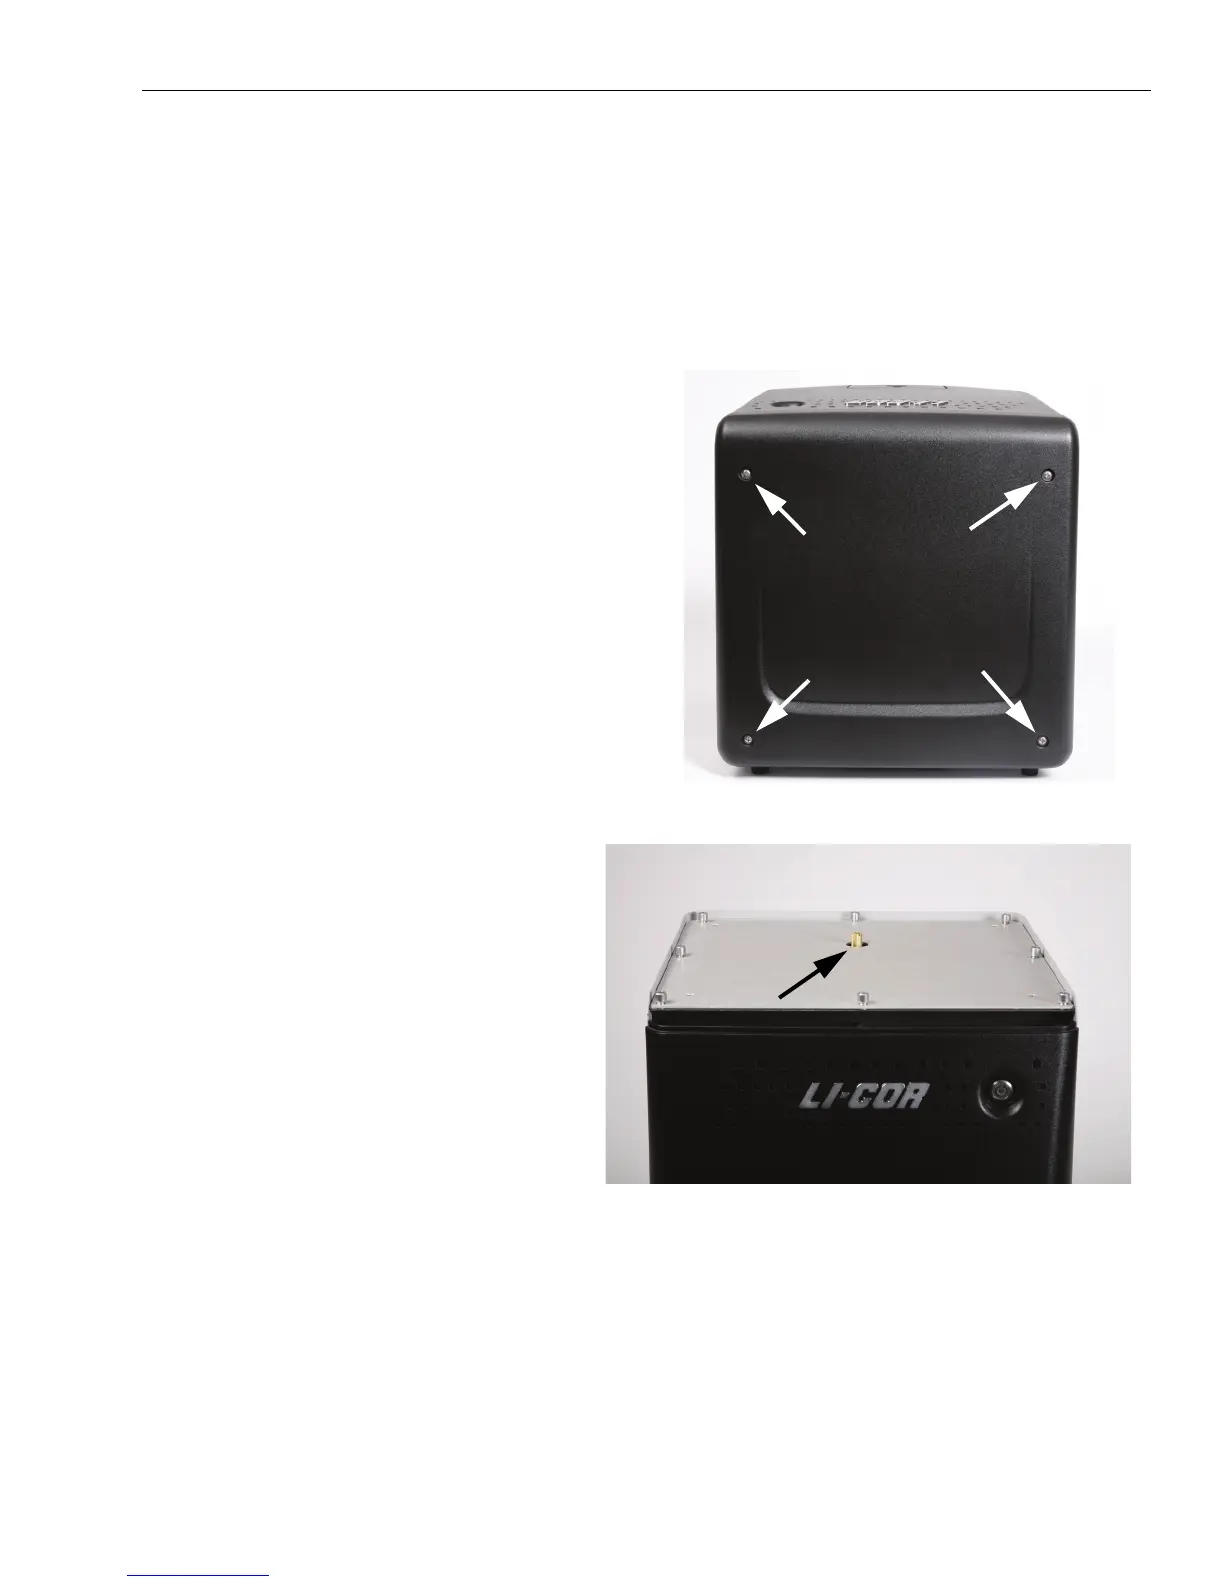
4) To access the desiccant, use a Phillips screw-
driver to loosen the 4 screws on the top panel of
the instrument. (These screws are captive and
cannot be removed from the panel.)
Figure 3-2. Top view of the Odyssey Fc Imager
showing the four top panel retaining screws.
6) The brass desiccant cap is now visible (Figure
3-3). Remove the desiccant cap by turning it
counter-clockwise. You can use a screwdriver
placed in the slot of the top of the cap to aid in
loosening the cap.
Figure 3-3. Odyssey Fc Imager with top panel removed. Location
of the brass desiccant cap is indicated.
 Loading...