10
4. Plug any computers and monitors into the orange battery backed up
receptacles.
Other office machines that do not exceed the capacity of the UPS—ink-
jet printers, scanners and fax machines—may be plugged into either of
the two (2) black receptacles, which provide surge protection only.
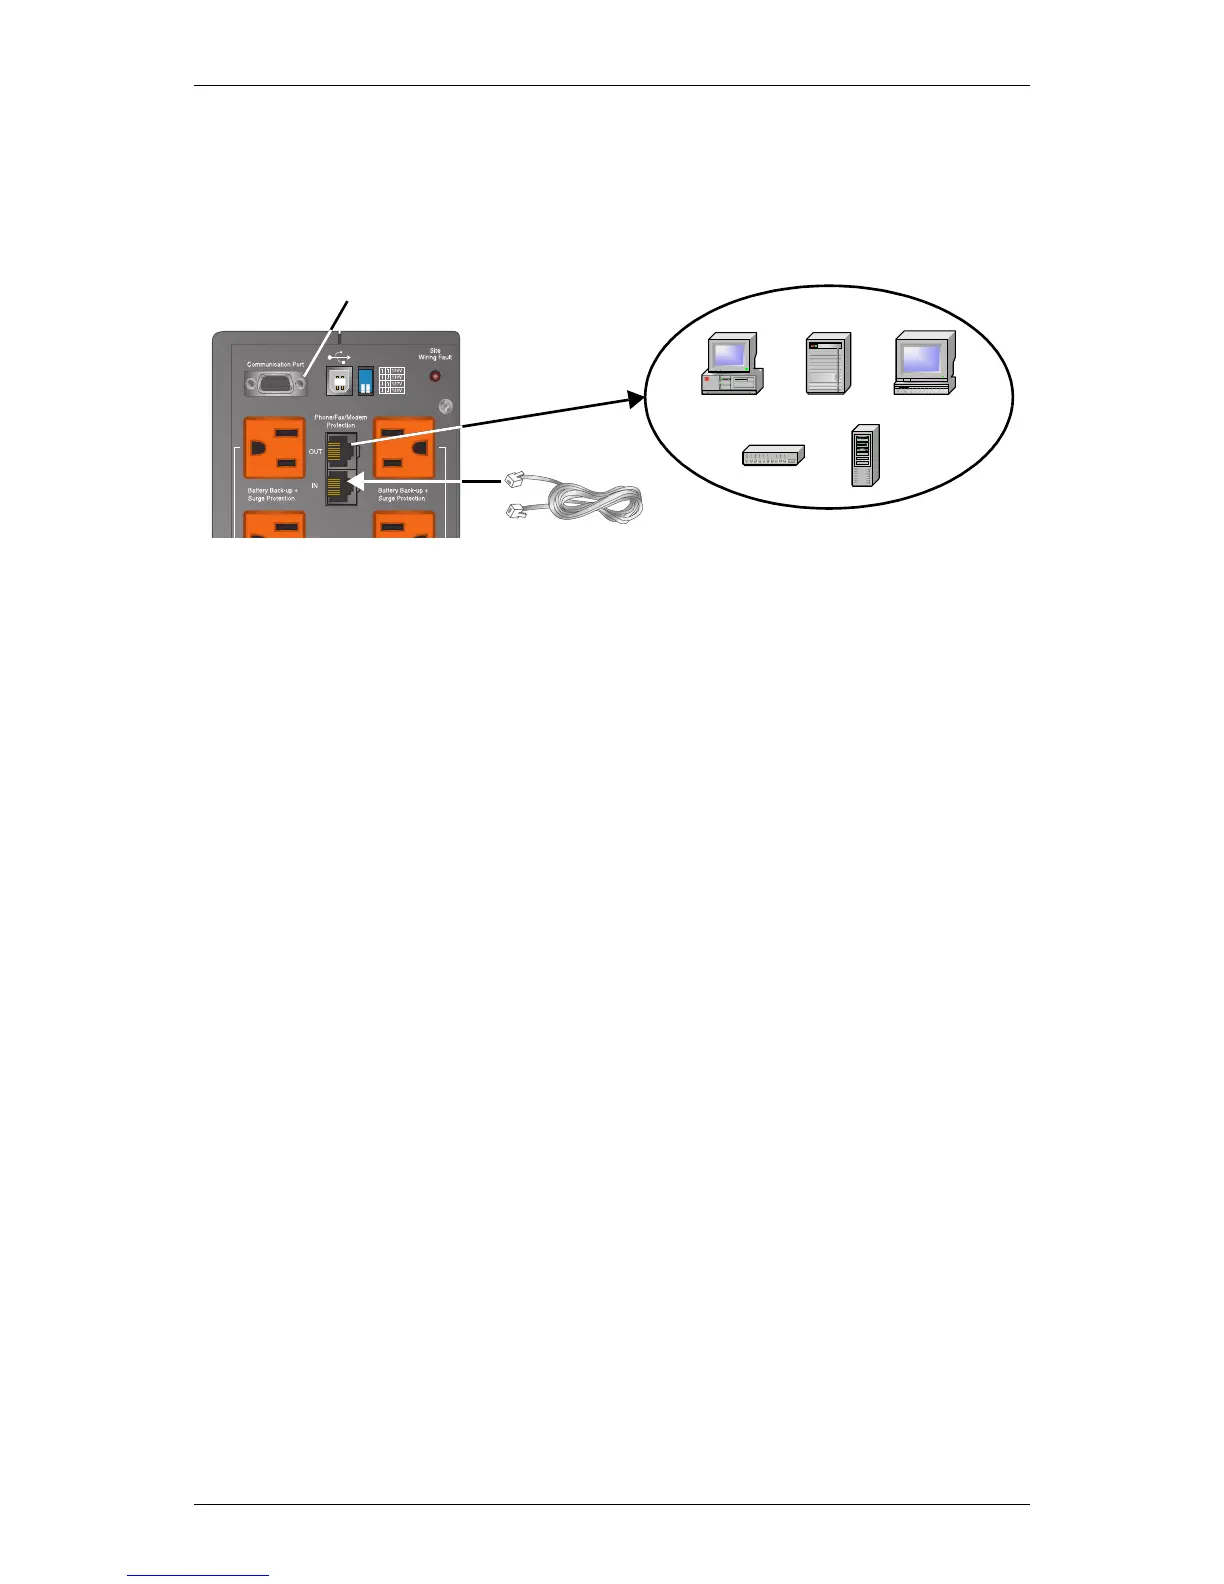
5. Connect Phone/Fax/DSL/Internet/Modem devices to data line connectors.
6. Press and release the ON/OFF/Alarm Silence button to turn on the
UPS. The UPS will beep and the Utility Indicator will illuminate
(green).
7. Turn on connected equipment.
8. Communication options (see Communications section for details):
Option 1—Serial Communications
Serial communications provides parametric data, for example,
input voltage and battery voltage.
a. Connect Multilink serial cable included with the UPS to commu-
nications port.
b. Install the MultiLink software—the software and installation
instructions, as well as the user manual, are on the CD included
in the PowerSure PSA package.
Option 2—Contact Closure Communications
Contact Closure communications provides on-battery and low-bat-
tery signals for orderly shutdown.
a. Refer to the MultiLink user manual for instructions on making
your own contact closure cable.
b. Install the MultiLink software—the software and installation
instructions, as well as the user manual, are on the CD included
in the PowerSure PSA package.
Option 3—USB Communications
a. Connect USB cable provided with the UPS to the USB ports on the
PSA and your computer. The PSA will work automatically with your
built-in power management software on Windows XP and 2000 and
Mac OS 10.2 or later (see USB Interface Port section for details).
Serial port for MultiLink cable connection