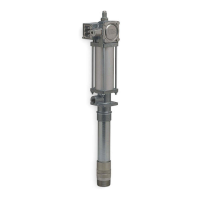
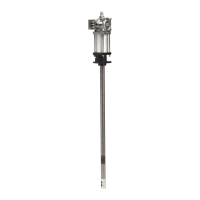
User Manual
Lubrigun Pumps 50:1
7.3A-38010-C05
Page 17 of 22
Subject to change
LINCOLN GmbH & Co. KG
∗
Postfach 1263
∗
D-69183 Walldorf
∗
Fax + (49) 6227 33259 ∗ Tel + (49) 6227 330
Disassembly of Pump. (continuation)
5. Lift Air Valve Casting (4) completely off of Air
Cylinder after removal of Trip Sleeve (5).
6. For removal of Muffler (55), see dwg. 3.
7. Remove Air Cylinder Gasket (26) from Air Valve
Casting (4) and unscrew the four Tie Rods (63).
8. Remove Air Passage Tube (12) and remove
O-Rings (6) from both ends of that tube.
9. Manually lift upward and remove Air Cylinder (13).
10. Remove Air Cylinder Gasket (26) from Outlet
Body (14).
11. Loosen Packing Cap (58) a little and unscrew
Packing Nut (61) from Air Valve Casting (4).
12. Remove Packing Nut Gasket (62); disassemble
Packing Nut (61) and remove parts (58-60).
13. Unscrew the four Valve Cover Screws (21) and
remove Cover (72) and O-Ring (20) from Air Valve
Casting (4).
14. Unscrew the four Hex. Socket Screws (71) inside the
Air Valve Casting (4) and remove Toggle Plate (74),
Trip Shoe (73) and Trip Sleeve (5).
15. Unscrew the four Hex. Socket Screws (70) inside the
Air Valve Casting (4) and remove four Springs (69),
Valve Guide Plate (66) incl. (67 & 68) as well as
Valve Slide & Seat (Valve incl. Slide Valve Gasket)
(65). Remove parts (64-68) from Valve Guide Plate.
16. Unscrew Trip Rod Packing Nut (25) from Air Valve
Casting (4) and remove Gasket (22), Packing
Washer (23) and Trip Rod Packing (24).
17. Remove Priming Tube (54) from Bushing Extension
(41).
18. Manually push the air piston down to the Gland
Packing Nut (27) and manually extend Plunger Rod
(47) from the bushing extension of the pump tube for
access to Check Seat (46) and Priming Plunger (53).
19. Hold Check Seat (46) in place by placing on an awl
through the small opening and unscrew Priming
Plunger (53) by a wrench; if unscrewed together with
Plunger Rod (47) then disassemble and remove the
two parts later.
20. Take off Bushing Extension (41) and parts (47-53)
and remove latter parts from the Bushing Extension.
21. Take (screwing) the check valve parts (48-52) off
from the Plunger Rod (47).
22. Disassemble the parts (48, 49, 50, 51 & 52) of the
foot valve.
23. Unscrew Priming Plunger (53) from Plunger Rod (47) if
not yet disassembled.
24. Unscrew Pump Tube (36) from the Outlet Body (14)
and remove it together with the bushing (part of 44) by
pulling it away from the plunger and extension rod.
25. Remove Pump Tube Gasket (15) from Outlet
Body (14).
26. Remove lower parts, Plunger Adapter, Piston (part of
44), etc.; disconnect (unscrew) lower parts from
Piston Rod at Coupling Nut (38).
27. Unscrew Piston Rod (35) from Piston Rod Connector
(17) and remove Gasket (18).
28. Pull Trip Rod (16) out of the Piston Rod
Connector (17).
29. Unscrew Piston Rod Connector (17) from Airmotor
Piston Rod (11).
30. Unscrew Air Piston Nut (7) from Air Piston Bolt (10)
and remove the two Air Piston Washers (8) and the
Air Piston Packing (9).
31. Loosen Gland Packing Nut (27) a little using a hex.
wrench and pull (screwing) Airmotor Piston Rod (11)
manually out from the Gland of the Outlet
Body (14).
32. Unscrew Gland Packing Nut (27) from Outlet Body
(14) and remove all Gland Parts (28-34).
33. Unscrew Bushing (part of 44) from Pump Tube (36)
and remove Gaskets (40).
34. Unscrew Plunger Adapter (39) and Check Seat (46)
from the Plunger (part of 44) and remove Ball (43) as
well as Ball Stop (42) from the two ends.
Lubrigun Pumps No. 82050, No. 82054, No. 83513, No. 82050-E575, Ser. J