24
Chapter 6: Setting Up and Configuring the Router
Setup Tab
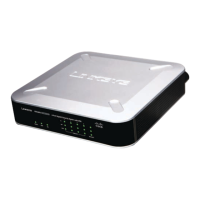
4-Port Gigabit Security Router with VPN
To set up static routing, you should add routing entries in the Router's table that tell the device where to send all
incoming packets. All of your network routers should direct the default route entry to the Linksys Router.
Enter the following data to create a static route entry:
1. Select Set Number: Select the set number (routing table entry number) that you wish to view or configure. If
necessary, click Delete This Entry to clear the entry.
2. Destination IP Address: Enter the network address of the remote LAN segment. For a standard Class C IP
domain, the network address is the first three fields of the Destination LAN IP, while the last field should be
zero.
3. Subnet Mask: Enter the Subnet Mask used on the destination LAN IP domain. For Class C IP domains, the
Subnet Mask is 255.255.255.0.
4. Gateway: If this Router is used to connect your network to the Internet, then your gateway IP is the Router's
IP Address. If you have another router handling your network's Internet connection, enter the IP Address of
that router instead.
5. Hop Count (max. 16): This value gives the number of nodes that a data packet passes through before
reaching its destination. A node is any device on the network, such as switches, PCs, etc.
Click the Save Settings button to save the Routing settings, click the Cancel Changes button to undo your
changes or click the Show Routing Table button to view the current routing table.
Time
Manually
If you wish to enter the time and date manually, select the Date from the drop-down fields and enter the hour,
minutes, and seconds in the Time field using 24 hour format (example 10:00pm would be entered 22:0:0).
Automatically
Time Zone. Select the time zone for your location and your time setting is synchronized over the Internet.
Auto Daylight Saving. If your location observes daylight savings time, select the Enable option.
Figure 6-15: Time
 Loading...