15
WWW.LIONPROTECTS.COM
3. Mounting holes are large to allow the use of washers which facilitate misaligned
wall fasteners. Recommended washer outer diameter is 1 in. (2.54 cm.) to
1.5 in. (3.81 cm.).
4. If wall is uneven, add spacers behind bracket as needed to avoid bending as a bent
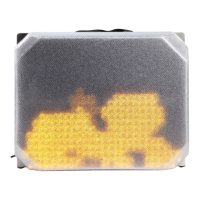
bracket will impede mounting of the ATTACK
™
panel.
5. Connect the power cord to the back of ATTACK panel. Do not use power cords
that were not provided by LION. Align the triangle features on the connector and
the plug. The power cord will always run towards the bottom of the panel when
connected. Push the connector into the plug. There is no need to twist the collar on
the plug. You will hear a click when the connector latches onto the plug correctly. .
6. Insert the bottom of the panel into the bottom brackets on the wall mounting
bracket.
7. Push the top of the panel against the back plate of the bracket until you hear
the pin click into place.
8. Make sure the panel is securely mounted by pushing and pulling the panel in
different directions.
9. Plug the power cord into the power supply, then plug the power supply into a
Ground Fault Circuit Interrupter (GFCI)/Residual-Current Circuit Breaker (RCCB)
outlet that is within a dry environment and will not come in contact with any water
spray. When the power supply is successfully connected, a blue light will appear.
The power supply to power cord connection and the power supply to
wall outlet
connection must be in a dry environment. The connection
of the power cord to the
panel can be in a wet environment.
NOTE
It is imperative that ATTACK be kept clean and dry when not in use.